


12
HOW THE PACER PROGRAMS OPERATE
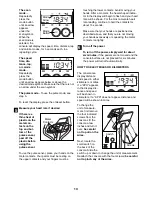
When you use a
pacer program, two
columns of bars will
appear in the dis-
play. The left col-
umn represents a
target pace and the
right column shows
your actual exercis-
ing pace. The target pace will change periodically dur-
ing the program; as the target pace changes, simply
adjust your exercising pace to keep both columns at
the same height.
Important: The target pace is a
goal
pace. Your actual pace may be slower than the
target pace, especially during the first few months
of your exercise program. Be sure to exercise at a
pace that is comfortable for you.
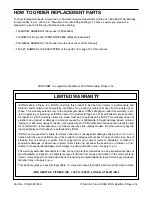
The three graphs on
the console show
how the target pace
will change during
the programs.
During the Aerobic
program (program
2), for example, the target pace will gradually increase
during the first half of the program, and gradually
decrease during the last half of the program. Each pro-
gram will last for twenty minutes.
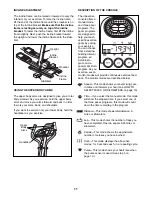
STEP-BY-STEP CONSOLE OPERATION
Before the console can be operated, two batteries
must be installed. (See assembly step 7 on page 7.)
Follow the steps below to operate the console.
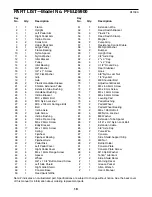
Turn on the power
To turn on the
power, press the
on/reset button
or simply begin
exercising. The
entire display will
appear for two
seconds; the console will then be ready for use.
Note: If batteries were just installed, the power will
already be on.
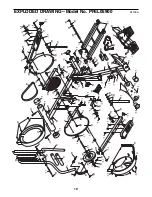
Select one of the three pacer programs or the
manual mode
To select one
of the pacer
programs,
repeatedly
press the pro-
gram button.
The program
indicator will
show which
program you
have selected.
To select the
manual mode, press the program button until the
program indicator disappears. The programs will
be selected in the following order: program 1
(Interval), program 2 (Aerobic), program 3 (Fat
Burn), manual mode.
Begin your workout
If you select-
ed the manual
mode, go to
step 4.
If you
selected one of
the pacer pro-
grams, two
columns of
bars will
appear in the display. The left column will show
one bar, indicating a relatively slow pace. The
right column will show your actual exercising
pace. Adjust your exercising pace until only one
bar appears in the right column. Each time the
target pace changes during the program, adjust
your exercising pace to keep both columns at the
same height.
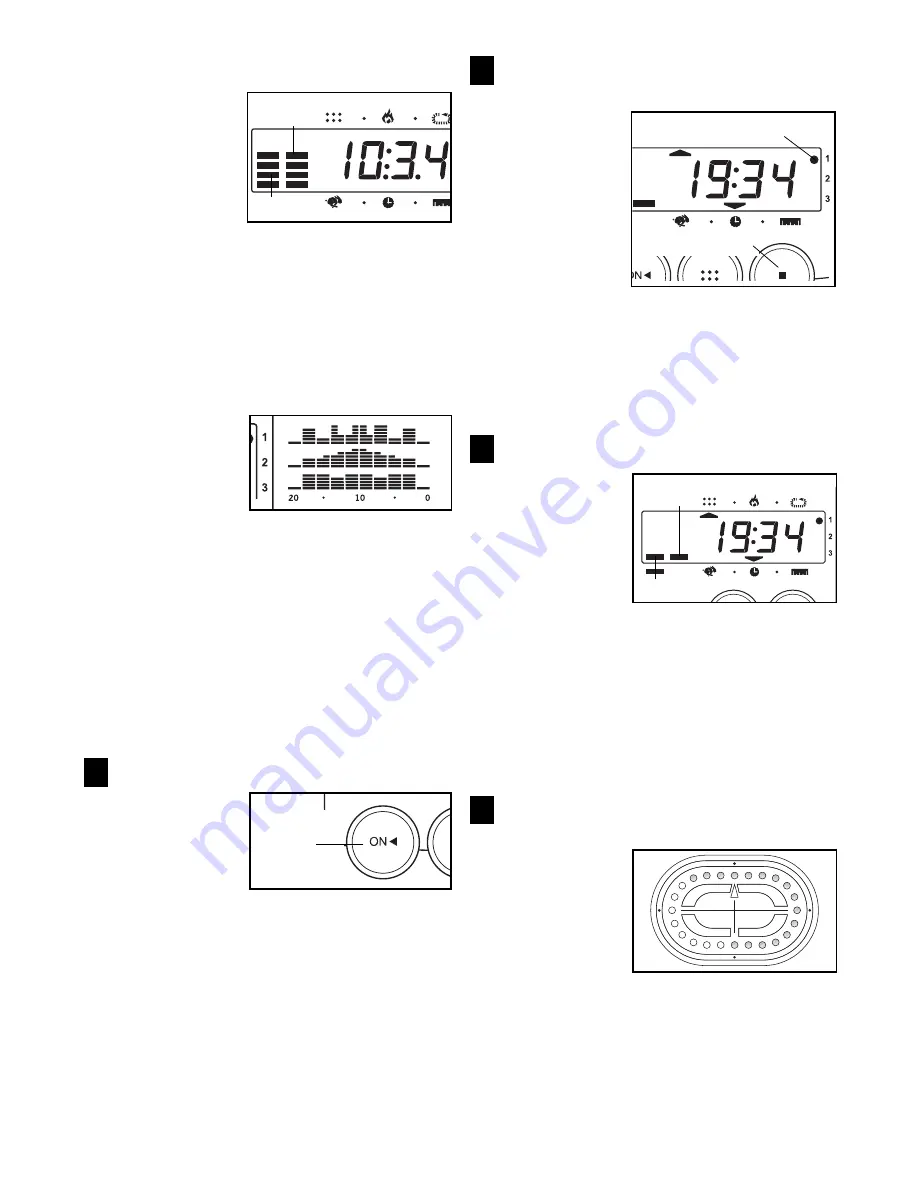
Follow your progress with the LED track and
the seven monitor modes
The LED
track
ÑThe LED
track represents
a distance of
0.25 miles or
kilometers. As
you pedal, the
indicators around
the track will light one at a time until you have com-
pleted one lap. A new lap will then begin.
4
3
2
1
Actual
Target
Actual
Target
Program Indicator
Program Button
On/Reset
Button
Summary of Contents for 695e
Page 17: ...17 NOTES...


