


9
HOW TO USE THE ELLIPTICAL CROSSTRAINER
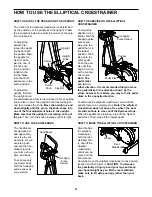
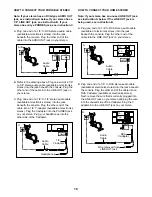
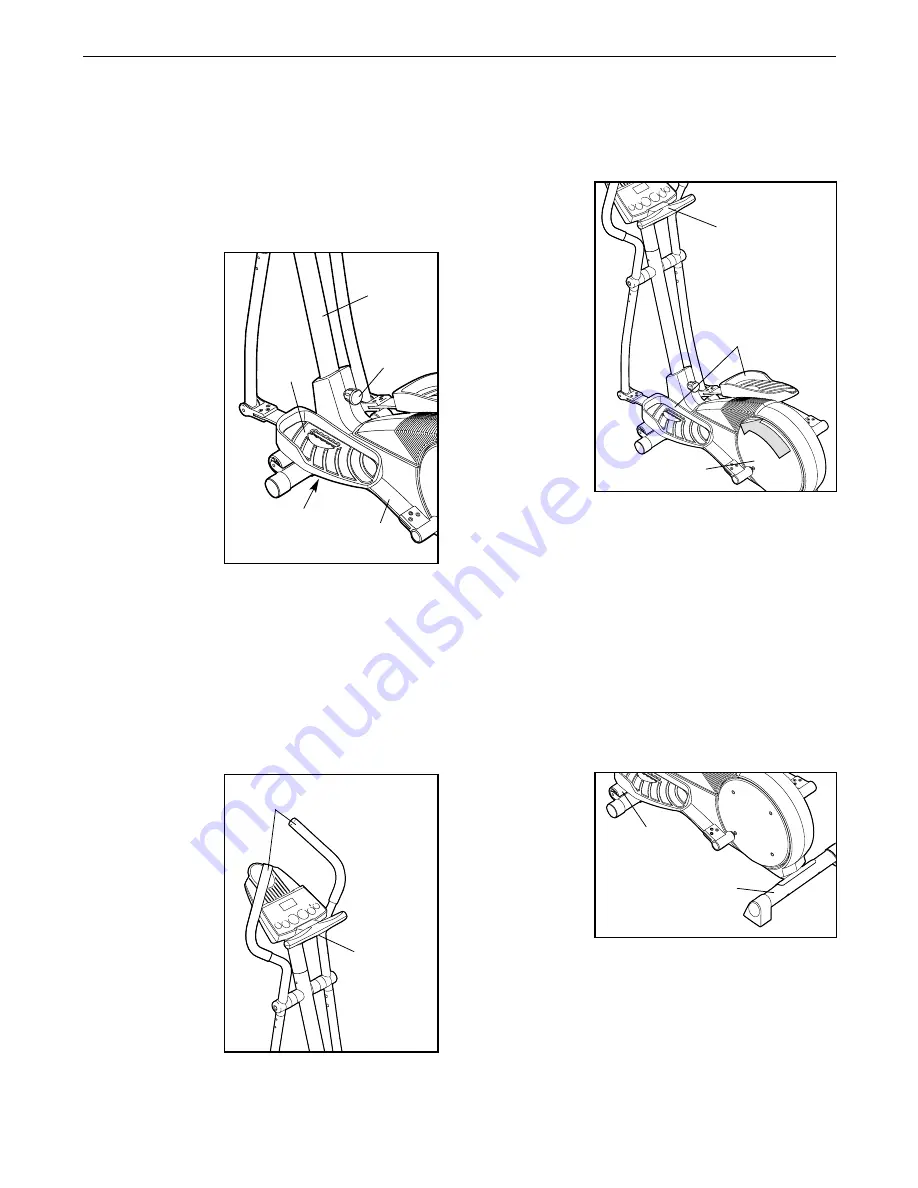
HOW TO ADJUST THE PEDALS AND THE UPRIGHT
The motion of the elliptical crosstrainer is determined
by the positions of the pedals and the upright. Follow
the instructions below to adjust the motion of the ellip-
tical crosstrainer.
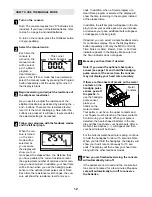
To adjust the
pedals, first
loosen the pedal
knobs beneath
the pedals. Slide
the pedals for-
ward or back-
ward to one of
the five posi-
tions, and then
retighten the
knobs. Make
sure that both
pedals are in the
same position.
To adjust the
upright, first turn
the upright knob
counterclockwise a few turns to loosen it. Next, pull the
knob, raise or lower the upright to the desired height,
and then release the knob. Move the upright up and
down slightly until the pin on the knob snaps into
one of the four adjustment holes in the upright.
Make sure that the upright is not resting on top of
the pin. Then, turn the knob clockwise until it is tight.
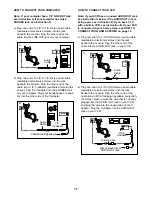
HOW TO USE THE HANDLEBARS
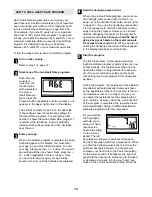
The handlebars
are designed to
add upper-body
exercise to your
workouts. As you
exercise, push
and pull the han-
dlebars to work
your arms, shoul-
ders, and back.
To exercise only
your lower body,
hold the handgrip
pulse sensor as
you exercise.
HOW TO EXERCISE ON THE ELLIPTICAL
CROSSTRAINER
To mount the
elliptical cross-
trainer, hold the
handgrip pulse
sensor and
step onto the
pedal that is in
the lowest
position. Then,
step onto the
other pedal.
Push the ped-
als until they
begin to move
with a continu-
ous motion.
Note: The
pedal disks
can turn in
either direction. It is recommended that you move
the pedal disks in the direction shown by the
arrow; however, for variety, you may turn the pedal
disks in the opposite direction.
To dismount the elliptical crosstrainer, wait until the
pedals come to a complete stop. Note: The elliptical
crosstrainer does not have a free wheel; the ped-
als will continue to move until the flywheel stops.
When the pedals are stationary, step off the highest
pedal first. Then, step off the lowest pedal.
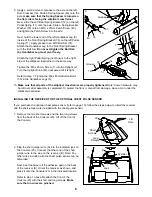
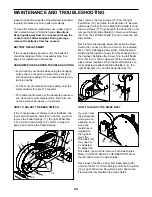
HOW TO MOVE THE ELLIPTICAL CROSSTRAINER
Stand behind
the elliptical
crosstrainer,
hold the rear
stabilizer firm-
ly, and lift the
elliptical
crosstrainer
until it can be
moved on the
front wheels.
Carefully move the elliptical crosstrainer to the desired
location and then lower it. CAUTION: To decrease
the possibility of injury, bend your legs and keep
your back straight as you lift the rear stabilizer;
make sure to lift with your legs rather than your
back.
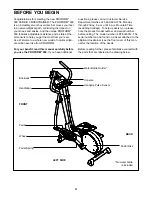
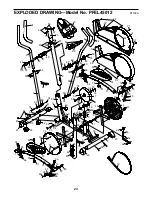
Pedals
Pedal Disk
Handgrip
Pulse Sensor
Handlebars
Handgrip
Pulse
Sensor
Pedal
Knob
Upright
Knob
Flex Bar
Pedal
Upright
Wheel
Rear
Stabilizer


