

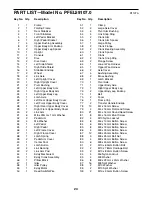

16
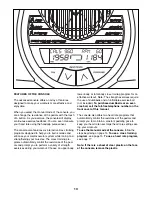
When the first segment is completed,
all resis-
tance levels will move one column to the left
. The
resistance level for the second segment will then
appear in the flashing Current Segment column
and the pedals will automatically adjust to the
resistance level for the second segment. Note: If
all the indicators in the Current Segment column
are lit,
the resistance levels may move downward
so that only the highest indicators appear in the
matrix.
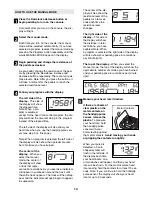
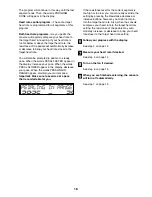
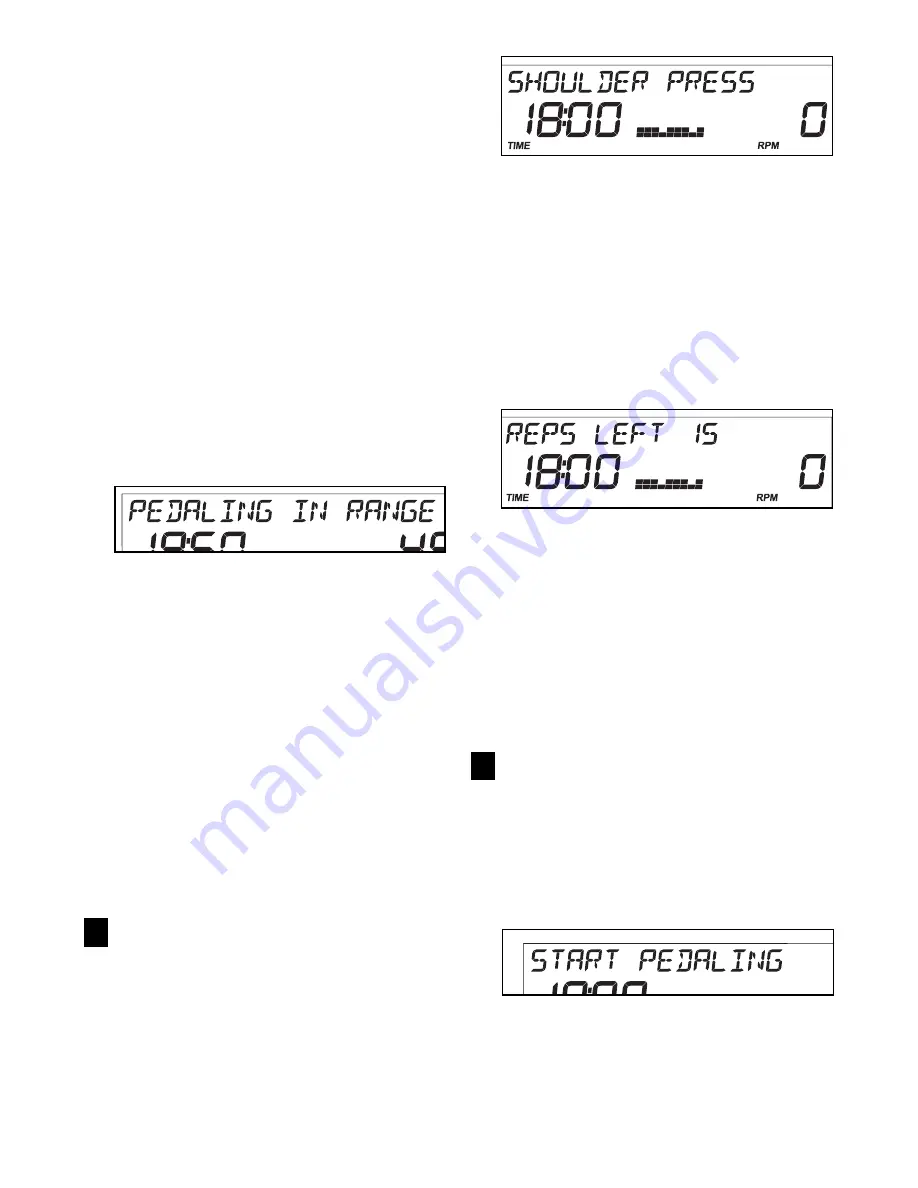
As you exercise, you will be prompted to keep
your pedaling pace near the target rpm setting for
the current segment. When the words PEDAL
FASTER appear in the display, increase your
pace. When the words PEDAL SLOWER appear,
decrease your pace. When the words PEDALING
IN RANGE appear, maintain your current pace.
Important: The target rpm settings are intend-
ed only to provide motivation. Your actual
pace may be slower than the target rpm set-
tings. Make sure to exercise at a pace that is
comfortable for you.
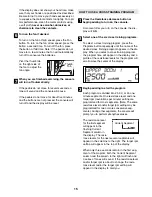
If the resistance level for the current segment is
too high or too low, you can manually override the
setting by pressing the Resistance decrease or
increase buttons. Every few times you press a
Resistance button, an additional indicator will
appear or disappear in the Current Segment col-
umn; if any of the columns to the right of the
Current Segment column have the same number
of lit indicators as the Current Segment column,
an additional indicator may appear or disappear
in those columns as well.
Important: When the
current segment of the program ends, the ped-
als will automatically adjust to the resistance
level for the next segment.
To stop the program at any time, stop pedaling.
The time will begin to flash in the display. To
restart the program, simply resume pedaling.
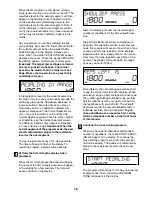
Perform the first strength exercise when
prompted.
When the first strength exercise segment begins,
the name of the first strength exercise will appear
in the display for a few seconds. The time will
pause and flash in the display.
Next, the display will show the recommended
number of repetitions for the first strength exer-
cise.
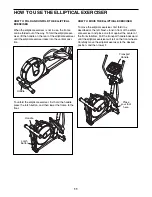
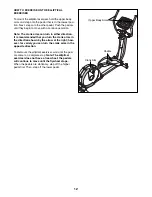
Step off the elliptical exerciser and prepare to
begin the first strength exercise. Every few sec-
onds, the console will sound a tone; when a tone
sounds, perform one repetition of the exercise.
Exercise with a slow, steady motion; do not per-
form more than one repetition each time a tone
sounds. The display will count down the repeti-
tions as you perform them.
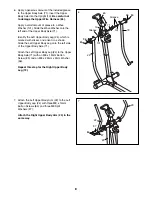
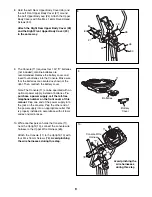
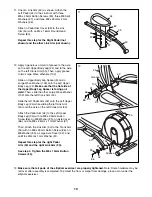
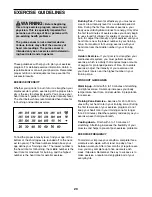
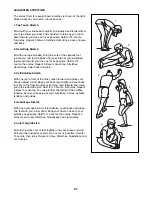
Note: Refer to the accompanying exercise chart
to see the correct form for each exercise. When
performing lunges, alternate legs with each repe-
tition. When performing dumbbell rows, perform
half the repetitions with your right arm and half
the repetitions with your left arm. The strength
exercises require the use of dumbbells and an
inflatable exercise ball (not included).
To pur-
chase dumbbells or an exercise ball, call the
toll-free telephone number on the front cover
of this manual.
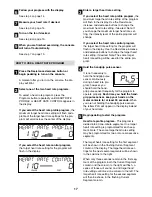
Continue the cross training program.
When you have performed the recommended
number of repetitions, the words START PEDAL-
ING will appear in the display. To continue the
cross training program, step onto the exerciser
and start pedaling. The pedals will automatically
adjust to the resistance level for the next seg-
ment.
The program will continue in this way until the last
segment ends. Then, the words PROGRAM
DONE will appear in the display.
5
4
Summary of Contents for 930 SPACE SAVER
Page 22: ...22 NOTES...
Page 23: ...23 NOTES...


