8
Small
Hole
71
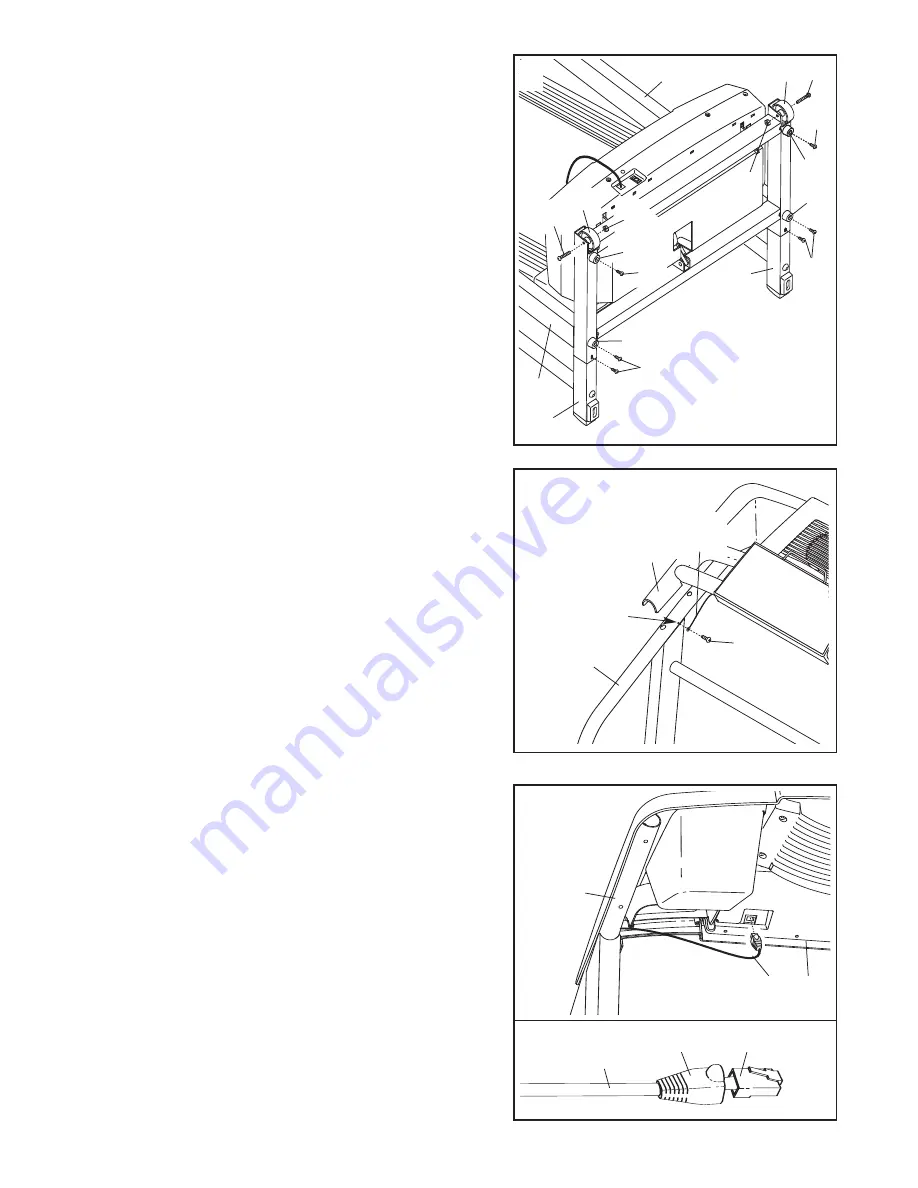
5. Hold the Console Base (47) near the Left Handrail (71).
Attach the end of the ground wire on the Console Base
to the indicated small hole in the Left Handrail with the
Silver Ground Screw (75).
47
75
Ground
Wire
42
6.
Touch the Right Handrail (72) to discharge any static.
Slide the sleeve off the connector as shown in the inset
drawing. Press the end of the Upright Wire (42) into the
socket in the bottom of the Console Base (47).
The con-
nector should slide easily into the socket and snap
into place.
If the connector does not slide easily and snap
into place, turn the connector and then insert it. Slide the
sleeve back over the connector.
72
47
5
6
4. Attach each Extension Leg (63) with two 1” Tek Screws
(39) and a Base Pad (57) as shown.
Attach the lower
Tek Screw, without the Base Pad, first.
Attach two more Base Pads (57) to the base of the
Upright (69) with two 1” Tek Screws (39). Note: One re-
placement Base Pad may be included. If a Base Pad be-
comes worn and needs to be replaced, use the replace-
ment Base Pad.
Attach the two Wheels (66) with two 2” Bolts (64) and
two Wheel Nuts (32) as shown.
Do not overtighten the
Bolts;
the Wheels should be able to spin freely.
With the help of another person, carefully raise the
Upright (69) to the vertical position.
See step 2. Tighten the two Handrail Bolts (37).
39
69
63
39
57
63
57
57
39
64
66
32
69
64
66
32
57
39
4
42
Sleeve
Connector
Summary of Contents for colling breeze 495Pi
Page 19: ...19 NOTES...


