17
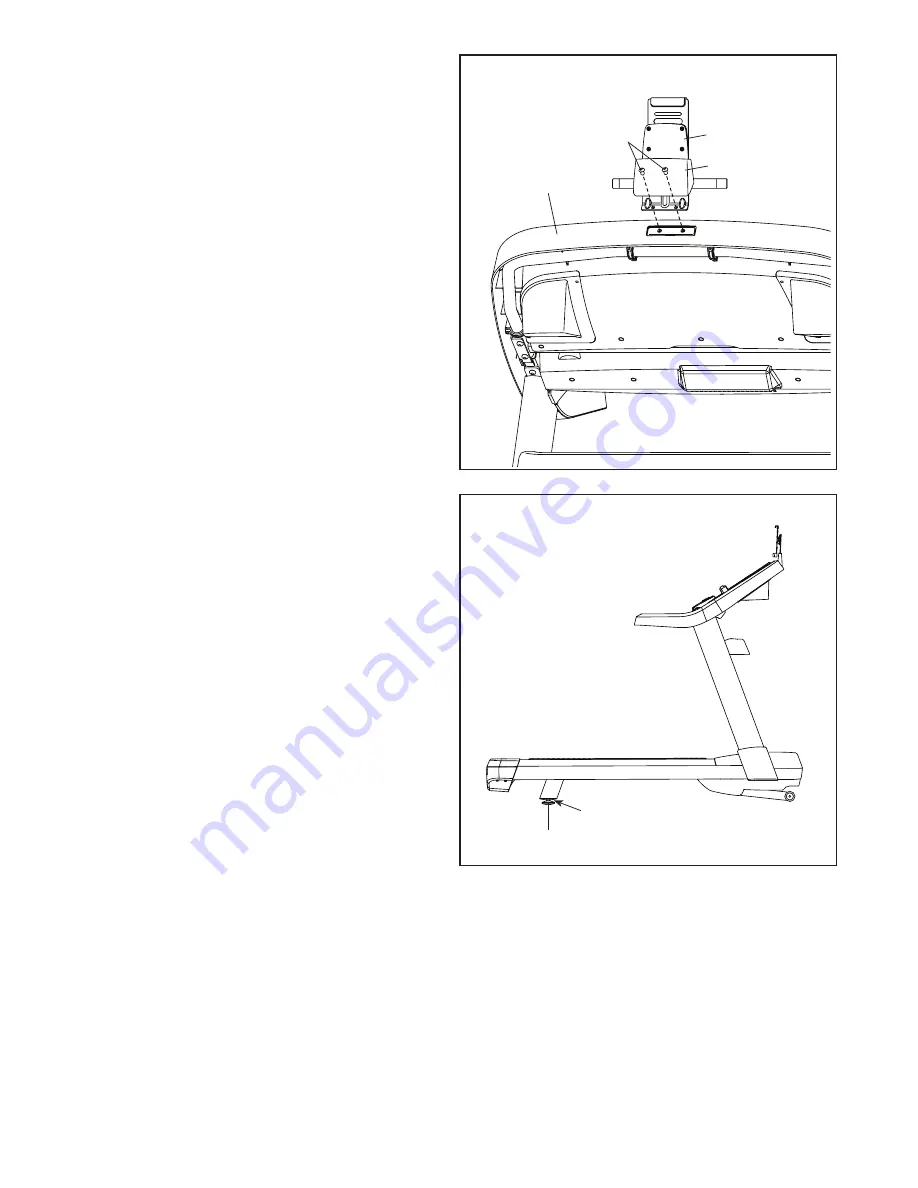
17. See HOW TO MOVE THE TREADMILL on page
30. Move the treadmill to the desired location.
Make sure that the leveling feet rest firmly on the
floor. If the treadmill rocks even slightly, loosen
one of the nuts, turn the leveling foot clockwise
or counterclockwise until the rocking motion is
eliminated, and then retighten the nut.
17
18.
Make sure that all parts are properly tightened before you use the treadmill.
If there are sheets of plastic
on the treadmill decals, remove the plastic. To protect the floor or carpet, place a mat under the treadmill.
Note: Extra parts may be included. Keep the included hex keys in a secure place; one of the hex keys is used
to adjust the walking belt (see pages 32 and 33).
Leveling Feet
Nuts
16. Slide the iPad Holder Cover (91) up on the iPad
Holder (92). Attach the iPad Holder to the con-
sole assembly with two 1/4" x 1/2" Screws (6).
Slide the iPad Holder Cover (91) down against
the console assembly.
6
16
92
Console
Assembly
91
Summary of Contents for PFTL17112.0
Page 5: ...5...


