7
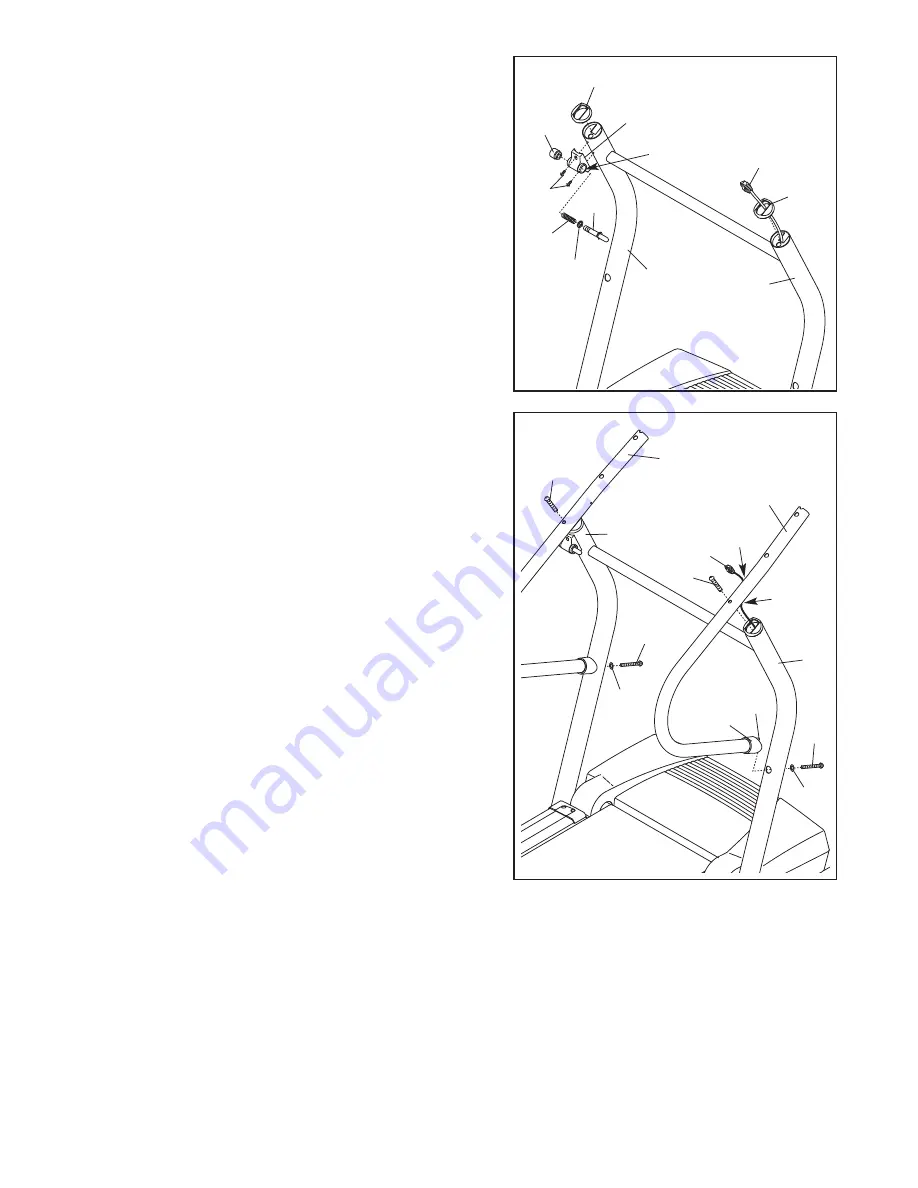
3. Identify the Right Handrail (72), which has a large hole in
the left side. Feed the Upright Wire (42) into the hole in
the bottom of the Right Handrail and out of the large hole
in the side. (Note: It may be helpful to use needlenose
pliers to pull the Upright Wire out of the hole.) Next, slide
a Handrail Endcap (103) onto the lower end of the Right
Handrail, and rotate the Handrail Endcap so that the
small pin is at the top.
Attach the upper end of the Right Handrail (72) to the
right Upright (69) with a Handrail Bolt (37).
Do not
tighten the Handrail Bolt yet.
Attach the lower end of
the Right Handrail with a Lower Handrail Bolt (98) and a
Star Washer (101).
Tighten both Bolts.
Attach the Left Handrail (71) as described above. Note:
There is not an upright wire on the left side.
42
Hole
72
101
103
Pin
98
37
71
69
69
101
98
Hole
3
37
2. Attach the Latch Housing (29) to the left Upright (69)
with two 3/4” Screws (2).
Note: Make sure the large
hole in the Housing is on the indicated side.
Next, re-
move the knob from the pin. Make sure that the collar
and the spring are on the pin. (Note: If there are two col-
lars, place one on each side of the spring.) Insert the pin
into the Latch Housing (29), and tighten the knob back
onto the pin.
Cut any ties holding the Upright Wire (42) to the the
Upright (69). Insert the Upright Wire through an Upright
Cap (73). Press the Upright Cap onto the right Upright
(69).
Make sure that the ridges on the sides of the
Upright Cap slide into the notches in the Upright.
69
69
42
2
Knob
Collar
Spring
Pin
73
2
29
Large Hole
73


