JOKER EVOLUTION 29
We suggest proceeding and finishing one one side first in
so as to check if the the lock system works properly and
to use the other side as reference for the backrest
inclination.
If both holes “F” (ordering other two steel caps “T”) are
closet, the backrest will not lock when folded.
6.5 Rear wheel adjustment
This adjustment is very important to ensure the correct stability of the
wheelchair.
It is possible to adjust both the height and dept
h.
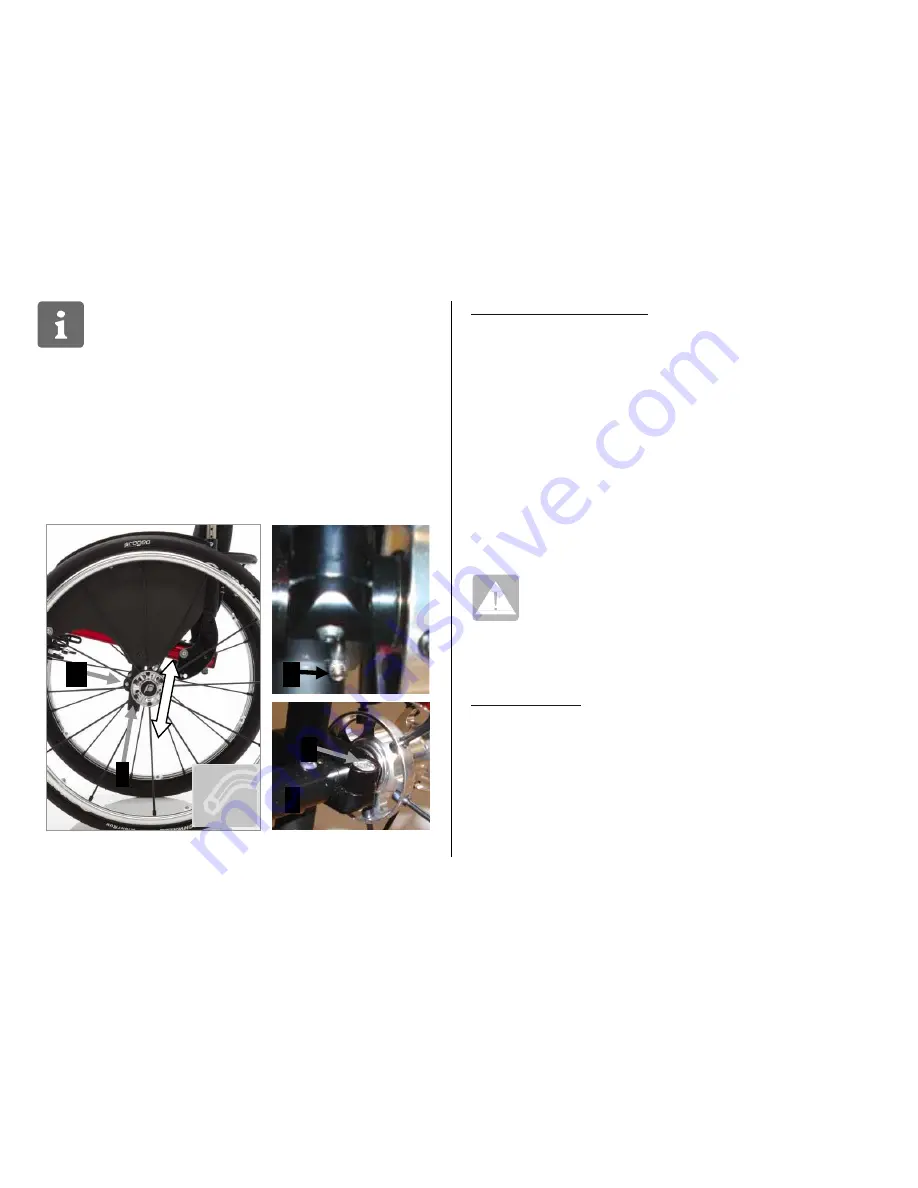
Height adjustment (figure 45):
the two clamps “M”, which are fixed to the adjustment tube “P”, are
directly connected to one another by the axle “A”. The rear height
of the wheelchair can be adjusted by moving the two clamps along
the adjustment tube.
Loosen the headless bolt “G” at the lower side of each clamp
“M” (2.5mm Allen key).
Loosen the bolt “V” of each clamps “M” (6mm Allen key).
Move the axle “A” up or down by sliding the clamps “M” along
the adjustment tubes “P” until the desired height.
Fix the clamp “M” on one side by tightening the bolt “V” hard
and then screwing the headless bolt “G” with a proper
pressure.
Check that the other clamp is positioned at the same height
and then fix the bolt “V” hard and the headless bolt “G” with a
proper pressure.
When the rear height of the wheelchair is lowered, it
is necessary to remove the mudguard before
proceeding with the adjustment. The mudguard is
not adjustable, thus, it will be necessary to drill new
holes.
After adjustment check that all bolts are securely
fixed.
Depth adjustment:
the clamp “K” fixes the frame and allows to adjust the rear wheel
position in depth so as to determine the setting (point of balance)
of the wheelchair.
To adjust the setting (figure 46):
Remove the bolt “V” that fixes the mudguard (4mm Allen key)
and turn it as much as to get access to the clamp “K” located
at the top of adjustment tube “P”.
Loosen the two headless bolts “G” (2.5mm Allen key) on the
clamp “K”.
Fig. 45
M G
V
P
A
2.5
6


