5
Reset Procedure
Operational Procedure
Once your
lifting columns are
installed, operation is simple. Using the wired remote will allow
full control over extending and retracting the lift columns. Use the up button to raise the
columns
and the down button to lower the
columns
.
You can program up to 4 locations using the memory setup: Use the up/down buttons on the remote
to find your desired height(s), then press “
M
” followed by a number 1-4. The
column
height position
s
are
now saved. To move to the set position, hold the number button.
IMPORTANT
You must reset the
lifting columns
prior to use:
To reset, press and hold the DOWN button on the Hand Remote (7) until the
lifting columns
reach
their
lowest point. Release the DOWN button. Press and hold the DOWN button again until the LED display
shows "RST". If you are not using an LED hand remote hold it for about 10 seconds. Release the
DOWN button. Finally
p
ress and hold the DOWN button once more until the
columns
lower, slightly
rises then stops. This signals the end of the reset procedure. Release the DOWN button and your
lifting columns are
now ready to use.
Troubleshooting
If your
columns
are
not functioning it might need to be reset. Follow the RESET procedure
.
If your hand remote has an LED display and it displays "RST" (reset), perform the reset procedure
.
If the LED displays shows an error message ("Er1" - "Er13"), confirm that all wired connections are
secure. Then pe
rf
orm the reset procedure
.
If the LED remote displays "HOT", let the unit cool down for 20 minutes.
If the error message persists after the reset procedure, contact us at 1-800-676-6123 or
sales@progressiveautomations.com.
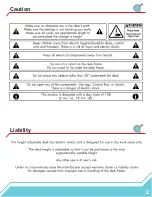
Summary of Contents for flt-06
Page 2: ...Caution Liability 2...


