Web Application Server: Post-Installation for Windows
22
2-Tier Installation
During installation, the setup program prompted you to provide the License Desk
with the appropriate information to obtain your permanent license file. It also
generated license request files (
*.lcl
) in the
licenses
subdirectory of your
Prolifics installation directory for each component installed on a given machine.
To obtain the license file:
1.
Submit the license request file (for each component on a given machine) to the
Prolifics License Desk. The License Desk returns the password-enabled file
for each component on a given machine via the requested method (as specified
during setup).
2.
Install the license file or files.
Refer to Appendix C for more information on licensing, and to Appendix D for a
description of the contents of a license file.
The web application server (
proweb
) receives its own license file (
proweb.lic
).
Install the password-enabled license file on the appropriate machine, and then, run
the
create_license
utility to create a
license.dat
for each machine. Follow
the directions for the method of receipt.
Note: In the following procedures, replace references to
SMBASE
with the full
pathname of the Prolifics installation directory.
To install a permanent license file:
1.
If you received a license file via e-mail, copy it to the
licenses
directory:
proweb.lic
(web application server). Proceed to Step 3.
2.
If you received a license file via fax or mail, make a copy of the license
request file (having
*.lcl
extension) in the
licenses
directory, giving the
copy a
.lic
extension. For example:
•
Open the license request file using a text editor (such as Wordpad) and
save it with a
.lic
extension. For example, open
SMBASE\li-
censes\prodev.lcl
(client development license template), choose
File
⇒
Save As, and save it as
prodev.lic
.
•
Update the copy of the license file (
*.lic
file) with the information
provided in the password-enabled file you received.
Replace text in angle brackets (and the angle brackets) with the
corresponding information provided on the
Feature
line. For example,
replace <
number of tokens
> and <
password
> with the appropriate
information from the password-enabled license file.
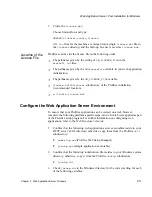
Repeat Steps 2 and 3 for each license file you received for this machine.
Installing the
License File

