11
LUMIPIX12QTOUR
3.13 INFORMATION
To view all the information on the device, proceed as follows:
• Press the MENU to access the main menu, then press the UP/DOWN button to select INFORMATION,
then use the ENTER button to enter the next menu.
• Press the UP/DOWN button to scroll through the menu, then select one of the following information
and press the ENTER button to display it
- Fixture Hours
- Through the Time Information function you can display the operating time of the
projector.e.
- Version
- Through Software Version function you can display the currently installed software
version.
• Press the MENU button repeatedly to exit the menu.
3.14 MASTER/SLAVE MODE
This mode allows you to connect multiple LUMIPIX12QTOUR units without a controller. The first will be set
as master and the other as slave.
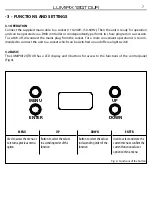
• Press the MENU button to enter the main menu, then select STAND ALONE.
• Select the suggested option with the UP/DOWN button and press the ENTER button to confirm.
• Use LUMIPIX12QTOUR DMX connectors and a XLR cable to form a drive chain. In certain conditions and
lengths, it is recommended to terminate as shown on page 15.
• Set the same DMX channel configuration to the slave units and the same address.
3.15 EFFECTS
The unit has preset pre-programmed effects that can be set using the following procedure:
• Press the MENU button to enter the main menu, then select STAND ALONE.
• Select EFFECT using the UP/DOWN button, then press the ENTER button.
• Set the desired effect and value using the UP/DOWN button, then press the ENTER button.
• Press the MENU button to go back or wait a few seconds to exit the setup menu.
3.16 STATIC MODE
The unit has pre-programmed color presets that can be set using the following procedure:
• Press the MENU button to enter the main menu, then select STAND ALONE
• Use the UP/DOWN button until STATIC shows on the display, then press the ENTER button.
• Select FIXED COLOR using the UP/DOWN button, then press the ENTER button.
• Set the R, G, B, W, GB, RB, RG, RGB, RW, GW, BW, RGW, RBW, GBW, RGBW colors using the UP/DOWN but-
tons and press the ENTER button.
• Press the MENU button to go back or wait a few seconds to exit the setup menu.
• Select MANUAL COLOR using the UP/DOWN button, then press the ENTER button.
• Set the Red, Green, Blue, White colors using the UP/DOWN button, then press the ENTER and
set the desired value.
• Press the MENU button to go back or wait a few seconds to exit the setup menu.

