8
ECLJRG2
3.3 MENU STRUCTURE
3.4 STATIC MODE
This fixture has the ability to accept custom static color settings. Access these chases via the control panel
on the back of the fixture.
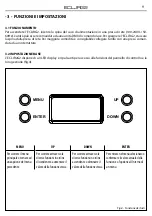
• To enable the static mode, press MENU repeatedly until
U - -
shows on the display.
• Set the strobo value
S
(
000 - 255
), through the buttons UP/DOWN, then press ENTER to confirm.
• Set the dimmer value
d
(
000 - 255
), through the buttons UP/DOWN, then press ENTER to confirm.
3.5 LINKING
Several units may be interconnected in order to control all further slave units to the same effect of the
master unit.
1. Connect the DMX OUT of the master unit via 3-pole XLR cable to the DMX IN of the first slave unit.
2. Connect the DMX OUT of the first slave unit to the DMX IN of the second slave unit, etc. until all units
are connected in a chain.
3.6 DMX CONFIGURATION
ECLJRG2 is equipped with different DMX configuration.
• Press the button MENU so many times until shows
1CH / 3CH
, and press the button ENTER to select the
desired DMX configuration.
• Select the desired DMX start address (
001 - 512
) through the buttons UP/DOWN, then press ENTER to
confirm.
The tables on page 12 indicate the operating mode and DMX value. The ECLJRG2 is equipped with 3-pole
XLR connections.
MENU
Remark
1
1 CH
ð
Value (001-512)
Default: 3CH; d=001
2
3 CH
ð
Value (001-512)
Default: 3CH; d=001
3
U - -
ð
Value d(0-255)
Default: d=255, S=0
Value S(0-255)
4
dIM
ð
Off
Default: Off
Dimmer 1
Dimmer 2
Dimmer 3
5
FAN
ð
Auto
Default: Auto
ON
OFF
SLnt
Fan mode silent always active
Summary of Contents for ECLJRG2
Page 1: ...USER MANUAL MANUALE UTENTE EN IT LED PROFILER ECLJRG2 ...
Page 30: ......
Page 31: ......


