background image

EN-7 

OPERATION 

1. Pull the power cord out of the appliance and insert the mains plug

into the mains socket.

A YELLOW mark on the power cord indicates the ideal cable

length. Do not extend the power cord beyond the RED mark.

2. Press the power button on top of the appliance to switch on the

appliance.

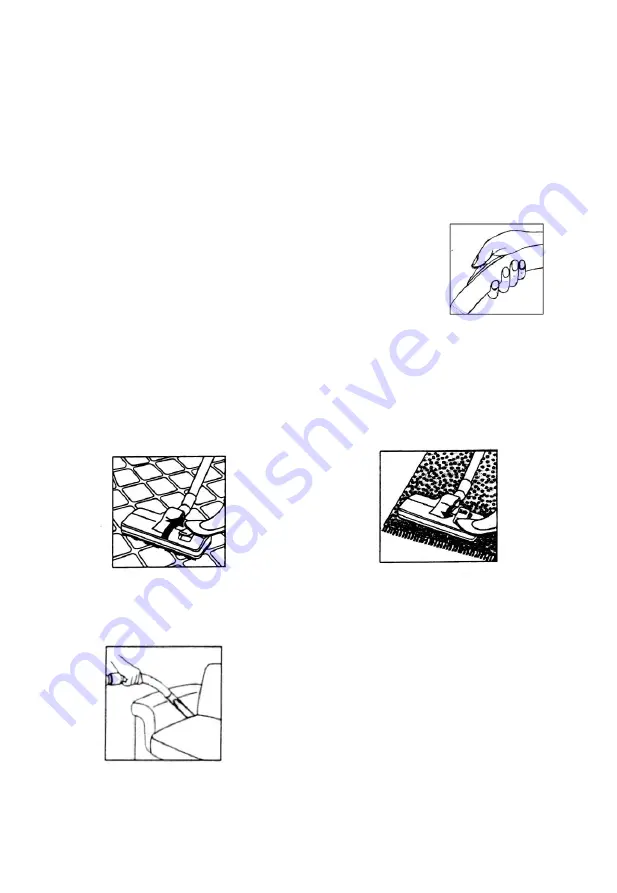
3. You can quickly reduce the suction power by

pushing the air flow regulator on the hose
handle. Push it forward, suction power will
increase; push it backward, suction power will
reduce.

Using the Cleaning Accessories 

● Dual position carpet / floor brush (Drawings for reference only)

Position 1: Bristles extended

-


For hard floors 

Position 2: Bristles retracted 

-


For carpets

● Combination tool (dusting brush and crevice tool)

For corners, edges or small spaces

Downloaded from www.vandenborre.be

Summary of Contents for VCBS0828

Page 1: ...VACUUM CLEANER ASPIRATEUR STOFZUIGER ASPIRADOR VCBS0828 OPERATING INSTRUCTIONS MANUEL D UTILISATION HANDLEIDING MANUAL DE INSTRUCCIONES D o w n l o a d e d f r o m w w w v a n d e n b o r r e b e ...

Page 2: ...D o w n l o a d e d f r o m w w w v a n d e n b o r r e b e ...

Page 3: ...Catalogue Language of introduction Page English EN1 EN13 French FR1 FR14 Dutch NL1 NL14 Espa ES1 ES14 D o w n l o a d e d f r o m w w w v a n d e n b o r r e b e ...

Page 4: ...nment If the supply cord is damaged it must be replaced by a special cord or assembly available from the manufacturer or its service agent Regarding the detailed instructions for the method and frequency of cleaning and the precautions during user maintenance refer to the section Cleaning and Maintenance on page EN 8 to EN 10 of the manual D o w n l o a d e d f r o m w w w v a n d e n b o r r e b ...

Page 5: ...nce in a safe way and understand the hazards involved Children shall not play with the appliance Cleaning and user maintenance shall not be made by children without supervision Following objects are strictly banned otherwise the vacuum cleaner will be damaged or fire calamity will be caused which bring such accidents as human body injuries Don t pick up large or sharp broken such as glasses D o w ...

Page 6: ...rning or glowing objects cigarettes matches hot ashes WARNING the plug must be removed from the socket outlet before cleaning or maintaining the appliance Regarding the detailed instructions for the safe use of the appliance and the precautions during user maintenance refer to the section Operation and Maintenance D o w n l o a d e d f r o m w w w v a n d e n b o r r e b e ...

Page 7: ...ance with wet hands or feet Do not use without filter in place Do not use the appliance to suck up water or any other liquid Do not immerse the product in water or any other liquid for cleaning Use only original accessories approved by the manufacturer The hose must be checked regularly and must not be used if damaged D o w n l o a d e d f r o m w w w v a n d e n b o r r e b e ...

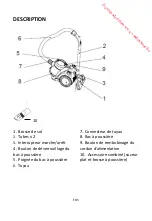
Page 8: ...bes x 2 3 Power button 4 Dust tank release button 5 Handle of the dust tank 6 Hose 7 Hose socket 8 Dust tank 9 Cord rewind button 10 Combination tool Dusting brush and crevice tool D o w n l o a d e d f r o m w w w v a n d e n b o r r e b e ...

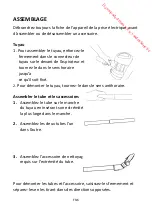
Page 9: ...l the hose is fixed 2 To remove the hose turn it anticlockwise Connecting tube and accessories 1 Attach the tube into the hose handle by inserting the bigger end of one tube into the handle 2 Connect the tube to the other one 3 Attach the desired cleaning accessory to the end of the tube To remove the tubes and accessory hold each piece tightly and pull firmly apart D o w n l o a d e d f r o m w w...

Page 10: ...ou can quickly reduce the suction power by pushing the air flow regulator on the hose handle Push it forward suction power will increase push it backward suction power will reduce Using the Cleaning Accessories Dual position carpet floor brush Drawings for reference only Position 1 Bristles extended For hard floors Position 2 Bristles retracted For carpets Combination tool dusting brush and crevic...

Page 11: ...ne 1 Press the dust tank release button to remove the dust tank 2 Hold the dust container over a trash receptacle and then press the dust release button to open the dust container door Empty the dust container 3 Close the dust container door after emptying Filters Maintenance It is very important to keep the filters clean to maintain maximum performance from the vacuum Clean the filters regularly ...

Page 12: ...ilter 4 Tap the HEPA filter against a trash receptacle Wash it and its casing under running water Dry thoroughly DO NOT USE DETERGENTS TO CLEAN THEM 5 Put the HEPA filter back into the casing Attach the HEPA filter with the casing to the lid by screwing them clockwise 6 Attach the lid of the anticlockwise to the dust container by turning it clockwise 7 Put the dust tank back into the appliance unt...

Page 13: ... to dry completely before replacing it in the appliance Power cord rewinding When not in use unplug the appliance from the mains socket and then press the cord rewind button to feed back the power cord CAUTION Take special care to rewind the mains cord by holding the plug to avoid injury by a whipping action Storage Insert the holder of the floor brush with tubes into the storage clip at the rear ...

Page 14: ...amaged 2 Check if the dust is full 3 Check if the filter is clogged the tube is correctly attached 1 Immediately remove the obstruction 2 Empty dust 3 Clean the filters or reassemble the tubes Power cord will not fully feed back Check if the power cord is twisted Pull out the power cord at its optimal length and rewind it Power cord can not be pulled out The power cord may be twisted Rewind or pul...

Page 15: ...EN 12 SPECIFICATIONS Ratings 220 240V 50 60Hz Nominal power 1000W 1200W max ABCDEFG dB 41 0 kWh annum VCBS0828 D ABCDEFG ABCDEFG 86 0 D o w n l o a d e d f r o m w w w v a n d e n b o r r e b e ...

Page 16: ... inconvenience caused by minor inconsistencies in these instructions which may occur as a result of product improvement and development Darty Plc UK EC1N 6TE 14 05 2014 D o w n l o a d e d f r o m w w w v a n d e n b o r r e b e ...

Page 17: ...câble d alimentation est endommagé il doit être remplacé par le fabricant son service après vente ou des personnes de qualification similaire afin d éviter un danger En ce qui concerne les informations détaillées sur la méthode et la fréquence du nettoyage et des précautions qui concerne l entretien par l usager référez vous dans la section NETTOYAGE ET ENTRETIEN en page FR 8 à FR 10 D o w n l o a...

Page 18: ...utilisation de l appareil en toute sécurité leur ont été données et si les risques encourus ont été appréhendés Les enfants ne doivent pas jouer avec l appareil Le nettoyage et l entretien par l usager ne doivent pas être effectués par des enfants sans surveillance Les objets suivants sont strictement interdits sous peine d abî mer l aspirateur ou de causer un incendie et de provoquer des blessure...

Page 19: ...e substances inflammables ou explosives telles que l essence ou l alcool N aspirez pas les objets brûlants ou incandescents cigarettes allumettes cendres chaudes MISE EN GARDE la fiche de prise de courant du câble d alimentation doit être enlevée du socle avant de nettoyer l appareil ou d entreprendre les opérations d entretien D o w n l o a d e d f r o m w w w v a n d e n b o r r e b e ...

Page 20: ...e nettoyer ou de lui ajouter retirer un accessoire N utilisez pas l appareil si vos mains ou vos pieds sont mouillés N utilisez pas l appareil sans son filtre correctement installé N utilisez pas cet appareil pour aspirer de l eau ni aucun autre liquide N immergez pas l appareil dans de l eau ni dans un autre liquide pour le nettoyer Utilisez uniquement les accessoires d origine approuvés par le f...

Page 21: ...ton de déverrouillage du bac à poussière 5 Poignée du bac à poussière 6 Tuyau 7 Connecteur de tuyau 8 Bac à poussière 9 Bouton de rembobinage du cordon d alimentation 10 Accessoire combiné suceur plat et brosse à poussière D o w n l o a d e d f r o m w w w v a n d e n b o r r e b e ...

Page 22: ...oit fixé 2 Pour démonter le tuyau tournez le dans le sens antihoraire Assembler le tube et les accessoires 1 Assemblez le tube sur le manche du tuyau en insérant son extrémité la plus large dans le manche 2 Assemblez les deux tubes l un dans l autre 3 Assemblez l accessoire de nettoyage requis sur l extrémité du tube Pour démonter les tubes et l accessoire saisissez les fermement et séparez les en...

Page 23: ... la puissance d aspiration en agissant sur le régulateur de flux d air présent sur le manche du tuyau Poussez le vers l avant pour augmenter la puissance ou vers l arrière pour la réduire Utiliser les accessoires de nettoyage Brosse double sol moquette les illustrations ne sont fournies qu à titre indicatif Position1 Poils de brosse sortis Pour les sols durs Position2 Poils de brosse rentrés Pour ...

Page 24: ... MAX 1 Appuyez sur le bouton de déverrouillage du bac à poussière et retirez le bac 2 Placez le bac à poussière au dessus d une poubelle et appuyez sur le bouton d ouverture du bac pour ouvrir son couvercle Videz le bac à poussière 3 Refermez le couvercle du bac à poussière après l avoir vidé Entretien des filtres Il est très important de maintenir les filtres propres afin d assurer le fonctionnem...

Page 25: ...son support 4 Tapotez le filtre HEPA contre la paroi intérieure d une poubelle Lavez le filtre et son boîtier à l eau courante Séchez les soigneusement N UTILISEZ PAS DE DÉTERGENT POUR LES NETTOYER 5 Réinsérez le filtre HEPA dans son support Assemblez le filtre HEPA et son support sur le couvercle en les vissant dans le sens horaire 6 Refermez le couvercle sur le bac à poussière en tournant le cou...

Page 26: ... Rembobiner le cordon d alimentation Quand vous n utilisez pas l appareil débranchez le de la prise secteur puis rembobinez son cordon d alimentation en appuyant sur son bouton de rembobinage ATTENTION Pensez à toujours accompagner le mouvement de rembobinage du cordon d alimentation en tenant sa fiche afin d éviter qu il n ait un mouvement semblable à un fouet et ne blesse quelqu un Rangement Ins...

Page 27: ...z l aspirateur en actionnant son interrupteur marche arrêt L appareil aspire moins bien 1 Vérifiez que le tuyau le tube ou la brosse ne sont pas bouchés ni endommagés 2 Vérifiez que le bac à poussière n est pas plein 3 Vérifiez que le filtre n est pas bouché et que le tube est correctement assemblé 1 Débouchez les immédiatement 2 Videz le bac à poussière 3 Nettoyez les filtres ou réassemblez les t...

Page 28: ...ctionnant le bouton de rembobinage Impossible de régler la puissance d aspiration Le dispositif de réglage de la puissance d aspiration est peut être défectueux Redémarrez l appareil plusieurs fois S il ne fonctionne toujours pas contactez un agent de réparation agréé D o w n l o a d e d f r o m w w w v a n d e n b o r r e b e ...

Page 29: ...ÉCIFICATIONS Spécifications électriques 220 240 V 50 60Hz Puissance nominale 1000W 1200W max ABCDEFG dB 41 0 kWh annum VCBS0828 D ABCDEFG ABCDEFG 86 0 D o w n l o a d e d f r o m w w w v a n d e n b o r r e b e ...

Page 30: ...tions apportées à nos produits de petites incohérences peuvent apparaî tre dans cette notice d utilisation Veuillez nous excuser pour la gêne occasionnée Darty Plc UK EC1N 6TE 12 05 2014 D o w n l o a d e d f r o m w w w v a n d e n b o r r e b e ...

Page 31: ...g Als het snoer beschadigd is moet het door een speciaal snoer of assemblage dat bij de fabrikant of reparateur te verkrijgen is worden vervangen Voor gedetailleerde instructies over de reinigingsmethode en frequentie en de voorzorgsmaatregelen tijdens het onderhoud zie de rubriek Reiniging en onderhoud op pagina NL 8 aan NL 10 van de handleiding D o w n l o a d e d f r o m w w w v a n d e n b o r...

Page 32: ...aat op een veilige manier kunnen gebruiken en op de hoogte zijn van de gevaren die het gebruik van het apparaat met zich meebrengt Laat kinderen niet met het apparaat spelen Kinderen mogen het apparaat niet zonder toezicht reinigen of onderhouden Onderstaande voorwerpen zijn ten strengste verboden deze kunnen de stofzuiger beschadigen brand veroorzaken of lichamelijk letsel teweegbrengen D o w n l...

Page 33: ...bijtmiddel detergent Zuig geen ontvlambare of explosieve stoffen op zoals benzine of alcohol Zuig geen brandende of gloeiende voorwerpen op sigaretten lucifers hete as WAARSCHUWING Haal de stekker uit het stopcontact voordat u het apparaat reinigt of onderhoudt D o w n l o a d e d f r o m w w w v a n d e n b o r r e b e ...

Page 34: ... voeten Gebruik het apparaat niet zonder filter Gebruik het apparaat niet voor het opzuigen van water of andere vloeistoffen Dompel het product niet onder in water of een andere vloeistof om deze schoon te maken Gebruik alleen originele accessoires die door de fabrikant worden aanbevolen Controleer de slang regelmatig en gebruik deze niet als schade wordt waargenomen D o w n l o a d e d f r o m w ...

Page 35: ...zen x 2 3 Aan uit knop 4 Vrijgaveknop voor stofbak 5 Handvat van stofbak 6 Slang 7 Slangaansluitingstuk 8 Stofbak 9 Snoeroprolknop 10 Combinatiemondstuk stofborstel en spleetmondstuk D o w n l o a d e d f r o m w w w v a n d e n b o r r e b e ...

Page 36: ... 2 Om de slang los te maken draai deze tegen de klok in De buis en accessoires aansluiten 1 Maak de buis in het slanghandvat vast door het breder uiteinde van één buis in het handvat te schuiven 2 Verbind deze buis met de andere buis 3 Bevestig het gewenste schoonmaakaccessoire aan het uiteinde van de buis Om de buizen en accessoires af te halen houd elk onderdeel stevig vast en trek deze uit elka...

Page 37: ...elle manier aanpassen door op de luchtstroomregelaar op het slanghandvat te duwen Duw deze vooruit om de zuigkracht te verhogen en achteruit om de zuigkracht te verlagen De schoonmaakaccessoires gebruiken Tapijt vloerborstel met dubbele positie Tekeningen alleen ter referentie Positie 1 Borstels uitgeschoven Voor harde vloeren Positie 2 Borstels ingeschoven Voor tapijt Combinatiemondstuk stofborst...

Page 38: ... 1 Druk op de vrijgaveknop om de stofbak te verwijderen 2 Houd de stofbak boven een vuilnisbak en druk op de stofvrijgaveknop om de klep van de stofbak te openen Ledig de stofbak 3 Sluit de klep van de stofbak eenmaal de stofbak leeg is De filters onderhouden Het is van groot belang om de filters schoon te houden zodat de stofzuiger maximale prestaties blijft leveren Maak de filters regelmatig sch...

Page 39: ...filter 4 Tik de HEPA filter tegen een vuilnisbak Was de filter en de behuizing onder stromend water Droog grondig GEBRUIK GEEN SCHOONMAAKMIDDELEN OM SCHOON TE MAKEN 5 Plaats de HEPA filter opnieuw in de behuizing Bevestig de HEPA filter met de behuizing aan het deksel door deze met de klok mee vast te maken 6 Bevestig het deksel aan de stofbak door met de klok mee te draaien 7 Plaats de stofbak op...

Page 40: ...ilter volledig drogen voordat u deze opnieuw in het apparaat plaatst Het snoer oprollen Wanneer niet in gebruik haal de stekker uit het stopcontact en druk vervolgens op de snoeroprolknop om het snoer op te rollen OPGELET Wees voorzichtig wanneer u tijdens het oprollen van het snoer de stekker vasthoudt zodat u geen letsel oploopt Opslag Steek de houder van de vloerborstel met de buizen in de opbe...

Page 41: ...n of het apparaat wordt ingeschakeld 2 Schakel de AAN UIT schakela ar in De zuigkracht neemt af 1 Controleer of de slang vloerborstel of buis verstopt of beschadigd is 2 Controleer of de stofbak vol is 3 Controleer of de filter verstopt is en de buzen juist zijn vastgemaakt 1 Verwijder onmiddellijk de obstructie 2 Ledig de stofbak 3 Maak de filter schoon of zet de buizen opnieuw in elkaar Het snoe...

Page 42: ...n rol opnieuw op door op de snoeroprolknop te drukken De zuigkracht kan niet worden geregeld De zuigkrachtregelaar kan defect zijn Start het apparaat enkele keren na elkaar Indien nog steeds niet in orde neem contact op met een bevoegde reparateur D o w n l o a d e d f r o m w w w v a n d e n b o r r e b e ...

Page 43: ...NL 13 TECHNISCHE GEGEVENS Vermogen 220 240V 50 60Hz Nominaal 1000W 1200W max ABCDEFG dB 41 0 kWh annum VCBS0828 D ABCDEFG ABCDEFG 86 0 D o w n l o a d e d f r o m w w w v a n d e n b o r r e b e ...

Page 44: ... enig ongemak veroorzaakt door kleine inconsistenties in deze gebruikershandleiding die kunnen ontstaan door productverbetering of ontwikkeling Darty Plc UK EC1N 6TE 12 05 2014 D o w n l o a d e d f r o m w w w v a n d e n b o r r e b e ...

Page 45: ...comercial Si el cable de alimentación estuviera dañado deberá sustituirse por un cable o conjunto especial que podrá solicitar al fabricante o a su agente de servicio técnico Para obtener más información en relación al método y a la frecuencia de la limpieza consulte la sección de Limpieza y mantenimiento de la página ES 8 a ES 10 del manual D o w n l o a d e d f r o m w w w v a n d e n b o r r e ...

Page 46: ...rato y entienden los peligros que conlleva No permita que los niños jueguen con el aparato Las tareas de limpieza y mantenimiento no podrán ser realizadas por niños sin supervisión Queda estrictamente prohibido el uso del aspirador con los siguientes objetos De otro modo éste podrí a sufrir daños o incluso incendiarse y causar accidentes como pueden ser lesiones personales No aspire objetos rotos ...

Page 47: ...ancias inflamables o explosivas como pueden ser gasolina o alcohol No aspire objetos candentes cigarrillos cerillas cenizas calientes ADVERTENCIA el enchufe deberá desconectarse de la toma de corriente antes de realizar tareas de limpieza o mantenimiento en el aparato D o w n l o a d e d f r o m w w w v a n d e n b o r r e b e ...

Page 48: ...lice el aparato con las manos o los pies mojados No lo utilice sin el filtro No use el aparato para succionar agua o cualquier otro lí quido No sumerja el producto en agua ni en ningún otro lí quido para limpiarlo Utilice únicamente accesorios originales aprobados por el fabricante Revise el tubo flexible periódicamente y no use el aparato si estuviera dañado D o w n l o a d e d f r o m w w w v a ...

Page 49: ...ción del depósito del polvo 5 Asa del depósito del polvo 6 Tubo flexible 7 Conector de tubo flexible 8 Depósito del polvo 9 Botón de recogida automática del cable 10 Herramienta combinada cepillo para el polvo y herramienta para lugares difí ciles D o w n l o a d e d f r o m w w w v a n d e n b o r r e b e ...

Page 50: ...a retirar el tubo flexible gí relo en el sentido contrario de las agujas del reloj Conexión del tubo telescópico y los accesorios 1 Conecte el tubo telescópico al mango del tubo flexible insertando para ello el extremo de mayor tamaño del tubo en el mango 2 Conecte el tubo telescópico al otro 3 Fije el accesorio de limpieza deseado al extremo del tubo telescópico Para retirar los tubos telescópico...

Page 51: ... podrá reducir rápidamente la potencia de succión desplazando el regulador de flujo de aire situado sobre el mango del tubo flexible Desplácelo hacia adelante para aumentar la potencia de succión o bien hacia atrás para reducirla Utilización de los accesorios de limpieza Cepillo de posición dual alfombras suelos duros dibujos para referencia únicamente Posición 1 Cerdas extendidas Para suelos duro...

Page 52: ... Pulse el botón de liberación del depósito del polvo para retirar el depósito 2 Sujete el colector del polvo sobre una papelera y a continuación pulse el botón de liberación del polvo para abrir la compuerta del colector Vací e el colector del polvo 3 Cierre la compuerta del colector del polvo tras el vaciado Mantenimiento de los filtros Es muy importante mantener los filtros limpios para seguir o...

Page 53: ...la carcasa del filtro HEPA 4 De unos golpecitos al filtro HEPA contra una papelera Lave éste y su carcasa con agua del grifo Seque perfectamente NO UTILICE DETERGENTES PARA LIMPIARLOS 5 Vuelva a colocar el filtro HEPA dentro de su carcasa Acople el filtro HEPA con su carcasa a la tapa enroscándolos en el sentido de las agujas del reloj 6 Acople la tapa al colector de polvo girándola en el sentido ...

Page 54: ... del cable de alimentación Cuando no lo esté utilizando desenchufe el aparato de la toma de corriente y a continuación pulse el botón de recogida automática del cable para recogerlo PRECAUCIÓ N Preste mucha atención a la hora de retraer el cable de alimentación al aparato sujete el cable por su enchufe para evitar que actúe como un látigo y llegue a ocasionar lesiones fí sicas Almacenamiento Inser...

Page 55: ...uelva a insertar el enchufe en la toma de corriente y asegúrese de que ésta funciona 2 A continuación encienda el interruptor de alimentación del aspirador El aparato pierde progresivamente potencia de succión 1 Compruebe si el tubo flexible el cepillo para suelos o el tubo telescópico están obstruidos o dañados 2 Compruebe si la bolsa del polvo está llena 3 Verifique que el filtro no está obstrui...

Page 56: ...el cable de alimentación esté retorcido Retraiga y extraiga el cable varias veces pulsando el botón de recogida automática La potencia de succión no puede regularse El dispositivo de regulación de la potencia de succión podrí a ser defectuoso Apague y encienda el aparato varias veces Si éste no funcionara de forma persistente póngase en contacto con un servicio técnico autorizado D o w n l o a d e...

Page 57: ...ES 13 ESPECIFICACIONES Valores nominales 220 240 V 50 60Hz 1000W Nominal 1200W max ABCDEFG dB 41 0 kWh annum VCBS0828 D ABCDEFG ABCDEFG 86 0 D o w n l o a d e d f r o m w w w v a n d e n b o r r e b e ...

Page 58: ...olestia debido a inconsistencias menores en estas instrucciones como consecuencia del esfuerzo continuo por mejorar y desarrollar nuestros productos Darty Plc UK EC1N 6TE 12 05 2014 D o w n l o a d e d f r o m w w w v a n d e n b o r r e b e ...

Page 59: ...D o w n l o a d e d f r o m w w w v a n d e n b o r r e b e ...

Page 60: ...D o w n l o a d e d f r o m w w w v a n d e n b o r r e b e ...

Reviews: