8
English
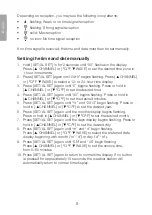
Depending on reception, you may see the following icon patterns:
•
flashing: Weak or no time signal reception
•
flashing: Strong signal reception
•
solid:
Max reception
•
no icon: No time signal reception
If no time signal is received, the time and date must then be set manually.
Setting the time and date manually
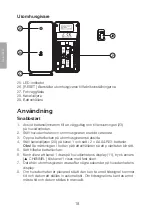
1. Hold [ SET/AL SET ] in for 2 seconds until “00” flashes in the display.
Press [
▲
CHANNEL ] or [ ºC/ºF
▼
WAVE ] to set the desired time zone in
1-hour increments.
2. Press [ SET/AL SET ] again until “24Hr” begins flashing. Press [
▲
CHANNEL ]
or [ ºC/ºF
▼
WAVE ] to select a 12- or 24-hour time display.
3. Press [ SET/AL SET ] again until “0” begins flashing. Press or hold in
[
▲
CHANNEL ] or [
▼
ºC/ºF ] to set the desired hour.
4. Press [ SET/AL SET ] again until “00” begins flashing. Press or hold in
[
▲
CHANNEL ] or [
▼
ºC/ºF ] to set the desired minutes.
5. Press [ SET/AL SET ] again until “Yr” and “2013” begin flashing. Press or
hold in [
▲
CHANNEL ] or [
▼
ºC/ºF ] to set the desired year.
6. Press [ SET/AL SET ] again until the months display begins flashing.
Press or hold in [
▲
CHANNEL ] or [
▼
ºC/ºF ] to set the desired month.
7. Press [ SET/AL SET ] again until the days display begins flashing. Press or
hold in [
▲
CHANNEL ] or [
▼
ºC/ºF ] to set the desired day.
8. Press [ SET/AL SET ] again until “m” and “d” begin flashing.
Press [
▲
CHANNEL ] or [ ºC/ºF
▼
WAVE ] to select the preferred date
display beginning with month (“m” “d”) or day (“d” “m”).
9. Press [ SET/AL SET ] again until “SN” and “05” begin flashing.
Press [
▲
CHANNEL ] or [ ºC/ºF
▼
WAVE ] to set the snooze time,
from 5–60 minutes.
10. Press [ SET/AL SET ] again to return to normal time display. If no button
is pressed for approximately 10 seconds, the weather station will
automatically return to normal time display.
Summary of Contents for IW006-DCF
Page 63: ......


