- 11 -
Charge in a well ventilated area. DO NOT block charger vents. Keep them clear to allow proper
ventilation.
CHARGING LITHIUM POLYMER BATTERY PACKS
Lithium Polymer batteries deliver fade-free power for their entire run time. The Prolux vacuum will not
gradually lose power due to decreasing battery charge. The vacuum will perform at its normal performance
level until the battery has been depleted. Once this happens, recharging of the battery is required. It is not
necessary to drain the battery pack completely before recharging.
If the charger’s light is not lit at any point during the charging process, remove the battery pack from the
charger to avoid damaging the product. DO NOT insert another battery.
Contact the service with any issues.
BATTERY PROTECTION FEATURE
The 25.2-volt Lithium Polymer batteries are designed with features that protect the Lithium Polymer cells
and maximize battery life. When the battery has reached its minimum voltage level the electronics will
shut off the battery. Once the battery shuts off, it must be recharged.
PREPARING BATTERY PACK FOR CHARGING
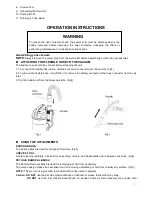
1. Turn off the power switch. Confirm the switch is on the off position.
2. Unlock the battery pack from the vacuum by pulling up on the metal battery hook located on the top of
the battery, and take the battery pack out from the vacuum. (Fig 17)
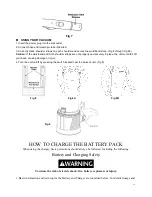
3. Plug the round connector on the charger’s cord into the battery pack. (Fig 18)
4. Plug the charger’s power cord into 120V wall outlet (Fig 19)
5. The Battery pack may require approximately 8 hours to full charge.
Note: Battery pack may get warm while charging.
Before you assemble the battery pack back into the vacuum, please check the on/off switch is on the off
position.
Figure 17 below shows how the battery is inserted into the vacuum. Make sure it is firmly shoved down
all the way. To remove battery, lift of wire handle and pull out. Always make sure vacuum switch is
turned to off position before inserting or removing handle.
Figure 18 below shows to plug the charger into the battery to recharge.
Figure 19 below shows how to plug the charger into the wall outlet.

