11
electrician or service person if you are in doubt as to whether
the outlet is properly grounded. Do not modify the plug
provided with the tool.
The green/yellow conductor is the equipment-grounding
conductor. If repair or replacement of the electric cord or plug
is necessary, do not connect the equipment-grounding
conductor to a live terminal.
Use only 3-wire extension cords with grounding plugs.
Repair or replace damaged or worn cord immediately.
7.2
Extension cords
The use of extension cords is discouraged; try to position
machines near the power source. If an extension cord is
necessary, make sure it is in good condition.
An undersized cord will cause a drop in line voltage resulting in
loss of power and overheating.
Only use extension cords marked H07RN-F, with wires 1,5mm2
or more.
The total length of cord may not exceed 18 Meter
Extension cords and plugs must be free from defects.
8.0
Adjustments
8.1
Changing spindle speed
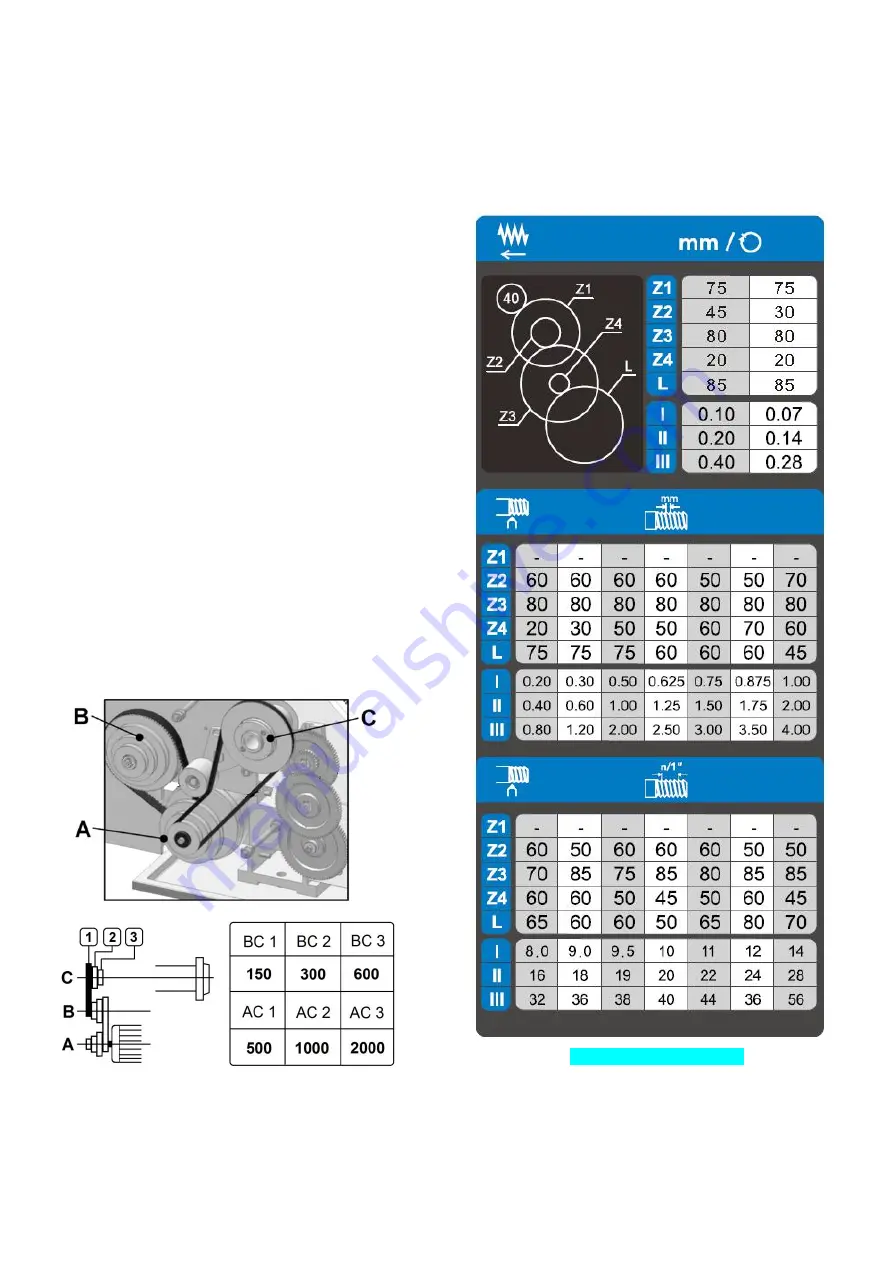
The speeds of the lathe are controlled by the position of the
belt on the pulleys (Fig 8-1).
Figure 8-1: Spindle speed chart
Remove the pulley cover (C, Fig 5-1) to change the belt
position. Reinstall the pulley cover.
8.2
Change gear setup
Remove the pulley cover.
The rotational speed of the lead screw, and hence the rate of
feed of the cutting tool, is determined by the gear
configuration and by the feed speed select lever (R, Fig 5-2).
Assemble the gears with desired setup (Fig 8-2)
Figure 8-2: Change gear setup
Adjust gears to mesh with upper and lower gear.
Placing ordinary paper in between gears helps to adjust for
correct gear spacing (… remove the paper afterwards!).
Reinstall the pulley cover.
Summary of Contents for PBD-2870
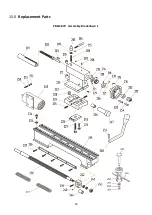
Page 20: ...20 15 0 Replacement Parts PBD 2870 Assembly Breakdown 1 ...
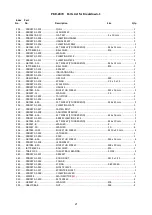
Page 23: ...23 PBD 2870 Assembly Breakdown 2 ...
Page 25: ...25 PBD 2870 Assembly Breakdown 3 ...
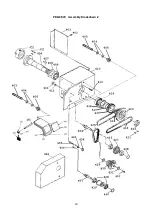
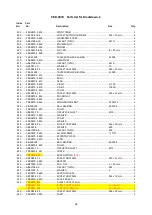
Page 27: ...27 PBD 2870 Assembly Breakdown 4 ...
Page 29: ...29 PBD 2870 Assembly Breakdown 5 ...
Page 31: ...31 PBD 2870 Assembly Breakdown 6 ...
Page 33: ...33 PBD 2870 Assembly Breakdown 7 ...
Page 39: ...39 16 0 Wiring Diagrams PBD 2870 1 230V PE 50Hz ...
Page 58: ...58 15 0 Ersatzteile PBD 2870 Explosionszeichnung 1 ...
Page 60: ...60 PBD 2870 Explosionszeichnung 2 ...
Page 62: ...62 PBD 2870 Explosionszeichnung 3 ...
Page 64: ...64 PBD 2870 Explosionszeichnung 4 ...
Page 66: ...66 PBD 2870 Explosionszeichnung 5 ...
Page 68: ...68 PBD 2870 Explosionszeichnung 6 ...
Page 70: ...70 PBD 2870 Explosionszeichnung 7 ...
Page 72: ...72 16 0 Schaltplan PBD 2870 1 230 V PE 50 Hz ...
Page 91: ...91 15 0 Pièces de rechange PBD 2870 Vue explosée 1 ...
Page 93: ...93 PBD 2870 Vue explosée 2 ...
Page 95: ...95 PBD 2870 Vue explosée 3 ...
Page 97: ...97 PBD 2870 Vue explosée 4 ...
Page 99: ...99 PBD 2870 Vue explosée 5 ...
Page 101: ...101 PBD 2870 Vue explosée 6 ...
Page 103: ...103 PBD 2870 Vue explosée 7 ...
Page 105: ...105 16 0 Schémas de câblage PBD 2870 1 230V PE 50Hz ...


