background image

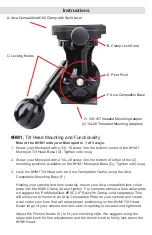
Mount the #HM1 onto your Monopod in 1 of 3 ways.

Screw your Monopod with a 3/8-16 screw into the bottom center of the #HM1 

Monopod Tilt Head Base (G). Tighten until snug.

Screw your Monopod with a 1/4-20 screw into the bottom of either of the (2) 

mounting positions available on the #HM1 Monopod Base (G). Tighten until snug.

Lock the #HM1 Tilt Head onto an Arca Compatible Clamp using the Arca 

Compatible Mounting Base (F).

Holding your camera and lens securely, mount your Arca compatible lens collar 

plate into the #C60 Clamp (A) and tighten. For cameras without a lens collar plate 

we suggest the ProMediaGear #PXC2 8" Rail with Clamp, sold separately. This 

will allow you to mount to an Arca Compatible Plate on your camera and create 

a rail under your lens that will allow proper positioning on the #HM1 Tilt Head. 

Never let go of your camera and lens until everything is secured and tightened.

Adjust the Friction Knobs (C) to fit your shooting style. We suggest using the 

larger ball knob for fine adjustments and the thumb knob to firmly lock down the 

#HM1 Head.

Instructions

A. Arca Compatible #C60 Clamp with Spirit Level

1.

2.

3.

B. Clamp Lock Knob

C. Locking Knobs

G. 3/8-16 Threaded Mounting Adapter

F. Arca Compatible Base

E. Pivot Point

(2) 1/4-20 Threaded Mounting Adapters

#HM1,

 Tilt Head Mounting and Functionality

Summary of Contents for HM1

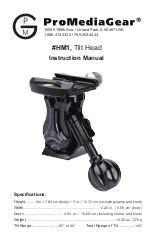
Page 1: ...ing clamp and knob Width 2 20 in 5 59 cm body Depth 4 20 in 10 69 cm including clamp and knob Weight 13 30 oz 378 g Tilt Range 55 to 90 Total Range of Tilt 145 16555 108th Ave Orland Park IL 60467 USA 1 888 413 3332 708 263 4443 HM1 Tilt Head Instruction Manual ...

Page 2: ...t a lens collar plate we suggest the ProMediaGear PXC2 8 Rail with Clamp sold separately This will allow you to mount to an Arca Compatible Plate on your camera and create a rail under your lens that will allow proper positioning on the HM1 Tilt Head Never let go of your camera and lens until everything is secured and tightened Adjust the Friction Knobs C to fit your shooting style We suggest usin...

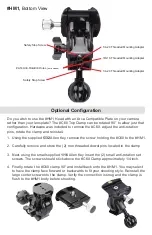
Page 3: ...e the clamp and reinstall Using the supplied 5 32 Allen Key remove the screw holding the C60 to the HM1 Carefully remove and store the 2 non threaded dowel pins located in the clamp Next using the small supplied 1 16 Allen Key insert the 2 small anti rotation set screws The screws should stick above the C60 Clamp approximately 1 4 inch Finally rotate the C60 clamp 90 and install back onto the HM1 ...

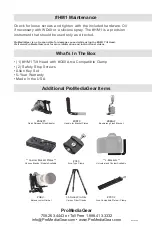
Page 4: ...ww ProMediaGear com for more information and instructional videos Rev 02 19 HM1 Maintenance What s In The Box HB70 Handle for Bracket Plates BBGv2 Boomerang Flash Bracket C60 Arca Type Clamp L Brackets Universal and Custom Available GKJr Katana Junior Gimbal PXC2 Arca Compatible Plate w Clamp 34 Series Pro Stix Carbon Fiber Tripods Custom Bracket Plates Various Brands Models Available SS2P3 Quick ...

Reviews: