Summary of Contents for M3000C

Page 1: ...SERVICE MANUAL FOR COMPUTERIZED SEWING MACHINE ULT2003D SUPER GALAXIE 3100D ULT2001N ULT2001C M3000N M3000C 3 2003 www promelectroavtomat ru ...

Page 2: ...ASSEMBLING THE SEWING MACHINE 8 III HOW TO ADJUST MECHANICAL ELEMENTS 24 IV HOW TO ADJUST ELECTRONIC ELEMENTS 58 1 Always use rubber gloves when handling printed circuit boards and never touch the metal portion of a printed circuit board with bare hands 2 Keep your body earthed in order to avoid generating static electricity 3 Pack printed circuit boards in aluminum foil and avoid subjecting them ...

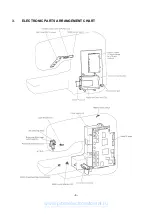
Page 3: ... TRANSMISSION CHART 3 3 ELECTRONIC PARTS ARRANGEMENT CHART 4 4 CONTROL SYSTEM BLOCK DIAGRAM 5 5 MAIN MOTOR CONTROL 5 6 PATTERN GENERATOR 6 7 AUTOMATIC THREAD TENSION 6 8 OTHER ELECTRONIC COMPONENT FUNCTIONS 7 www promelectroavtomat ru ...

Page 4: ... 2 1 MECHANICAL CHART EMBROIDERY UNIT MECHANISM www promelectroavtomat ru ...

Page 5: ... 3 2 POWER TRANSMISSION CHART A Generating mechanism of needle bar thread take up lever and zigzag movements B Mechanism of feed dog and rotary hook movement www promelectroavtomat ru ...

Page 6: ... 4 3 ELECTRONIC PARTS ARRANGEMENT CHART www promelectroavtomat ru ...

Page 7: ...ng machine is required to smoothly change from low speed to high speed without any fluctuations due to load or temperature changes To fully comply with this requirement this machine adopts Pulse width modulation PWM control using Field Effect Transistor FET www promelectroavtomat ru ...

Page 8: ...he number of stitches simply by adding extra memory capacity so that about 3 800 patterns comprising a total of approximately 20 000 stitches can be stored In addition the pulse motors must move the position of the needle while the needle is raised and stop it in the correct position and similarly they must move the position of the feed regulator while the needle is lowered Thus highly precise pos...

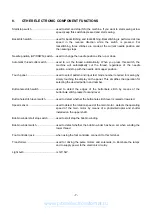
Page 9: ...mber required for sewing by simply touching the display on the panel This simplifies the operation for selecting the desired pattern and number Buttonhole stitch switch used to detect the edges of the buttonhole stitch by means of the buttonhole stitch presser foot and lever Buttonhole stitch lever switch used to detect whether the buttonhole stitch lever is raised or lowered Speed sensor used to ...

Page 10: ... 8 II 1 DISASSEMBLING AND REASSEMBLING THE OUTER PARTS AND MAIN PARTS 9 2 LEAD WIRE ARRANGEMENT 23 www promelectroavtomat ru ...

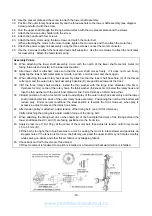
Page 11: ...ock on the main board connector first When the front cover has been removed always adjust the touch panel after assembling the front cover 6 Remove the screws at the 4 locations then remove the FDD unit 7 Remove the two screws securing the needle plate and the needle plate 8 Remove the three screws securing the rear cover and the rear cover from the rear side 9 Remove the two securing screws then ...

Page 12: ...ove the two screws Remove the thread tension assembly 19 Remove the screw and the needle bar supporter stud holder assembly 20 Remove the two springs B and the needle bar block assembly 21 Remove the two screws and the two cord holders 22 Remove the three screws and the ZPM assembly Disassembly Points 11 To disconnect the connectors grab the base of the connector and pull it straight out In order ...

Page 13: ... 11 www promelectroavtomat ru ...

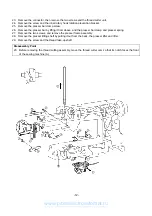
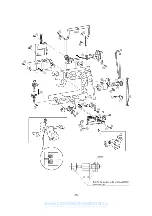
Page 14: ...m above and the presser bar clamp and presser spring 27 Remove the two screws and remove the presser frame assembly 28 Remove the presser lifting shaft by pulling it out from the back the presser lifter and lifter 29 Remove the screw and the thread take up shaft Disassembly Point 23 Before removing the thread cutting assembly move the thread cutter cam so that its notch faces the front of the sewi...

Page 15: ...motor holder remove the motor fan then remove the 2 screws 33 Remove the four screws and the handle 34 Remove the screw and the tension pulley holder 35 Remove the two screws securing the upper shaft metal the upper shaft assembly and the timing belt 36 Remove screw and the outer rotary hook assembly 37 Remove the both presser plate screws Remove the lower shaft assembly and the timing belt Disass...

Page 16: ...e front 39 Of the three rotary shaft washers install the thin washer with the large inner diameter dia 6mm thickness 0 2mm on top of the rotary hook the think washer thickness 3mm below the rotary hook and then the thin washer with the small inner diameter dia 5mm thickness 0 2mm below that 39 Adjust position of notch of eccentric metal to adjust play of the outer rotary hook assembly and the lowe...

Page 17: ... 15 www promelectroavtomat ru ...

Page 18: ...e to the inner rotary hook or breaking the needle 52 Before installing the thread cutting assembly move the thread cutter cam so that its notch faces the front B of the sewing machine 52 Check E and adjust F so that the height of the lower thread guide is such that the highest point is at almost the same height as the inner rotary hook rib If the height is not correct defective thread cutting and ...

Page 19: ... 17 www promelectroavtomat ru ...

Page 20: ... stud holder then install a spring Hook the longer end of the other spring F to the main unit 56 Install the needle bar supporter stud holder from the needle bar supporter pin side then attaching it using a 14 mm screw 57 Initial adjusting system Tension unit assembly XA9551 101 parts assembly method 1 Insert one end of the spring b into the small hole dia 1mm of the thread tension cam 2 Insert th...

Page 21: ... bobbin winder assembly align the tab C in the bobbin winder assembly holder with the positioning hole in the sewing machine 64 Insert the connectors correctly and pass the lead wires under the guides E www promelectroavtomat ru ...

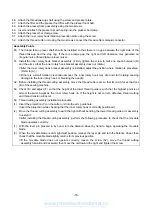
Page 22: ...ttach the front thread guard cover using the one screw 71 Attach the thread winder cover using the two screws 72 Insert the hose on the left of the upper cover into the hole of the rear cover then insert the notch plate on the right side of the rear cover to attach 73 Attach the free arm cover using the screw 74 Attach the face plate using the screw Assembly Points 67 When installing the rear cove...

Page 23: ...mbly Point 3 Check to make sure that there is space between sensors on X and Y shutters Set X sensor lead wire and X pulse motor lead wire in section A Attach main frame taking care not to pinch cord Attach so that the YPM lead wire frame detection SW lead wire and Y sensor lead wire pass under the couching clip B Move X carriage side to side to make certain that Y sensor lead wire and YPM lead wi...

Page 24: ...he washer b and fitting the stop ring a 6 In the case of Y Insert on end of the spring i into the small hole dia 1mm of the Y driving gear pulley B j 7 Insert the other end of the spring into the small hole dia 1mm of the Y driving gear pulley A h put the 3 parts i h and j together rotate h and hold so that j and the dia 3mm hole are aligned 8 Pass the dia 3mm shaft XA1847 051 needle release lever...

Page 25: ... 23 2 LEAD WIRE ARRANGEMENT www promelectroavtomat ru ...

Page 26: ...erformed 40 11 HEIGHT OF FEED DOG 41 12 THREAD ADJUSTMENT 42 13 POSITION OF BUTTONHOLE SWITCH LEVER 44 14 BOBBIN WINDER 45 15 BOBBIN THREAD DETECTOR 46 16 INNER ROTARY HOOK BRACKET POSITION 47 17 LARGE ONE POINT PATTERN SHAPE SOFT ADJUSTMENT 48 18 FEED ADJUSTMENT VERTICAL FEED 49 19 INNER ROTARY HOOK TENSION 50 20 KNEE LIFTER 50 21 NEEDLE THREADER 51 22 NEEDLE THREADER CHECKING THE HOOK POSITION I...

Page 27: ...r sharp pointed object If the buzzer sounds once when cross number 5 is touched the adjustment has been made correctly and the square will be displayed in Black If the buzzer sounds 4 times when cross number 5 is touched an error has occurred and the square will be displayed in Red In this case touch the crosses on the touch panel again in order from 1 to 5 Never press the thread cutter button dur...

Page 28: ...uch panel The respective test mode will be entered when the numeral is pressed NO Test Name Contents Notes NO01 Serial number of machine on display Displays the serial number of the machine NO02 Fabric thickness setting Refer to 40 NO03 Pattern adjustment Refer to 48 NO04 3 point needle drop Refer to 32 NO05 Needle clearance Refer to 34 NO06 Feed dog position Refer to 37 www promelectroavtomat ru ...

Page 29: ...read breakage sensor display mode Upper thread breakage sensor display mode Sensor penetration time when there is no thread 00 No sensor penetration NO012 Upper thread breakage function cancel mode Upper thread breakage function function cancel Upper thread breakage detection function cancellation next time power is turned on can only be used one time NO013 Reverse and forward feed Correct reverse...

Page 30: ...ectricity measurement pattern Electricity measurement pattern NO016 All type SW monitor mode All type SW monitor mode Presser foot SW BHSW BW front back SW 2SW Bobbin winding SW If the condition of the SW changes the buzzer will sound one time NO019 Flash memory domain deletion mode Flash memory domain deletion Practically clear the embroidery memory www promelectroavtomat ru ...

Page 31: ...35 no buzzer 335 5 buzzer sounds NO24 LCD check LCD check The LCD will change to the display indicated on the button NO25 Tension adjustment Refer to 42 NO30 FD drive check Install a 2HD FD and press Test1 If GOOD displays it is OK Next install a write protected 2HD FD and press Test2 If GOOD displays it is OK NO40 Demo screen Animated demo screen The other test modes are used for factory adjustme...

Page 32: ...n the main PC board is replaced upgrade the software to the newest version Refer to 57 2 When the ZPM holder assembly BH assembly or presser bar is removed or presser height is adjusted Make adjustments using test mode 2 3 When the FPM holder assembly or SPM holder is removed Make adjustments using test mode 3 4 To adjust the upper thread tension Be sure to adjust the tension according to test mod...

Page 33: ...st the belt tension by moving the motor holder 3 Tighten the two screws Adjustment Points 1 If the timing belt tension is too loose the belt may jump while sewing on denim and other thicker fabrics or overlapping fabric or the feed timing or the closeness of the needle and rotary hook may prevent sewing 2 If the motor belt tension is too tight the torque becomes too much causing the motor to rotat...

Page 34: ... down position 3 Loosen the screw securing the zigzag connecting rod assembly 4 Press the keys on the display to move the needle to the left and right and then turn the zigzag adjusting nut by using the box wrench to set the needle in the center of the needle hole 5 Tighten the screw securing the zigzag connecting rod assembly 6 Press the keys on the display to move the needle to the left and righ...

Page 35: ...ns described above press SW5 to change the seam position without regard to the needle position left seam position right seam position left seam position Medium speed 410 RPM Feed 0 In the conditions described above press SW5 to change the seam position without regard to the needle position left seam position right seam position left seam position High speed 850 RPM Feed 0 In the conditions describ...

Page 36: ...he right side of the needle 4 Tighten the three screws of the lower shaft gear 5 Turn the eccentric screw and set the clearance between the needle and the rotary hook point to 0 1 mm or less Make sure that the needle does not make contact with the rotary hook point Adjustment Points 1 When adjusting the timing the needle should be at its lowest and leftmost position 3 If the needle rises too littl...

Page 37: ... screw of the needle bar block assembly 4 Move the needle bar vertically to adjust the clearance to between 1 0 1 4 mm 5 Tighten the screw of the needle bar block assembly NOTE The needle bar clamp should be parallel to the side of the needle plate If the needle bar is loose when you adjust the needle bar height it may result in sewing troubles Adjustment Points 1 If the needle bar height is too l...

Page 38: ... center of lower shaft is positioned higher by 1 mm against the center of eccentric metal 2 Install the outer rotary hook 3 Tighten the screw on the bushing presser L by turning the eccentric metal Make sure that there is no backlash on the gears www promelectroavtomat ru ...

Page 39: ...illustration ADJUSTMENT 1 Select test mode 6 2 Loosen the screw securing the side feed linkage 3 In the test mode align the feed dog s left right position 4 Align the feed dog s left right position 5 Tighten the screw securing the side feed linkage 6 In test mode select the feed start position 7 Check that the clearance between the feed dog and the needle plate is 0 3 1 2 mm If the feed dog contac...

Page 40: ... After operating the feed to the 4mm position operate the feed to the 5mm position Thread tension maximum operation After operating to 9 on the thread tension scale operate to the 0 position on the scale When the needle is up Perform the maximum width operation After operating to the needle bar release position operate to the rightmost position The pulse motor will operate at 70 power 5 Press the ...

Page 41: ...ositioned in the center of the needle hole of the needle plate Adjustment Points 1 Install presser foot J 2 When adjusting the presser bar height the presser foot should be parallel with the feed dog hole in the needle plate Refer to A A hexagonal pencil can be used to check the height 3 If the presser foot is not parallel with the feed dog hole the needle may contact the presser foot or the fabri...

Page 42: ...uld sound once 4 Insert a spacer with a thickness of 3 mm beneath the J presser foot 5 Press 3 mm on the display The buzzer should sound once NOTE If the values read in steps 3 and 5 are normal the buzzer will sound once each time If they are not normal the buzzer will sound twice each time If there is an abnormality perform the procedure again starting from 2 Adjustment Points 1 Be sure to instal...

Page 43: ... to adjust the feed dog height to within 0 9 1 1 mm 4 Tighten the screw securing the vertical feed roller shaft Adjustment Points 1 If the feed dog is too high the following problems may occur the feed dog may contact the back of the needle plate a noise may be generated an incorrect forward and backward motion of the feed bar may be produced an incorrect feed may be produced or the fabric may not...

Page 44: ...n in Fig 3 and after lowering the presser foot check that the tension 2 is within the following standard Thread used schappe 60 Standard 52 to 62 cN 53 to 63 gf If the tension is not within the standard turn the adjusting nut a until the tension is within the standard NOTE After adjusting fix the adjusting nut with the screw lock 7 To finely adjust while sewing after performing the above adjustmen...

Page 45: ...n the previous page 2 Rotate the thread tension cam counterclockwise by hand so that it is almost as shown by arrow a At this time the thread tension cam moves in steps of 7 5 3 Check gap b that the initial adjust plate can move to the right side and tighten the screw when the rubber is touching the tab of the thread tension cam 4 Return to step 6 of the adjustment procedure on the previous page w...

Page 46: ...sser foot lever 3 Adjust the position of buttonhole lever so that BH0 touches BH1 when the buttonhole eccentric shaft is rotated NOTE In case that the length are shorter than the standard bend the BH 1 to be far from BH 0 In case that the length are longer than the standard bend the BH 2 to be close to BH 0 Adjustment Point If the buttonhole eccentric shaft C is rotated clockwise the clearance D b...

Page 47: ...o that the thread is evenly wound around the bobbin by moving the thread guide holder vertically A 4 Tighten the thread guide holder screw 5 Set the bobbin winder assembly to the left 6 Loosen the screw of the bobbin winder switch 7 Adjust the clearance between the bobbin winder switch and the bobbin winder assembly to 0 5 1 0 mm 8 Tighten the screw of the bobbin winder switch Adjustment Point 3 I...

Page 48: ...t the bobbin in the inner rotary hook 4 Loosen the screw holding the photo transistor slightly adjust the photo transistor to the left until appears on the display Then adjust it to the right until 0 0 appears on the display and tighten the screw NOTE Keep the area around the photo transistor and the photo diode clean Remove the lamp during the adjustments Adjustment Points 1 Remove the needle pla...

Page 49: ...e inner rotary hook bracket 2 Adjust the position of the inner rotary hook bracket by moving it vertically and or horizontally NOTE Surface A of the inner rotary hook bracket should be perpendicular to the feeding direction 3 Tighten the screw of the inner rotary hook bracket Adjustment Point 1 If the inner rotary hook bracket position is moved by a large amount be sure to check and adjust the bob...

Page 50: ...he direction press the vertical button A If the pattern is stretched in the direction press the vertical button B If the pattern is compressed in the direction press the horizontal button C If the pattern is stretched in the direction press the horizontal button D 2 The should be adjusted using the four settings for each direction If the pattern cannot be adjusted using the four settings for each ...

Page 51: ...e adjustment 3 Tighten the screw securing the pulse motor Adjustment Points If the pulse motor position is to be adjusted when the screw is to be turned or the motor is to be moved turn off the power to the sewing machine in order to reduce the risk of a short circuit or damage to the main PC board with the screwdriver 1 If the pattern is open as shown by E move the pulse motor slightly backward 2...

Page 52: ... gauge 2 Adjust the tension by turning the screw to either the right or left using a screwdriver NOTE After adjusting the tension lock the screw with paint 20 KNEE LIFTER STANDARD When 5N 500g is applied to bend of lifter there should be 2 3mm of space between lifter and presser holder see A on diagram ADJUSTMENT 1 Lower presser foot To prevent operation of knee lever feel free to remove it 2 Loos...

Page 53: ...d thread combinations 2 Combinations marked with a are not recommended since they might lead to the breakage of needle threader performance 3 Lower the presser foot when you use needle threader 4 Nylon transparent thread is applicable in needle 14 16 5 Do not turn the balance wheel when using needle threader 6 Do not lower the needle threader lever while the machine is running If it is lowered the...

Page 54: ...go through eyelet of all needles Adjust by bending hook 3 In case that hook does not go through eyelet of some needles Needles through which the hook does not go through are defective Example for checking When you check five brand new sewing needles HA X1 9 on condition that it achieves above first case if the hook does not go through eyelet of all of these needle all five needles are defective an...

Page 55: ...eader device to remove it Push down on the portion of the thread guide assembly shaded in the illustration 3 Place the new device so that groove S and groove T of the hook assembly and thread guide assembly are aligned with pin A as shown in the illustration 4 Push the needle threader device up until pin A is inserted in the grooves Be careful that pin B is inserted into the groove in part C www p...

Page 56: ...edle threader position setter slightly up and check the clearance between the top of hook and top of needle eye is 0 mm In case part a and part b is not parallel or the hook does not work readjust needle threader by loosening the screw If a and b are not parallel the needle threader will not be held by the needle threader position setter refer to Fig 1 the hook will not enter the eyelet of the nee...

Page 57: ...he X carriage unit is moved all the way to the right ADJUSTMENT 1 Move the X carriage unit all the way to the right 2 Loosen the screw of the X tension pulley screws A and B 3 Adjust the position of the X tension pulley 4 Tighten the screw of the X tension pulley screws A and B Adjustment Point If the tension in the belt is too weak or too tight the embroidery may not be aligned correctly the insi...

Page 58: ...d a 5 N 500 g push pull gauge is applied to the center of the timing belt between the Y drive shaft and the Y tension pulley ADJUSTMENT 1 Move the Y carriage all the way forward 2 Loosen the screw of the Y tension pulley screw C and D 3 Adjust the position of the Y tension pulley 4 Tighten the screw of the Y tension pulley screw C and D CHECK STANDARD The product standard taking any measurement er...

Page 59: ...ERT FLOPPY DISK NO3 AND PRESS THE BOBBIN WINDING START STOP BUTTON Insert the floppy disk with PROGRAM3 UPG and press the bobbin winding button again Display LOADING FLOPPY DISK NO3 When the data is finished loading the display will change as shown below Display INSERT FLOPPY DISK NO4 AND PRESS THE BOBBIN WINDING START STOP BUTTON Insert the floppy disk with PROGRAM4 UPG and press the bobbin windi...

Page 60: ... not created 60 8 Buttonholes are not stitched correctly 60 9 Manual operation of feed and zigzag pulse motors is not possible 60 10 Vertical movement of needle bar and backstitch operation are abnormal 60 11 Foot controller does not operate normally when depressed 60 12 Thread tension is not correct 61 13 Needle bar release mechanism does not operate correctly 61 14 Thread cutter does not operate...

Page 61: ...ch shows an abnormality 2 Replace NP board assembly 3 Replace power supply unit assembly 4 Replace main PC board assembly 3 Pattern can not be selected 1 Does switch on SS VR PC board remain pressed 2 When the foot controller is connected does it remain depressed 3 Is the touch panel adjusted 4 Others 1 Adjust or replace SS VR PC board assembly 2 Check the foot controller 3 Adjust or replace the t...

Page 62: ...less 4 Others 1 Check 2 Adjust the assembly or replace the BH switch assembly 3 Adjust the assembly or replace the BH switch assembly 4 Replace the main PC board assembly 9 Manual operation of feed and zigzag pulse motors is not possible 1 Do manual keys of feed and zigzag pulse motors turn off and on normally and do the LCD s change 2 Are the resistances of the pins of the feed and zigzag pulse m...

Page 63: ...nds of the bobbin winder button on the VR PC board 1 Ω or less when the button is pressed and when the button is not pressed 4 Others 1 Adjust the assembly or replace the bobbin winding switch assembly 2 Replace the bobbin winding motor 3 Check the assembly or replace the VR PC board assembly 4 Replace the main PC board assembly or the card PC board assembly 16 Needle thread breakage detector does...

Page 64: ...Embroidery frame detector does not operate correctly 1 Is each switch of the frame detection board operating correctly When on 1 Ω or less When off 2 Is the resistance between pins 4 3 2 3 and 1 3 of CN2 on the X sensor PC board changing correctly according to the operation of each frame detection switch When on 1 Ω or less When off 3 Is the resistance between pins 7 2 8 2 and 9 2 of CN1 on the X ...

Page 65: ...tor Floppy disk drive Card Bobbin motor Bobbin switch Power supply board Lamp Needle position sensor board BH switch Potention meter Zigzag pulse motor Thread cutter solenoid Feed pulse motor Bobbin thread detector Main motor Fuse 3 Inlet 120 V 230 V Power supply switch Transformer Fuse 2 Fuse 1 Main PC board www promelectroavtomat ru ...

Page 66: ...verter Foot controller Main PC board SS PC board VR PC board Touch panel LCD module Switch Main PC board SS PC board VR PC board Speed sensor Card PC board Switch Speed volume Card PC board Needle position sensor NP PC board www promelectroavtomat ru ...

Page 67: ...ULT2003D S G 3100D ULT2001N ULT2001C M3000N M3000C 11C03HF114200 www promelectroavtomat ru ...

Reviews: