Chapter 3: Management with the Promise Utility
71
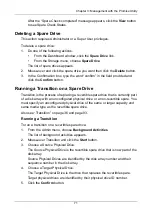
After the “Spare Check completed” message appears, click the
View
button
to see Spare Check Status.
Deleting a Spare Drive
This action requires Administrator or a Super User privileges.
To delete a spare drive:
1.
Do one of the following actions:
•
From the Dashboard window, click the
Spare Drive
link.
•
From the Storage menu, choose
Spare Drive
.
The list of spare drives appears.
2.
Mouse-over and click the spare drive you want then click the
Delete
button.
3.
In the Confirmation box, type the word “confirm” in the field provided and
click the
Confirm
button.
Running a Transition on a Spare Drive
Transition is the process of replacing a revertible spare drive that is currently part
of a disk array with an unconfigured physical drive or a non-revertible spare. You
must specify an unconfigured physical drive of the same or larger capacity and
same media type as the revertible spare drive.
Also see “Transition” on page 36 and page 93.
Running a Transition
To run a transition on a revertible spare drive:
1.
From the Admin menu, choose
Background Activities
.
The list of background activities appears.
2.
Mouse-over Transition and click the
Start
button.
3.
Choose a Source Physical Drive.
The Source Physical Drive is the revertible spare drive that is now part of the
disk array.
Source Physical Drives are identified by the disk array number and their
sequence number in the disk array.
4.
Choose a Target Physical Drive.
The Target Physical Drive is the drive that replaces the revertible spare.
Target physical drives are identified by their physical drive ID number.
5.
Click the
Confirm
button.


