Pegasus R6, R4 Product Manual
90
Formatting Logical Drives
A RAID logical drive must also be formatted to be compatible with your computer.
In this
Product Manual
, the term
format
includes both partition and format
operations.
You can format your logical drives using the:
•
Promise Utility with default settings (below)
•
Promise Utility with custom settings (page 90)
•
Both the Promise Utility and the computer’s disk utility offer a choice of formatting
options. However, if there is no specific reason to customize, the default format
settings are recommended.
Promise Utility with default settings
Wizard Automatic or Express
When you create your logical drives using the Wizard
Automatic
or
Express
options, your logical drives are always formatted automatically.
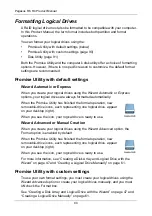
When the Promise Utility has finished the format operation, new
removable-drive icons, each representing one logical drive, appear
on your desktop (right).
When you see the icon, your logical drive is ready to use.
Wizard Advanced or Manual Creation
When you create your logical drives using the Wizard
Advanced
option, the
Format option is enabled by default.
When the Promise Utility has finished the format operation, new
removable-drive icons, each representing one logical drive, appear
on your desktop (right).
When you see the icon, your logical drive is ready to use.
For more information, see “Creating a Disk Array and Logical Drive with the
Wizard” on page 47 and “Creating a Logical Drive Manually” on page 61.
Promise Utility with custom settings
To use your own format settings, you must create your logical drives using the
Wizard
Advanced
option or create your logical drives manually, and you must
UNcheck the Format box.
See “Creating a Disk Array and Logical Drive with the Wizard” on page 47 and
“Creating a Logical Drive Manually” on page 61.

