Appendix A: Maintenance
133
8.
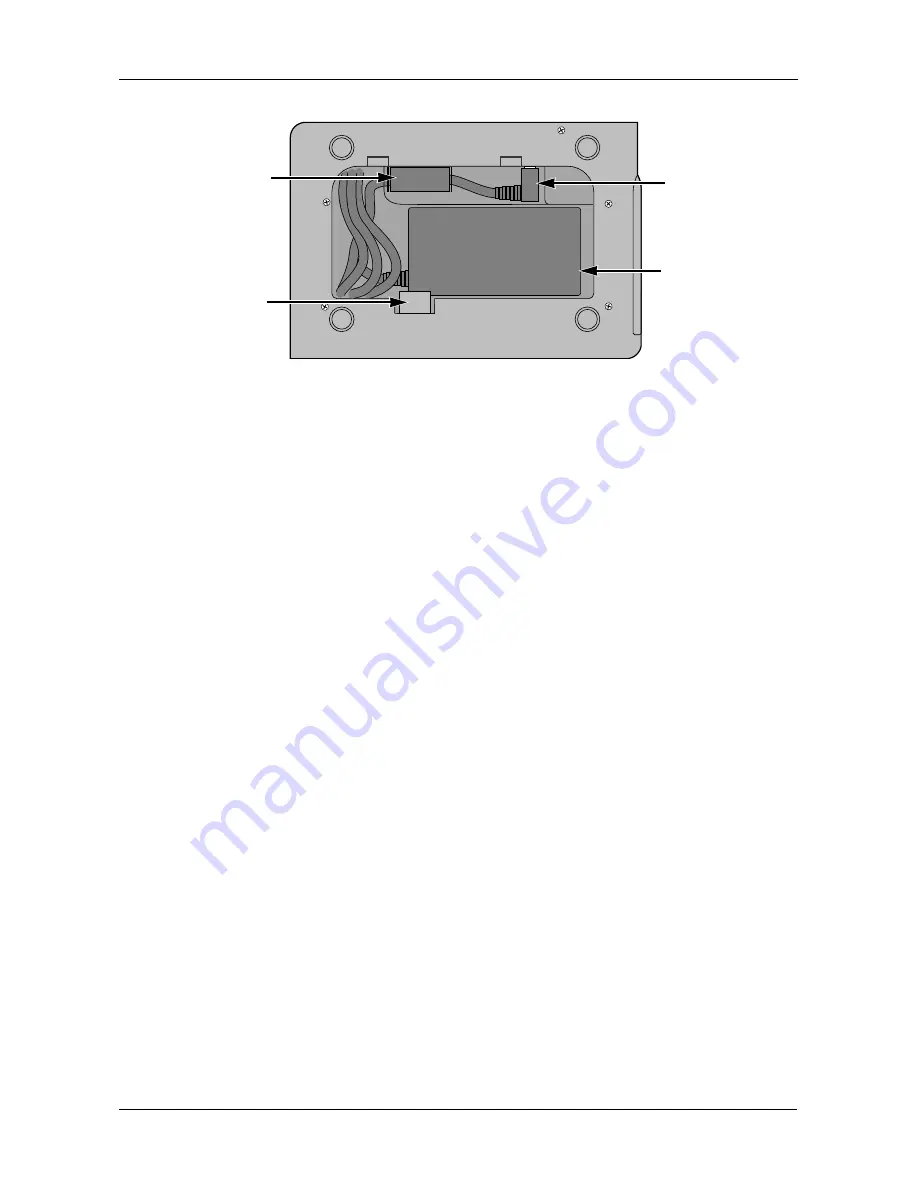
Installing the Power Supply
To install the new power supply:
1.
Plug in the motherboard power connector.
2.
Lay the power supply into its cradle and slide it back into position.
Be sure the pads on the power supply are downward and the retainer is
holding the power supply in place.
3.
Lay the cover in position and press it down until the two latches snap shut.
4.
Turn the SmartStor over and set it on its feet.
5.
Plug in the power cord.
6.
Boot the SmartStor.
See “Connecting the Power” on page 9.
EMI core
Power Supply
Retainer
Motherboard
power
connector
Power Supply
Summary of Contents for SmartStor DS4600
Page 1: ...SMARTSTOR DS4600 Product Manual Version 1 0 ...
Page 6: ...SmartStor DS4600 Product Manual vi GNU General Public License 137 Index 139 ...
Page 24: ...SmartStor DS4600 Product Manual 18 ...
Page 48: ...SmartStor DS4600 Product Manual 42 RAID 10 4 drives ...
Page 50: ...SmartStor DS4600 Product Manual 44 Click the Next button D to continue ...
Page 54: ...SmartStor DS4600 Product Manual 48 Figure 7 SmartStor file structure viewed from a MAC ...
Page 70: ...SmartStor DS4600 Product Manual 64 10 Click the Add button ...
Page 76: ...SmartStor DS4600 Product Manual 70 5 Click the folder whose contents you want to backup ...
Page 95: ...Chapter 3 SmartNAVI 89 Optional ...
Page 96: ...SmartStor DS4600 Product Manual 90 To view a photo click the View icon ...
Page 142: ...SmartStor DS4600 Product Manual 136 5 Boot the SmartStor See Connecting the Power on page 9 ...


