Chapter 2: Installation and Setup
11
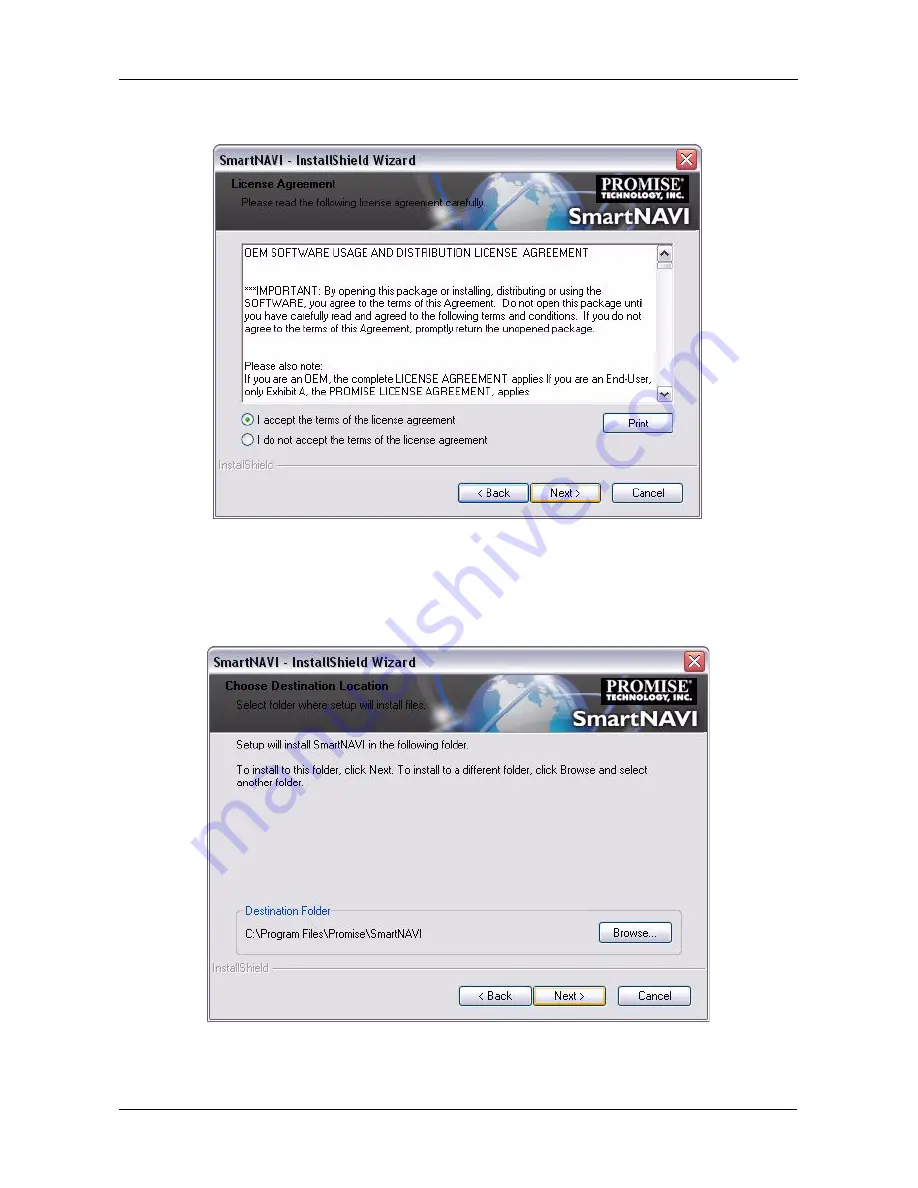
4.
Click the “I accept the terms...” option, then click the
Next
button.
The Choose Destination Location screen appears.
5.
Optional. Click the
Browse...
button to choose a new install location for the
software.
Click the
Next
button.
The Ready to Install screen appears.
Summary of Contents for SmartStor DS4600
Page 1: ...SMARTSTOR DS4600 Product Manual Version 1 0 ...
Page 6: ...SmartStor DS4600 Product Manual vi GNU General Public License 137 Index 139 ...
Page 24: ...SmartStor DS4600 Product Manual 18 ...
Page 48: ...SmartStor DS4600 Product Manual 42 RAID 10 4 drives ...
Page 50: ...SmartStor DS4600 Product Manual 44 Click the Next button D to continue ...
Page 54: ...SmartStor DS4600 Product Manual 48 Figure 7 SmartStor file structure viewed from a MAC ...
Page 70: ...SmartStor DS4600 Product Manual 64 10 Click the Add button ...
Page 76: ...SmartStor DS4600 Product Manual 70 5 Click the folder whose contents you want to backup ...
Page 95: ...Chapter 3 SmartNAVI 89 Optional ...
Page 96: ...SmartStor DS4600 Product Manual 90 To view a photo click the View icon ...
Page 142: ...SmartStor DS4600 Product Manual 136 5 Boot the SmartStor See Connecting the Power on page 9 ...


