QUICK TOUR OF RECYCLE
26
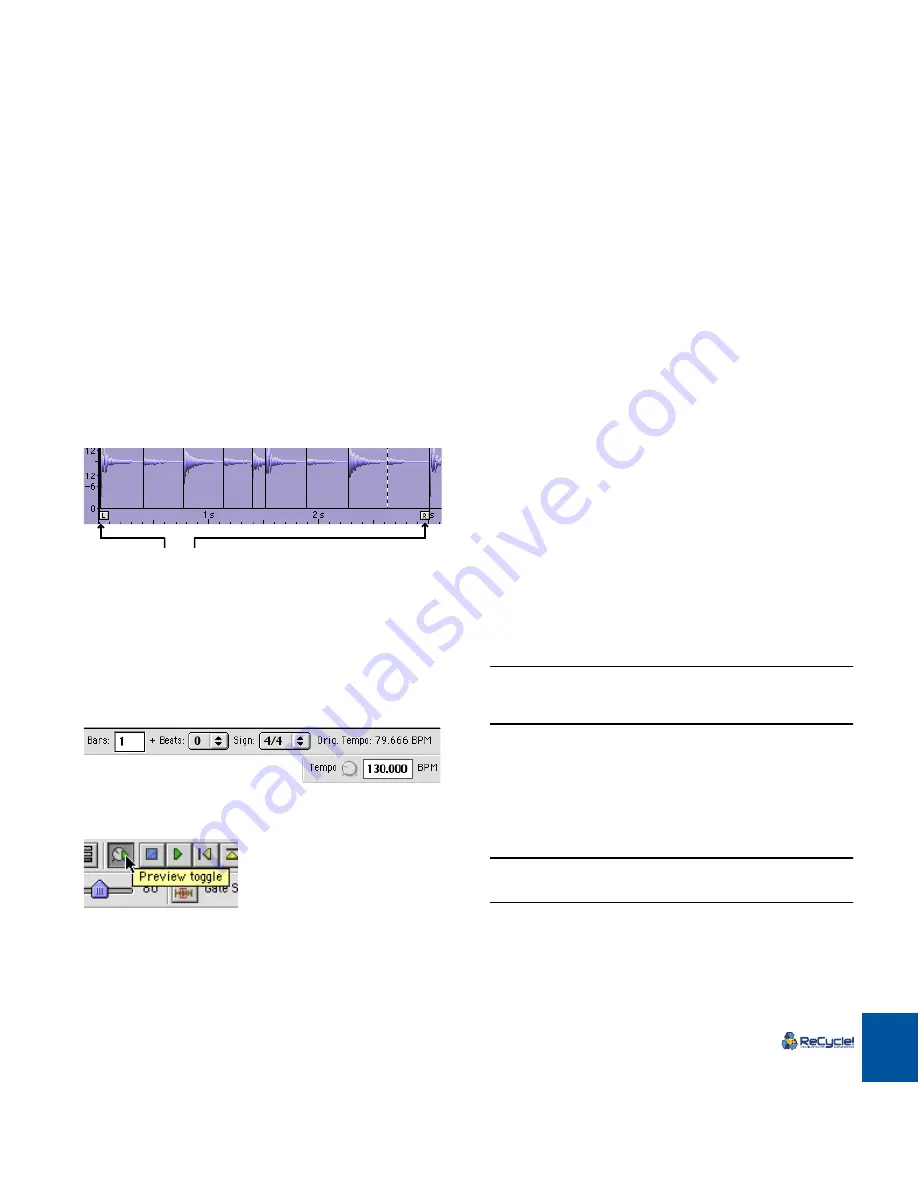
7. Drag the Left and Right Locators until the loop is exactly 1 bar long.
The left locator should be positioned at the start of the loop, on the first slice
marker, and the right locator should positioned on the last slice marker. This
last slice contains the “extra” downbeat (see step 4), but as the Right Loca-
tor position governs when the loop should jump back to the Left Locator, this
second downbeat won’t be played, and the loop will now be exactly 1 bar.
8. With playback turned off, move the pointer over the waveform view.
The pointer changes to a speaker symbol.
9. Click with the Speaker pointer on the slices in the waveform view.
You will hear each individual sound in the loop. The slice you clicked last is indi-
cated by a dotted vertical line to the left - this slice is called the Current Slice.
You can also drag the pointer over the slices with the mouse button pressed to
audition the sounds in the loop.
10. Click in the “Bars” field, type “1”, and hit [Return].
The calculated tempo is now shown as the “Orig. Tempo” on the Toolbar.
The Bars/Beats settings, the (calculated) Original Tempo and the Preview Tempo field.
11. Click on the Preview Toggle button.
Preview mode is now activated.
Now you can make various settings to the loop, and hear the results in real-time.
Preview mode lets you hear exactly how the loop will sound after being saved as
a file or transmitted to your sampler:
D
D
D
D
By adjusting the Preview Tempo knob or typing in a new tempo di-
rectly in the Preview Tempo field, you can change the tempo of the
loop.
If you intend to play back the loop as a REX2 file in a sequencer, or if you
transmit the loop to a sampler together with a MIDI file, the loop will follow
the tempo setting of the sequencer, regardless of this setting!
D
D
D
D
By adjusting the Pitch knob you can change the pitch of the loop.
D
D
D
D
There is a Gate function which can be used to remove all sound in a
loop that falls below a set threshold.
This is described on page 67.
D
D
D
D
In addition there are three effect processors; Envelope, EQ and
Transient Shaper, that allow you to further tweak the sound of the
loop before transmitting it to your sampler, or exporting/saving it
as a file.
The processors are described in the chapter “Processing Audio”.
12. Pull down the Process menu and check the Transmit options (the
items “Transmit as One Sample” and “Silence Selected”). They
should be turned off (no tick mark).
The status of the Transmit options can also be toggled by using the Transmit
option buttons on the Toolbar.
!
If you don’t use ReCycle together with a sampler, but rather with an-
other computer program such as Reason or Cubase, you could at
this point simply save the sliced-up loop as a REX2 file and import
this file into the program. This is described on page 78.
So, now we have everything we need, a perfect loop, a tempo, possibly some
audio processing parameters, and a good set of slices. Let’s send this stuff to
the sampler.
13. Pull down the Sampler menu and select the sampler you want to
use, at the bottom of the menu.
The available options on this menu depends on which samplers you have
added to the Sampler List, manually or automatically, as described on page
30.
!
If you are using a file-based sampler such as SampleCell or a
SoundFont compatible soundcard, you t can use the Export dialog
on the File menu to save files in these formats. See page 76.
The Locators set up correctly.
Summary of Contents for ReCycle
Page 3: ...D D D D Table of Contents...
Page 6: ...TABLE OF CONTENTS 4...
Page 7: ...1 D D D D Introduction...
Page 10: ...INTRODUCTION 8...
Page 11: ...2 D D D D Macintosh Installation...
Page 17: ...3 D D D D Windows Installation...
Page 25: ...4 D D D D Quick Tour of ReCycle...
Page 31: ...5 D D D D Sampler Settings...
Page 36: ...SAMPLER SETTINGS 34...
Page 37: ...6 D D D D Opening and Receiving Audio...
Page 42: ...OPENING AND RECEIVING AUDIO 40...
Page 43: ...7 D D D D The ReCycle Window...
Page 51: ...8 D D D D Playing Audio...
Page 55: ...9 D D D D Setting Slices And Loops...
Page 63: ...1 0 D D D D Processing Audio...
Page 70: ...PROCESSING AUDIO 68...
Page 71: ...1 1 D D D D Transmit and Sampler Options...
Page 76: ...TRANSMIT AND SAMPLER OPTIONS 74...
Page 77: ...1 2 D D D D Saving and Exporting...
Page 82: ...SAVING AND EXPORTING 80...
Page 83: ...1 3 D D D D Example Applications...
Page 89: ...D D D D Index...

