TRANSMIT AND SAMPLER OPTIONS
72
Program Name
Using this field you can specify a name for the Programs you are about to create
in the sampler.
•
You can specify the name directly in the dialog. You will only be able to type
in characters supported by the sampler, and the name will be truncated to fit
the length of the names in the specific sampler.
•
The actual slices that the Program contains will get names derived from the
Program name, with a number added at the end. For example BigDrums#01,
BigDrums#02, etc.
Sample rate
ReCycle can handle samples with any sample rate and can convert samples
from any rate to any other.
Status Bar shows inherent rate
When you Open or Receive a sample, its inherent sample rate is displayed in the
Status Bar at the bottom of the ReCycle application window (Windows) or at
the bottom of the screen (MacOS).
A sample recorded at 44.1 kHz.
Available rates
In the transmit dialog, a number of sample rates can be selected from a pop-up.
Exactly what options are available depends on the selected sampler.
D
D
D
D
If possible, the sample’s inherent rate is suggested.
If, for example, the sample was recorded at 48 kHz, this will be the suggested
sample rate in the Transmit dialog.
D
D
D
D
If the sample’s inherent rate is not supported by the sampler, the
next higher rate is suggested.
D
D
D
D
In addition to the above, a number of other sample rates can be se-
lected from the pop-up in the Transmit dialog.
If the sampler only handles a few sample rates, they can all be selected. If
the sampler supports many rates, the most commonly used ones (or the
ones closest to these) are available. Those most common rates are 11.025
kHz, 22.05 kHz, 32 kHz, 44.1 kHz and 48 kHz.
When is sample rate conversion performed?
If you transmit, and the sample rate set in the Transmit dialog is not the same as
shown on the Status Bar (the sample’s inherent rate), a sample rate conversion
will be performed during the transmission.
When should I change from the suggested sample rate?
Lowering the sample rate will make the samples occupy less memory in the sam-
pler, but it will also lower the fidelity of the recording (less high frequency mate-
rial will be present).
On the other hand, increasing the sample rate will not raise the fidelity of the
sample in any way. It is therefore not recommended to convert from a low rate to
a higher one, unless it is required by the sampler.
!
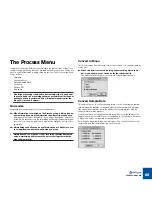
You can also convert sample rate using offline processing (see
page 65).
Templates
When ReCycle sends audio to your sampler it will put the samples it creates in
a “container” which holds all the samples and their mapping on the keyboard.
This “container” may be called a Program, Instrument, Patch or similar, all de-
pendent on the naming used by the sampler manufacturer. For now, let’s call it a
Program.
There are a number of settings in the Program which may or may not be of im-
portance to you.
•
If the settings are
not
important to you, you don’t need to use templates, you
should use the Default option in the Transmit dialog. ReCycle will then cre-
ate as simple a Program as possible. You can then change this Program’s
settings by using the controls on the sampler itself.
•
If you
do
need special settings, you use Templates. You might for example
want the first slice to appear on a certain key, you might want to have all
samples play to a certain output, you may want the Program to receive on a
certain MIDI Channel etc. Proceed as follows:
1. On the sampler, manually create a Program with the desired set-
tings.
Make sure the first sample in the Program’s keyboard map is positioned
where you want the first sample in the keyboard map created by ReCycle.
2. Save this Program to disk (using the sampler’s regular file saving
functions), for later use, but make sure it still resides in the sam-
pler’s internal memory.
3. In the ReCycle Transmit dialog, select this program on the Template
pop-up.
Exactly how this is done depends on the sampler. If it is external you can se-
lect the Program from a pop-up menu in the dialog. If ReCycle saves the
data on to your computer’s hard disk, then you select a disk file as your tem-
plate.
Summary of Contents for ReCycle
Page 3: ...D D D D Table of Contents...
Page 6: ...TABLE OF CONTENTS 4...
Page 7: ...1 D D D D Introduction...
Page 10: ...INTRODUCTION 8...
Page 11: ...2 D D D D Macintosh Installation...
Page 17: ...3 D D D D Windows Installation...
Page 25: ...4 D D D D Quick Tour of ReCycle...
Page 31: ...5 D D D D Sampler Settings...
Page 36: ...SAMPLER SETTINGS 34...
Page 37: ...6 D D D D Opening and Receiving Audio...
Page 42: ...OPENING AND RECEIVING AUDIO 40...
Page 43: ...7 D D D D The ReCycle Window...
Page 51: ...8 D D D D Playing Audio...
Page 55: ...9 D D D D Setting Slices And Loops...
Page 63: ...1 0 D D D D Processing Audio...
Page 70: ...PROCESSING AUDIO 68...
Page 71: ...1 1 D D D D Transmit and Sampler Options...
Page 76: ...TRANSMIT AND SAMPLER OPTIONS 74...
Page 77: ...1 2 D D D D Saving and Exporting...
Page 82: ...SAVING AND EXPORTING 80...
Page 83: ...1 3 D D D D Example Applications...
Page 89: ...D D D D Index...


