background image

V1.0 

3/4 in. Air Impact Wrench 

8844201 

Visit www.princessauto.com for more information 

INTRODUCTION 

This 3/4 in. Air Impact Wrench has a composite housing with a cushion 
grip and maximum torque of 1,300 ft-lb. The tool has variable torque in 
forward and reverse. 

SAFETY 

WARNING! Read and understand all instructions before using this 

tool. The operator must follow basic precautions to reduce the 

risk of personal injury and/or damage to the equipment. 

Keep this manual for safety warnings, precautions, operating or 
inspection and maintenance instructions. 

WORK AREA 

1.  Operate in a safe work environment. Keep your work area clean, 

well-lit and free of distractions. Place lights so you are not working 
in a shadow. 

2.  Keep anyone not wearing the appropriate safety equipment away 

from the work area. 

3.  Store tools properly in a safe and dry location. Keep tools out of 

the reach of children. 

4.  Do not install or use in the presence of flammable gases, dust or 

liquids. 

PERSONAL SAFETY 

WARNING! Wear personal protective equipment approved by the 

Canadian Standards Association (CSA) or American National 

Standards Institute (ANSI). 

PERSONAL PROTECTIVE EQUIPMENT 

1.  Always wear impact safety goggles that provide front and side 

protection for the eyes. Eye protection equipment should comply 
with CSA Z94.3-07 or ANSI Z87.1 standards based on the type of 
work performed. 

2.  Wear the appropriate type of full-face shield in addition to safety 

googles, as the work can create chips, abrasive or particulate 
matter. 


Summary of Contents for 8844201

Page 1: ...V1 0 8844201 Please read and understand all instructions before use Retain this manual for future reference AIR IMPACT WRENCH 3 4 IN ...

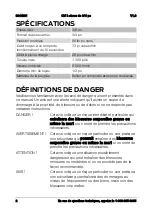
Page 2: ...ibility of property damage injury or death if certain instructions are not followed DANGER This notice indicates an immediate and specific hazard that will result in severe personal injury or death if the proper precautions are not taken WARNING This notice indicates a specific hazard or unsafe practice that could result in severe personal injury or death if the proper precautions are not taken CA...

Page 3: ... of distractions Place lights so you are not working in a shadow 2 Keep anyone not wearing the appropriate safety equipment away from the work area 3 Store tools properly in a safe and dry location Keep tools out of the reach of children 4 Do not install or use in the presence of flammable gases dust or liquids PERSONAL SAFETY WARNING Wear personal protective equipment approved by the Canadian Sta...

Page 4: ...avoid personal injury or damage to the tool 1 Do not operate any tool when tired or under the influence of drugs alcohol or medications 2 Avoid wearing clothes or jewelry that can become entangled with the moving parts of a tool Keep long hair covered or bound 3 Do not overreach when operating a tool Proper footing and balance enables better control in unexpected situations 4 Keep your fingers awa...

Page 5: ...A power tool that fails to respond to the controls is dangerous and can cause an injury A qualified technician must repair and verify the power tool is operating correctly before it can be used 4 Never use a tool with a cracked or worn tool accessory Change the tool accessory before using it 5 Never operate the tool when the safety guard is removed or broken Never clamp or tie the guard into the o...

Page 6: ...to absorb reaction torque above 10 Nm to protect against a twist injury AIR TOOL PRECAUTIONS 1 Use only clean and dry compressed air as a power source Contaminated or moist air will gradually damage the tool 2 Install an in line shutoff valve or regulator to allow immediate control over the air supply in an emergency even if a hose is ruptured 3 Discontinue tool use if it does not work properly or...

Page 7: ...other faults before each use Discontinue use if the air hose is damaged or hissing is heard from the air hose or couplers Replace the defective air hose 2 Do not allow people mobile equipment or vehicles to pass over the unprotected air hose Position the air hose away from high traffic areas in a reinforced conduit or place planks on both sides of the air hose to create a protective trench 3 Preve...

Page 8: ...reduce the effects of vibration 4 DO NOT use this tool before consulting a physician if one of the following applies a Pregnant b Impaired blood circulation to the hands c Past hand injuries d Nervous system disorders e Diabetes f Raynaud s Disease 5 Do not use worn or ill fitting sockets or extensions as this is likely to cause a substantial increase in vibration UNPACKING WARNING Do not operate ...

Page 9: ...e used to connect the leader hose to the air line hose OPERATION 1 Disconnect the air supply 2 Push the socket onto the anvil until it clicks into place 3 Connect the air hose and turn on the air compressor 4 Adjust the air regulator on the impact wrench as needed to set the amount of torque 5 To loosen fasteners move the lever Fig 1 1 on the back of the drive head counter clockwise to align the a...

Page 10: ...rate numbers to the tool s air inlet not the compressor s outlet Calculate the pressure drop for your air supply set up and increase the compressor outlet pressure to compensate Make sure you do not exceed the maximum pressure for any part of your air supply system Installing a pressure gauge at the tool inlet is the best way to measure the air pressure and adjust the compressor s output CARE MAIN...

Page 11: ...under no load until the exhaust is clear 2 Manually add a drop or two of air tool oil into the tool s coupler plug before each use and after every hour of continuous use The tool will not work properly without lubrication and parts will wear prematurely 3 Avoid adding too much air tool oil as this can cause premature power loss and eventual tool failure A qualified technician will need to take the...

Page 12: ...ir tool lubricating oil into air inlet as per lubrication instructions for clearing shipping grease 3 Operate tool in short bursts to clear debris 4 If tool still jammed clean tool and lubricate per lubrication instructions Tool runs slowly Air flows slightly from exhaust 1 Air regulator in closed position 2 Damage or excessive wearing of internal parts 1 Open the air regulator to desired airflow ...

Page 13: ...essive drain on the air hose Incorrect size or type of hose connectors 2 Moisture or restriction in the air hose tank 3 Air compressor has insufficient flow 1 Check the air hose and confirm the hose fitting is correct for the inlet bushing 2 Depressurize system and drain tank and air hose of water 3 Ensure tool is connected to a compressor with a rate flow that matches the tool ...

Page 14: ...LIST DESCRIPTION QTY 1 Motor Housing Assembly including 38 1 2 Air Inlet 1 3 O ring 1 4 Exhaust Deflector 1 5 O Ring 2 6 Spring 1 7 Throttle Valve Assembly including 7 1 and 7 2 1 7 1 Throttle Valve Pin 1 7 2 Throttle Valve 1 8 Throttle Valve Seat 1 10 Trigger Assembly including 11 and 12 1 11 Trigger Pin 1 ...

Page 15: ...Rear End Plate 1 23 Rotor 1 24 Rotor Blade 6 25 Spring Pin 2 26 Cylinder 1 27 Front End Plate 1 28 Ball Bearing 1 29 Gasket 1 30 Hammer Frame 1 31 Hammer 2 32 Hammer Pin 2 33 Anvil 1 34 O Ring 1 35 Socket Retainer 1 36 Bushing 1 37 Hammer Case Assembly including 36 and 45 1 38 Bushing 1 39 Screw 4 40 Pin 1 41 Spring 1 42 Muffler Element 1 43 Spacer 1 44 Screw 1 45 Grease Fitting 1 TK Tune up Kit i...

Page 16: ...8844201 3 4 in Air Impact Wrench V1 0 16 For technical questions call 1 800 665 8685 ...

Page 17: ...V1 0 8844201 Vous devez lire et comprendre toutes les instructions avant d utiliser l appareil Conservez ce manuel afin de pouvoir le consulter plus tard CLÉ À CHOCS DE 3 4 PO ...

Page 18: ...de dommage à la propriété de blessure ou de décès si on ne respecte pas certaines instructions DANGER Cet avis indique un risque immédiat et particulier qui entraînera des blessures corporelles graves ou même la mort si on omet de prendre les précautions nécessaires AVERTISSEMENT Cet avis indique un risque particulier ou une pratique non sécuritaire qui pourrait entraîner des blessures corporelles...

Page 19: ... Gardez votre aire de travail propre bien éclairée et exempte de toute distraction Placez les lampes de façon à ne pas travailler dans l ombre 2 Assurez vous que les personnes qui ne portent pas l équipement de sécurité approprié ne se trouvent pas à proximité de l aire de travail 3 Rangez les outils correctement dans un lieu sécurisé et sec Gardez les outils hors de la portée des enfants 4 N inst...

Page 20: ...du niveau de décibels 7 L outil peut être à haute pression Portez des lunettes de sécurité et des gants pour vous protéger au cours de l opération Gardez les mains à l écart des parties de caoutchouc exposées du tuyau PRÉCAUTIONS PERSONNELLES 1 N utilisez pas l outil si vous êtes fatigué ou sous l effet de drogues d alcool ou de médicaments 2 Évitez de porter des vêtements ou des bijoux pouvant se...

Page 21: ...ISSEMENT Ne permettez PAS au confort ou à votre familiarisation avec l outil obtenus après un emploi répété de se substituer à une adhésion stricte aux règles de sécurité de l outil Si vous utilisez cet outil de façon dangereuse ou incorrecte vous pouvez subir des blessures corporelles graves 1 Utilisez le bon outil pour la tâche à effectuer Cet outil a été conçu pour une utilisation spécifique Év...

Page 22: ...e fonctionnement de l outil au régime à vide le plus élevé pendant au moins 30 secondes dans une position sans danger Arrêtez immédiatement en présence d une vibration anormale ou d une oscillation Examinez bien l outil pour déterminer la cause du problème 12 Ne forcez jamais l outil Une pression excessive pourrait briser l outil entraînant ainsi des dommages au niveau de la pièce à travailler ou ...

Page 23: ...ement ou s il présente des fuites d air Attachez une étiquette sur l outil indiquant qu il est défectueux ou qu il est hors service jusqu à ce qu il soit réparé 4 Consultez la pression nominale maximale du fabricant en ce qui concerne les outils pneumatiques et accessoires La pression de sortie du compresseur doit être réglée de façon à ne jamais dépasser la pression nominale maximale de l outil c...

Page 24: ...yau d air de l outil pour déceler des fissures des effilochures et tout autre défaut avant chaque utilisation Arrêtez l utilisation si le tuyau d air est endommagée ou si un sifflement se fait entendre provenant du tuyau à air Remplacez le tuyau d air ou le composant défectueux 2 Veillez à ce que personne ni aucun matériel mobile ou des véhicules n écrasent le tuyau d air non protégée Placez le tu...

Page 25: ...symptômes reliés aux vibrations comme un fourmillement un engourdissement des doigts blancs ou bleus consultez un médecin le plus tôt possible 3 Portez des gants appropriés pour réduire les effets des vibrations 4 N utilisez PAS cet outil en présence d une des conditions suivantes a Grossesse b Mauvaise circulation sanguine aux mains c Blessures antérieures aux mains d Troubles neurologiques e Dia...

Page 26: ...ORTANT La vibration peut entraîner une panne si un raccord rapide est relié directement à l outil pneumatique Pour contourner ce problème reliez un tuyau de guidage à la perceuse Vous pouvez alors utiliser un raccord rapide pour relier le tuyau de guidage à la conduite d air UTILISATION 1 Débranchez l alimentation en air 2 Enfoncez la douille sur l enclume jusqu à ce qu elle reste bloquée en place...

Page 27: ...9 Cet outil cessera de fonctionner tourner pendant quelques secondes lorsque vous relâcherez la gâchette 10 Une fois la fixation bien serrée relâchez la gâchette et retirez l outil et la douille 11 Servez vous d une clé dynamométrique pour vérifier le couple de serrage de la fixation 12 Lorsque vous n avez plus besoin de l outil arrêtez le compresseur d air débranchez le tuyau à air et évacuez tou...

Page 28: ...r et ou pour les autres LUBRIFICATION D OUTILS PNEUMATIQUES AVIS Utilisez uniquement une huile pour outil pneumatique pour lubrifier l outil Les autres lubrifiants ne conviennent pas puisqu ils endommageront l outil et causeront un mauvais fonctionnement durant l utilisation AVIS N utilisez jamais une huile pénétrante pour lubrifier l outil L huile pénétrante agit à la façon d un solvant qui disso...

Page 29: ...s de mise au rebut ou les règlements en ce qui concerne les appareils électroniques les batteries l huile et les liquides toxiques IMPORTANT Veillez à NE PAS polluer en évitant le rejet d huile usée dans l environnement DÉPANNAGE Si l outil ne fonctionne pas correctement ou si des pièces sont manquantes visitez un magasin Princess Auto Ltd afin de trouver une solution Si ce n est pas possible dema...

Page 30: ...pièces internes 1 Demandez à un technicien qualifié de réparer l outil 2 Remplacez l outil ou les pièces Il est impossible d arrêter l outil La soupape d accélérateur à joints toriques est sortie de la soupape d admission à siège 1 Remplacez les joints toriques de la soupape d accélérateur 2 Nettoyez le mécanisme de gâchette et lubrifiez le ensuite Perte de puissance ou fonctionnement irrégulier 1...

Page 31: ...IÈCES NO DESCRIPTION QTÉ 1 Ensemble du carter du moteur comprenant 38 1 2 Entrée d air 1 3 Joint torique 1 4 Deflecteur d échappement 1 5 Joint torique 2 6 Ressort 1 7 Ensemble de soupape d accélérateur including 7 1 et 7 2 1 7 1 Tige de soupape d accélérateur 1 7 2 Soupape d accélérateur 1 8 Siège de soupape d accélérateur 1 ...

Page 32: ...ement à billes 1 22 Plaque d extrémité arrière 1 23 Rotor 1 24 Pale de rotor 6 25 Tige de ressort 2 26 Cylindre 1 27 Plaque d extrémité avant 1 28 Roulement à billes 1 29 Joint d étanchéité 1 30 Cadre de marteau 1 31 Marteau 2 32 Goupille de marteau 2 33 Enclume 1 34 Joint torique 1 35 Retenue de douille 1 36 Douille 1 37 Ensemble de boîtier de marteau comprenant 36 et 45 1 38 Douille 1 39 Vis 4 4...

Reviews: