background image

8880429 

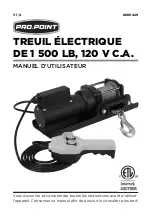
1,500 LB 120V AC ELECTRIC WINCH 

V1.0 

For technical questions call 1-800-665-8685 

PERSONAL SAFETY 

WARNING! Wear personal protective equipment approved by the 

Canadian Standards Association (CSA) or American National 

Standards Institute (ANSI). 

PERSONAL PROTECTIVE EQUIPMENT 

1. 

Always wear impact safety goggles that provide front and side 

protection for the eyes. Eye protection equipment should comply 

with CSA Z94.3-07 or ANSI Z87.1 standards based on the type of 

work performed. 

2.  Wear gloves that provide protection based on the work materials 

or to reduce the effects of tool vibration. 
2.1  Do not wear gloves when operating a tool that can snag the 

material and pull the hand into the tool. 

3.  Wear protective clothing designed for the work environment and 

tool. 

4.  Non-skid footwear is recommended to maintain footing and 

balance in the work environment. 

5.  Wear steel toe footwear or steel toe caps to prevent a foot injury 

from falling objects. 

PERSONAL PRECAUTIONS 

Control the tool, personal movement and the work environment to 

avoid personal injury or damage to the tool. 
1. 

Do not operate any tool when tired or under the influence of 

drugs, alcohol or medications. 

2.  Avoid wearing clothes or jewelry that can become entangled 

with the moving parts of a tool.  Keep long hair covered or 

bound. 

3.  Do not overreach when operating the tool. Proper footing and 

balance enables better control in unexpected situations. 


Summary of Contents for 8880429

Page 1: ...V1 0 8880429 Please read and understand all instructions before use Retain this manual for future reference USER MANUAL 1 500 LB 120V AC ELECTRIC WINCH ...

Page 2: ...ad Holding Control Type Tethered Control Fairlead Steel Hawse Full Load Line Speed FPM 4 2 FPM Gear Train 2 stage planetary Cable Material Galvanized Steel Colour Finish Matte Black IP Rating IP44 INTRODUCTION The 1 500 lb 120V AC Electric Winch is strong enough for use in a shop or garage to pull vehicles onto a lift or frame straightener The unit has a tethered remote overload protection to avoi...

Page 3: ... injury or death if the proper precautions are not taken WARNING This notice indicates a specific hazard or unsafe practice that could result in severe personal injury or death if the proper precautions are not taken CAUTION This notice indicates a potentially hazardous situation that may result in minor or moderate injury if proper practices are not taken NOTICE This notice indicates that a speci...

Page 4: ...ear gloves when operating a tool that can snag the material and pull the hand into the tool 3 Wear protective clothing designed for the work environment and tool 4 Non skid footwear is recommended to maintain footing and balance in the work environment 5 Wear steel toe footwear or steel toe caps to prevent a foot injury from falling objects PERSONAL PRECAUTIONS Control the tool personal movement a...

Page 5: ...el cable when spooling the line in or out Hold the cable by the strap Fingers caught in the hook or fairlead may be pulled into the mechanism and crushed or pinched 5 Make sure the winch is fixed to a solid support structure that can withstand the towing capacity 6 Never fully extend the cable while under load 7 Do not exceed the winch load capacity 7 1 Do not use the winch if damaged or it was su...

Page 6: ...leup can interfere with the winch tie rods causing damage to the winch 16 Do not use the winch to transport animals or people ELECTRICAL SAFETY WARNING Do not touch or handle a live tool with any part of your body that is wet or damp Wet skin reduces resistance to electrical current increasing the danger of a serious or fatal shock WARNING To reduce risk of electric shock be certain that the plug ...

Page 7: ...COHS 8 Grounded tools must be plugged into an outlet that is properly installed and grounded in accordance with all codes and ordinances Check with a qualified electrician if you are in doubt as to whether the outlet is properly grounded If the tool should electronically malfunction or break down grounding provides a low resistance path to carry electricity away from the user 8 1 Never remove the ...

Page 8: ...h plug with wet hands 4 Prevent damage to the power cord by observing the following 4 1 Do not pull on the cord to disconnect the plug from an outlet 4 2 Keep cord away from heat oil sharp edges or moving parts 4 3 Never use the cord to carry the tool 4 4 Place the electrical cord in a position that prevents it from coming into contact with the tool and from getting caught by the workpiece The cor...

Page 9: ...rlead IDENTIFICATION KEY A Power Supply Cord B Control Box C Overload Reset Button D Steel Cable E Clutch not visible F Fairlead G Sling Hook H Retract Button I Remote Cable J Release Button K Tethered Remote ASSEMBLY INSTALLATION Numbered references in parenthesis 1 refer to the included Parts List Letter references in parenthesis A refer to the included Identification Key All bolts washers and n...

Page 10: ...ble must be broken in before using to pull a heavy load The break in process will stretch the cable ensure the individual wires are seated and the wire compacted Run the winch with a light load of approximately 150 lb several times before normal use Also use the weight when spooling the cable onto the winch This will provide the correct tension when spooling OPERATION 1 Make sure the operator can ...

Page 11: ...ote control s retract button H until the slack is removed from the steel cable 11 Recheck the connections to ensure the terminal tackle will not shift 11 1 Check the clutch is engaged Do not pull the clutch knob out when the winch is under load 12 Press and hold the remote control s retract button to pull the load towards the winch Release the button when the load is in the final position 12 1 Sec...

Page 12: ...le from slipping off Use a snatch block to move a heavier load that is close to the winch This will double the amount of line outside the fairlead and increase the winch s pulling power at close range LINE SPEED The heavier the load the longer it will take the winch to move the load to the desired location Consult Table 2 to determine how fast the line will be drawn into the winch A snatch block w...

Page 13: ...cing 3 Follow instructions for lubricating and changing accessories 4 Only use accessories intended for use with this tool 5 Keep the tool handles clean dry and free from oil grease at all times 6 Maintain the tool s labels and name plates These carry important information If unreadable or missing contact Princess Auto Ltd for replacements WARNING Only qualified service personnel should repair the...

Page 14: ...nable to do so have a qualified technician service the tool PROBLEM S POSSIBLE CAUSE S SUGGESTED SOLUTION S Motor overheats 1 Incorrect power cord 2 Winch running time too long 1 Use only supplied power cord 2 Allow winch to cool down periodically Motor does not turn on 1 Solenoid malfunctioning 2 Remote damaged 3 Defective motor 4 Internal damage or wear 1 Tap solenoid to loosen contacts 2 Replac...

Page 15: ...uns in one direction only 1 Defective or stuck solenoid 2 Remote damaged 3 Defective remote button 1 Tap solenoid to loosen contacts 2 Repair or replace solenoid 3 Replace remote Motor is water damaged Submerged in water or water from pressure washing Allow to drain and dry thoroughly then run the motor without load in short bursts to dry the windings ...

Page 16: ...8880429 1 500 LB 120V AC ELECTRIC WINCH V1 0 16 For technical questions call 1 800 665 8685 PARTS BREAKDOWN ...

Page 17: ...Tie bar 2 14 Cotter pin 1 15 Clutch shaft 1 16 Sliding bearing 1 17 Spring location plate 1 18 Spring 1 19 Cross screw M4 2 20 Gearbox cover 1 21 Washer 3 22 Spline 1 23 Dish gear 1 24 2nd planetary gear assembly 1 25 1st planetary gear assembly 1 26 Ring gear 1 27 Motor bracket 1 28 Motor assembly 1 29 Control box assembly 1 30 Power cord 1 31 Hook strap 1 32 Switch 1 33 Steel cable hook 1 34 Hex...

Page 18: ...8880429 1 500 LB 120V AC ELECTRIC WINCH V1 0 18 For technical questions call 1 800 665 8685 ...

Page 19: ...880429 Vous devez lire et comprendre toutes les instructions avant d utiliser l appareil Conservez ce manuel afin de pouvoir le consulter plus tard MANUEL D UTILISATEUR TREUIL ÉLECTRIQUE DE 1 500 LB 120 V C A ...

Page 20: ...le Écubier en acier Vitesse linéaire à la charge maximale pi min 4 2 pi min Train d engrenage Planétaire à 2 plateaux Matériau de câble Acier galvanisé Couleur finition Noir mat Indice de protection IP44 INTRODUCTION Le treuil électrique de 120 V c a d une capacité de 1 500 lb est suffisamment robuste pour servir dans un atelier ou un garage pour tirer des véhicules sur un pont élévateur ou sur un...

Page 21: ...er qui entraînera des blessures corporelles graves ou même la mort si on omet de prendre les précautions nécessaires AVERTISSEMENT Cet avis indique un risque particulier ou une pratique non sécuritaire qui pourrait entraîner des blessures corporelles graves ou même la mort si on omet de prendre les précautions nécessaires ATTENTION Cet avis indique une situation possiblement dangereuse qui peut en...

Page 22: ...ctué 2 Portez des gants qui protègent en fonction des matériaux de travail et pour réduire les effets des vibrations de l outil 2 1 Ne portez pas de gants lorsque vous utilisez un outil dans lequel le tissu pourrait demeurer coincé entraînant ainsi la main 3 Portez des vêtements de protection conçus pour l environnement de travail et pour l outil 4 Les chaussures antidérapantes sont recommandées p...

Page 23: ... Réparez ou remplacez les pièces 3 Tous les utilisateurs doivent comprendre le fonctionnement de toutes les commandes et savoir comment arrêter le treuil rapidement en cas d urgence 4 Gardez vos mains loin du treuil et du câble en acier en déroulant ou en rembobinant le câble Tenez le câble par la sangle Des doigts coincés dans le crochet ou le guide câble peuvent être tirés dans le mécanisme et é...

Page 24: ... des cales à un véhicule avant de relier et de retirer le câble de treuil 15 Observez le bobinage du câble sur le tambour Une traction latérale peut faire en sorte que le câble s empilera à une extrémité du tambour Pour corriger un empilage inégal déroulez cette partie du câble déplacez la à l autre extrémité du tambour et continuez Un débobinage non uniforme qui provoque un empilage du câble peut...

Page 25: ...ppareil 5 Ne modifiez aucune partie de l outil ou des accessoires Toutes les pièces et tous les accessoires sont conçus avec des dispositifs de sécurité intégrés qui seront compromis s ils sont modifiés 6 Assurez vous que la source d énergie est conforme aux exigences de votre équipement consulter les spécifications 7 Au moment de câbler un appareil électrique respectez tous les codes en matière d...

Page 26: ...t outil si le cordon d alimentation est effilé ou endommagé car un choc électrique peut se produire ce qui pourrait causer des blessures ou des dommages à la propriété 2 1 Avant chaque utilisation inspectez le cordon d alimentation de l outil vérifiez qu il n est ni fissuré ni effiloché et que l isolant et la fiche ne sont pas endommagés 2 2 Arrêtez d utiliser l outil si le cordon d alimentation e...

Page 27: ...planches de chaque côté du cordon d alimentation pour créer un couloir protecteur 6 N enroulez pas le cordon autour de l outil car les bords tranchants risquent d entailler l isolant ou des fissures peuvent se former sur le cordon s il est enroulé trop serré Enroulez délicatement le cordon et suspendez le à un crochet ou attachez le sur un support pour qu il reste enroulé pendant son rangement DÉB...

Page 28: ... pièces comprise Les lettres de référence entre parenthèses A se rapportent à la clé d identification comprise Les boulons les rondelles et les écrous doivent tous être de calibre SAE 5 ou plus 1 Placez le profilé en U de montage no 36 contre la structure de montage il sert de gabarit Marquez les trous de boulon que vous utiliserez pour fixer le treuil à la structure 1 1 Sur une structure de béton...

Page 29: ...arantira que les fils individuels sont correctement assujettis et qu ils sont bien compactés Utilisez le treuil avec une charge légère d environ 150 lb plusieurs fois avant son usage normal Utilisez également le poids en rembobinant le câble sur le treuil Cela permet d obtenir la bonne tension pendant le rembobinage UTILISATION 1 Assurez vous que l utilisateur puisse contrôler le treuil de manière...

Page 30: ...nez le jusqu à que tout le relâchement du câble en acier soit supprimé 11 Vérifiez bien à nouveau les connexions pour garantir que l élingue d extrémité ne se déplacera pas 11 1 Vérifiez si l embrayage est embrayé Ne faites pas ressortir le bouton d embrayage lorsque le treuil est sous charge 12 Maintenez enfoncé le bouton de rappel de la télécommande pour tirer la charge vers le treuil Relâchez l...

Page 31: ... glisser gardez toujours cinq spires de câble sur le tambour Utilisez une moufle mobile pour déplacer une charge plus lourde qui se trouve près du treuil Cela doublera la longueur de câble à l extérieur du guide câble et augmentera la puissance de traction du treuil à portée rapprochée VITESSE DE LA LIGNE Plus la charge est lourde plus le treuil prendra de temps pour déplacer la charge à l endroit...

Page 32: ...us facile à contrôler et préviendra les problèmes de fonctionnement 2 Inspectez les composants de l outil régulièrement Réparez ou remplacez les composants endommagés ou usés Employez seulement des pièce autorisées 3 Suivez les instructions pour lubrifier et remplacer les accessoires 4 Utilisez seulement des accessoires conçus pour être utilisés avec cet outil 5 Gardez les poignées de l outil prop...

Page 33: ...e de lubrifiant sur les pièces en acier pour éviter qu elles ne rouillent Enlevez le lubrifiant avant de réutiliser l outil MISE AU REBUT Recyclez votre outil endommagé dans une installation prévue à cet effet s il est impossible de le réparer Communiquez avec votre municipalité locale afin de connaître la liste des sites de mise au rebut ou les règlements en ce qui concerne les appareils électron...

Page 34: ...le moteur 4 Faites réparer le treuil par un technicien Le moteur tourne mais le tambour de câble d acier ne tourne pas L embrayage n est pas enclenché Déplacez la poignée d embrayage à la position embrayée Si le problème persiste un technicien qualifié doit effectuer une vérification et réparer Le moteur tourne lentement ou sans puissance normale 1 La tension ou le courant est insuffisant 2 Cordon...

Page 35: ...V 1 0 TREUIL ÉLECTRIQUE DE 1 500 LB 120 V C A 8880429 Visitez www princessauto com pour plus d informations 17 RÉPARTITION DES PIÈCES ...

Page 36: ...d embrayage 1 16 Palier coulissant 1 17 Plaque d emplacement du ressort 1 18 Ressort 1 19 Vis cruciforme M4 2 20 Couvercle de la boîte d engrenages 1 21 Rondelle 3 22 Cannelure 1 23 Engrenage concave 1 24 2e ensemble d engrenages planétaires 1 25 1er ensemble d engrenages planétaires 1 26 Couronne 1 27 Console de moteur 1 28 Ensemble du moteur 1 29 Ensemble de boîte de contrôle 1 30 Cordon d alime...

Reviews: