background image

16   PRO580 USER MANUAL: Operating & Safety Instructions

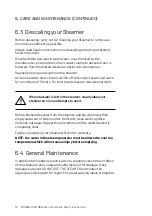
6.3  Descaling your Steamer

Before descaling, carry out 6.2 Cleaning your Steamer to remove as 

much loose sediment as possible.
Always read Caution Instructions on descaling product and carefully 

follow directions.
Dissolve/dilute descaler in warm water, or as directed by the 

manufacturer, ensuring the correct water volume to descaler ratio is 

followed. Pour the diluted descaler solution into the steamer.
Replace filler cap and switch on the steamer.
As soon as water starts to boil, switch off, disconnect power and leave 

for a minimum of 3 hours. For best results leave to descale overnight.

Before flushing descaler from the steamer, agitate vigorously then 

empty water out of steam outlet. Refill with clean water, agitate 

and flush out again. Repeat this procedure until the water drained is 

completely clear.
Failure to maintain your steamer will void its warranty.
NOTE: the water in the steam generator must be allowed to cool to a 

temperature which will not cause injury before emptying. 

6.4  General Maintenance

In addition to mandatory electrical tests, regularly check the condition 

of the steamer's plug, cable and cable restraint for damage. If any 

damage is present DO NOT USE THE STEAMER and contact an 

approved service agent for repair. Ensure all warning labels are legible.

6.  CARE AND MAINTENANCE (CONTINUED)

When descaler is left in the steamer, clearly label your 

steamer so no one attempts to use it.

Summary of Contents for PRO580

Page 1: ...PRO580 STEAMER USER MANUAL Operating Safety Instructions Before using your Propress steamer please read this manual thoroughly and retain it for future reference ...

Page 2: ...Safety Filler Cap 10 4 6 Refilling Your Steamer 11 5 Tips on Use 12 5 1 Steaming Clothing 12 5 2 Full Garment 13 5 3 Wedding Dresses 13 5 4 Curtains Soft Furnishings 14 5 5 Fabric Limitations 14 6 Care and Maintenance 15 6 1 Maintaining Your Steamer 15 6 2 Cleaning Your Steamer 15 6 3 Descaling Your Steamer 16 6 4 General Maintenance 16 7 Storing your Propress When Not In Use 17 8 Propress Trouble...

Page 3: ...fely with your Propress steamer is only possible when these operating and safety instructions are read completely and the contents herein are understood and followed PRO580 USER MANUAL OPERATING SAFETY INSTRUCTIONS ...

Page 4: ... and a fire risk Regularly check hose for damage or distortion Never tilt or carry steamer when in use or when steamer contains hot water Do not unplug the steamer by pulling the electric cord always switch off at the socket then firmly grip plug and pull out of socket Always disconnect from the power supply and wait for steamer to cool down before filling with water and mop up any water spillage ...

Page 5: ...nufacturer or an approved service agent Ensure that filler cap with pressure release valve ball is always replaced on filler inlet and the ball is always free moving before switching steamer on Never remove cap when steamer is in use Do not use steamer under a fire sprinkler system or smoke detector as the steam may trigger an alarm MAX 4L ...

Page 6: ...following Propress PRO580 Steamer Telescopic pole set and top hook Steam hose with aluminium nozzle and protective cotton cover bag 3 Castors Funnel Safe Operating Poster If any of these parts are missing or damaged notify your supplier immediately 2 UNPACKING YOUR PROPRESS Poster ...

Page 7: ...middle pole section counter clockwise and extend upwards by at least 10cm Twist clockwise to lock 2 Gently lower telescopic pole onto the base pole which is attached to the steamer 3 Ensure telescopic pole is pushed down over the black plastic sleeve and is resting on the top bracket of the base pole 3 ASSEMBLING YOUR PROPRESS STEAMER AND PREPARING FOR USE ...

Page 8: ...uitable height twisting clockwise to lock and counter clockwise to unlock so the hose can easily be rested in the hook 6 Attach hose to the hose outlet coupling by aligning the ears then pushing and twisting the hose end clockwise on the coupling until it locks in to position 3 ASSEMBLING YOUR PROPRESS STEAMER AND PREPARING FOR USE CONTINUED ...

Page 9: ...ropress steamer is designed to be used with clean tap water no additives in any form should be used as the use of additives except Propress Descaler will damage your steamer and void the warranty Your steamer is an electrical appliance and is designed for indoor use only It must be used on level ground uneven surfaces can cause damage to the heating element ...

Page 10: ...our steamer and void the warranty Refit filler cap Ensure ball bearing within filler cap is always free moving before switching steamer on Do not overfill When the steamer is full the indicator float will appear in the sight glass If condensation is restricting the view of the MAX symbol on the indicator float remove cap by twisting anti clockwise wipe dry and refit If the float indicator is touch...

Page 11: ...r outlet and push down the green on off switch that will illuminate to indicate the steamer is on Red refill light Amber steam light 2 Turn pointer on control knob to steam position amber steam light will illuminate If the control knob is left in the off position or standby position the water will not be heated NOTE The water in the steamer will take 10 to 15 minutes to produce steam dependent upo...

Page 12: ...ozzle From standby steam will be regenerated in seconds when control knob is switched back to steam position The steamer may be left in standby mode for as long as required NOTE When steamer has been left in standby mode condensation can occur in the steam nozzle after switching back to steam allow nozzle to heat and shake nozzle before use to remove any condensation see 4 3 Using Your Steamer 4 5...

Page 13: ...your steamer If the body of your steamer comes into contact with this type of spray it can cause severe damage to your steamer and will void your warranty Never leave hose assembly on the floor as this will cause a trip and burn hazard to the user and others and could damage the hose When steamer runs out of water an alarm buzzer will sound and the red refill light will illuminate Switch steamer o...

Page 14: ...ts on it This maintains the stability of the machine Run nozzle over the fabric while holding it taut with your free hand taking care not to steam near your hand in the process Always keep the row of holes on the nozzle horizontal at all times If steaming at a low level regularly lift hose up so condensation can be allowed to run back into the steamer If steamer nozzle is used with holes in vertic...

Page 15: ... unstable and topple over They are best steamed hanging from a rail or ideally using a plastic chain attached to a hook in the ceiling This allows the dress to be hung at different heights on the chain so the lower parts of the dress and the train can be steamed with ease Steam the dress in sections starting with the underskirt The back of the nozzle can be used as a low temperature iron to confir...

Page 16: ...ers banqueting table cloths and removing pressure marks on carpets Mattresses and bedding can be steamed to freshen and remove creases 5 5 Fabric Limitations Not recommended for use Moiré silk Seersucker Silk taffeta Artificial and natural furs Nap side of leather If in doubt test on a small inconspicuous area or steam from reverse side of fabric Extreme caution should be used with man made pile f...

Page 17: ...nto a ground level drain where possible to avoid raising the steamer up and emptying into a sink Start by emptying any residue water from the steamer Remove the filler cap and fill steamer with 2L of clean water replace the filler cap and agitate vigorously this action will suspend some sediment in the water immediately pour water out as directed above Refill steamer with fresh water and empty aga...

Page 18: ...ale overnight Before flushing descaler from the steamer agitate vigorously then empty water out of steam outlet Refill with clean water agitate and flush out again Repeat this procedure until the water drained is completely clear Failure to maintain your steamer will void its warranty NOTE the water in the steam generator must be allowed to cool to a temperature which will not cause injury before ...

Page 19: ... steamer should be emptied of water and cleaned The electrical cable should be coiled and steamer stored in a dry location If the steamer is not to be used for an extended period of time it is recommended that the steamer is descaled before storage ...

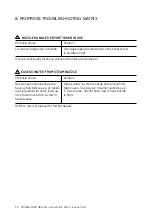
Page 20: ...ed Check cord set not damaged Steam is only produced when arrow is pointing at steam icon If cord is damaged do not use steamer and call your dealer to arrange service DIRTY WATER COMING OUT OF FILLER CAP Probable Cause Solution Steamer needs cleaning out or descaling Remove hose and poles from steamer and flush boiler as directed in 6 2 Cleaning your Steamer If steamer has not been descaled recen...

Page 21: ...eed replacing periodically and can be ordered from your local dealer BUZZING WHEN STEAMER IS NOT EMPTY Probable Cause Solution Thermal sensor is damaged or element heavily scaled Remove hose and poles from steamer and flush boiler as directed in 6 2 Cleaning your Steamer After flushing boiler descale as directed in 6 3 Descaling your Steamer If this does not correct problem call your dealer to arr...

Page 22: ...o order a new hose set EXCESS WATER FROM STEAM NOZZLE Probable Cause Solution Nozzle has not been allowed to heat up fully before use or nozzle is being used with holes lined up in vertical orientation Screw in handle loose Always allow nozzle to heat up before touching fabric see 4 3 Using your Steamer and also see 5 Tips on Use Check that screw in hose handle is tight Refer to full user manual f...

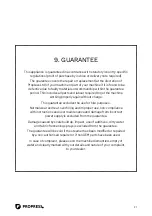
Page 23: ...gain without charge This guarantee excludes the use for hire purposes Normal wear and tear overfilling and improper use non compliance with instructions and user maintenance and damage from incorrect power supply is excluded from the guarantee Damage caused by scale build up impact use of additives dirty water and fabric freshening sprays is excluded from the guarantee The guarantee will be void i...

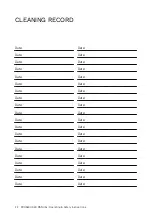
Page 24: ...afety Instructions CLEANING RECORD Date Date Date Date Date Date Date Date Date Date Date Date Date Date Date Date Date Date Date Date Date Date Date Date Date Date Date Date Date Date Date Date Date Date Date Date Date Date Date Date ...

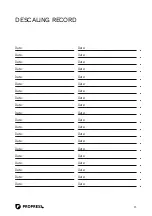
Page 25: ...ING RECORD Date Date Date Date Date Date Date Date Date Date Date Date Date Date Date Date Date Date Date Date Date Date Date Date Date Date Date Date Date Date Date Date Date Date Date Date Date Date Date Date ...

Page 26: ...PRESS Steamer serial number and purchase date here for future reference Serial Number Date of Purchase Your Propress PRO580 is covered by a 12 month Propress Guarantee Model No PROPRESS PRO580 4 Litre 50 60Hz 230 Volt 1750W THIS APPLIANCE MUST BE EARTHED T 44 0 20 8417 0660 E info propress co uk W propress co uk Propress Steamers Unit 3 The Pavilions 2 East Road London SW19 1UW ...

Page 27: ......
Reviews: