background image

16

17

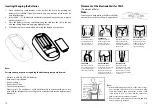
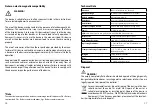
Turning On/ Off  the Device

To Turn On/Off the device, Press and hold the On/Off button for 

one (1) second to turn on the device. 

1.   The most recently selected treatment time and program will 

display on the screen

2.   The device turns off automatically after the therapy session 

time has elapsed. 


Note : Do not turn the unit on until all electrodes and lead 

wires are properly attached.

Note : When stimulating the muscles of the arms or legs bear 

in mind that the muscle contraction may cause involuntary 

limb movement which could cause injury to you or others. 

Always ensure the limb is secured to prevent movement.

Note : In an emergency you may also pull the connector(s) 

from the device and then remove the electrodes.  

Note : To prevent unpleasant  electric shocks, never remove 

the device while it is still turned  on..


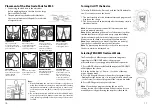
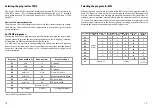
Placement of the Electrode Pads for EMS

1.     Connecting the lead wire to the electrodes 

before applying them to the Skin. Use the large 

Electrode Pads for EMS.

2.     The pad placement chart hereafter illustrates 

the correct placement of the pads for a selection 

of target muscles.

Note:

1.    When stimulating the muscles of the arms or legs bear in 

mind that the musclecontraction  may cause involuntary 

limb movement, which could cause injury to your or oth-

ers. Always ensure the limb is secured to prevent move-

ment.

2.    Do not turn the unit on until all electrodes and lead wires 

are properly attached. Always start with a low intensity 

level, increase gra dually. You may use any of the modes 

for EMS

SHOULDERS

Place one half of the 

pad on the front of your 

shoulder and the

otheron the side.

BACK OF THIGHS

Place each pair of pads

horizontally across

your hamstring.

ABS

Place each pair of pads

horizontally either side

of your nevel.

CALF MUSCLES

Place each pair of pads

horizontally across calf

muscle. Do not place

them too low on the leg,

as this can result in an 

uncomfortable contraction.

LOWER BACK

Place a pair of pads

horizontally either side

of your spine on the lower 
part of the back.

UPPER BACK

Place a pair of pads

horizontally either side

of your spine on the 
upper part of the back.

BOTTOM

Place a pair of pads

horizontally across the 

buttocks halfway 

between the midlone

and side of your body.

FRONT THIGHS

Place a pair of pads

horizontally across 

each thighs muscles.


Shoulder

Calf 

Muscle

Low

Back

Upper

Back

Bottom

ABS

Back of

Thighs

Front of

Thighs

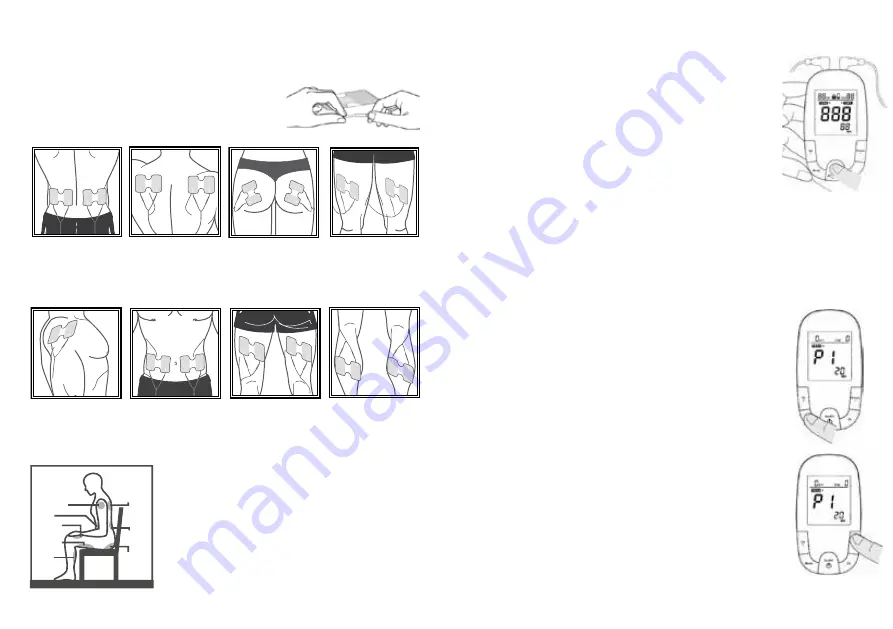
Selecting TENS/EMS Treatment Mode 

The Device offers 8 different preset treatment programs 

respectively for TENS /EMS modes ; the programs 

differ with respect to varying pulse widths and frequencies.  

1.   Press MODE , the preset (default) therapy mode TENS/EMS 

will display on the screen.

2.  Use the button Up+  ,or  Down – , for choice of therapy 

mode.  therapy mode.

3.  Press Mode again, the numeric number of program is then

 flashing.Press the button Up + (to increase) or the button Down 

– (to decrease) for choice of program of the selected modality.

4.  Press MODE again to save your selection.

Note : If you change programs during the course of a 

therapy session, the treatment time will not reset unless you

manually reset it by performing the steps described above.


Summary of Contents for SUPER DOU plus

Page 1: ...OPERATING INSTRUCTION SUPER DUO TENS EMS plus 1639...

Page 2: ...e carefully and keep them for lateruse besuretomakethemaccessibletootherusersand observe the information they contain Signs and symbols WARNING Warning instruction indicating a risk of injury or damag...

Page 3: ...e electrical impulses that are sent into the tissue influence the transmission of stimulation into nerves nerve centres and muscle groups in the application area Electrostimulation usually only has an...

Page 4: ...ormance e g after a marathon Thanks to integrated massage technology TENS EMS SuperDuoPlus units are also able to relieve muscle tension and combat fatigue with a program based on the sensation and ef...

Page 5: ...rs If you are receiving medical treatment In the event of complaints linked to stimulation treatment If you suffer from persistently irritated skin due to long term stimulation at the same electrode s...

Page 6: ...dhesive capability of the adhesive electrodes decreases please replace them immediately Only use the device again with new adhesive electrodes Otherwise the unequal adhesion of the adhesive electrodes...

Page 7: ...s to the stimulator use the following steps to prepare your skin at the electrode placement sites 1 Determine the placement sites for the electrodes 2 Wash the area with mild soap and water do not use...

Page 8: ...Always ensure the limb is secured to prevent movement 2 Do not turn the unit on until all electrodes and lead wires are properly attached Placement of the Electrode Pads forTENS Treatment of Pain Note...

Page 9: ...gra dually You may use any of the modes for EMS SHOULDERS Place one half of the pad on the front of your shoulder and the otheron the side BACK OF THIGHS Place each pair of pads horizontally across y...

Page 10: ...ation Program Pulse width uS Pulse rate Hz Waveform Type P1 P2 P3 P4 P5 P6 P7 P8 P9 260 260 260 260 156 260 156 260 260 156 50 260 uS 15 60 60 2 60 60 7 60 60 Constant Burst Constant Dense Disperese M...

Page 11: ...time you turn the device on Note If you change programs during the course of a therapy session the treatment time will not reset unless you manually reset it by performing the steps described above S...

Page 12: ...s 5 10 15 20 25 30 35 40 45 50 55 and 60 min utes Time will countdown on the display in 1 minute increments for the duration of your session The device turns off automatically when the therapy time ha...

Page 13: ...d electrodes Do not pull on the cables but on the connectors attached to the ends of the cables Store the stimulator with the cables in a clean dry place Electrode The electrode pads are disposable an...

Page 14: ...completely flat batteries should be disposed of through specially designated collection boxes recycling points or electronics retailers You are legally required to dispose of the batteries For environ...

Page 15: ...re he can send the device free of cost and what documentation is required Filing a warranty claim can only come into consideration if the buyer can submit a copy of the invoice proof of purchase and t...

Page 16: ...Well Life Healthcare Ltd 6F No 168 Lide St Jhonghe District New Taipei City 23512 Taiwan EXCLUSIVELY IMPORTED AND DISTRIBUTED IN EUROPE BY EUROMEDICS GmbH Hauptstra e 169 D 59846 Sundern Germany info...

Reviews: