7
D16
P10
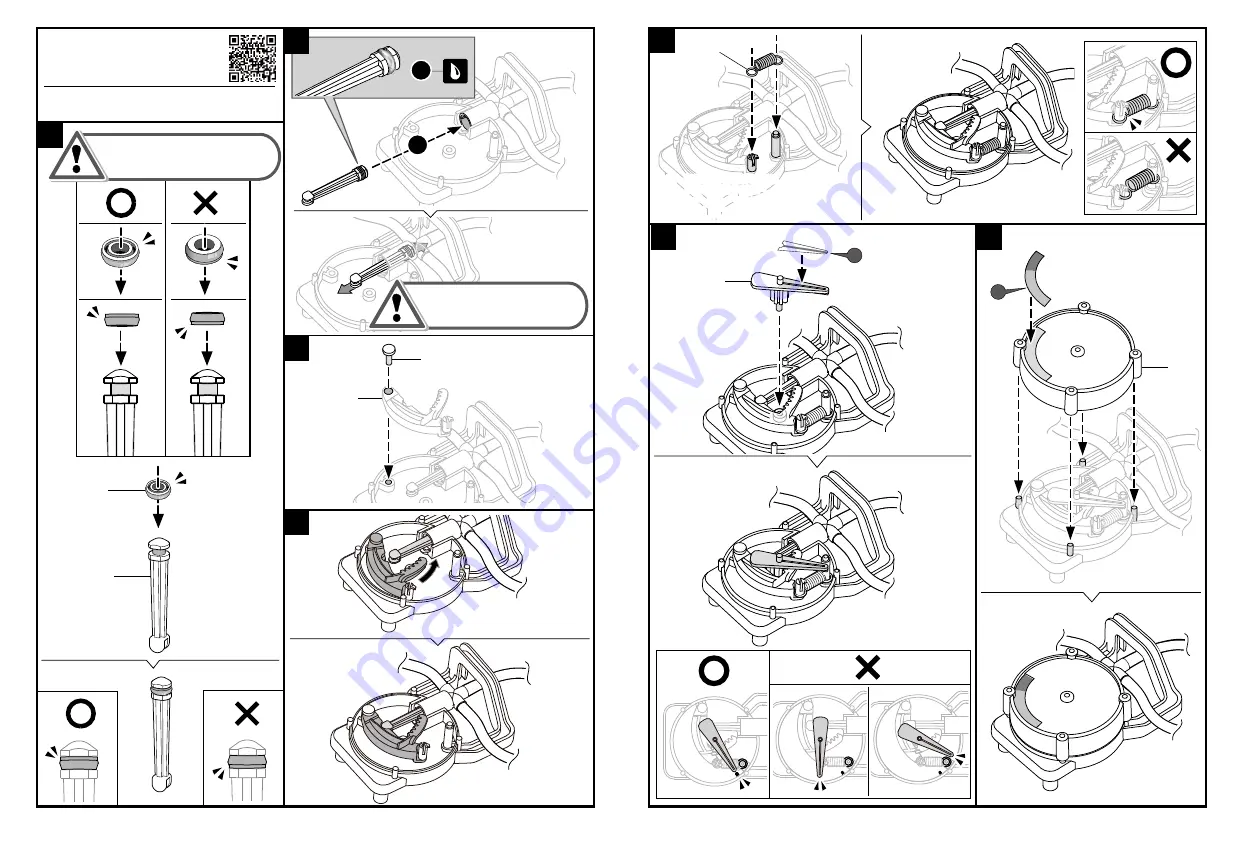
請確認
P10
安裝在正確位置,以免漏氣。
影片示範
請掃描
QR code
觀看影片,可幫助您組裝更順暢。
https://youtu.be/Zeoa563dsHQ
紅色活塞帽(小)
10
9
10
D12
D20
將
D16
重複推入及拉出數次,使油均勻
沾附零件,以利後續操作。
2
1
8
Make sure P10 is placed in the
proper direction to avoid air leakage.
Video Tips
Scanning the QR code to help you assemble below
steps smoothly.
Red Cap(Small)
Push & pull the oiled part D16 several
times to make it work smoothly.
B2
P8
11
12
13
E1
03
P19
04
P19
11
注意 : 組裝前請輕拉彈簧兩端
以確認彈簧伸縮性。
注意 : 組裝前請輕拉彈簧兩端
以確認彈簧伸縮性。
Note: Give a slight pull on both ends
of the spring to make sure of good
strength & extension before assembly
Summary of Contents for GE-631
Page 1: ...Manual Assembly Instruction 組裝說明手冊 GE 631 空氣動力引擎車 Air Engine Car Kit ...
Page 17: ...30 23 24 1 31 25 4 3 2 1 ...
Page 18: ...D6 C4 32 26 27 2 3 2 4 5 1 1 6 1 P19 P19 02 02 比例 1 1 P1x5 33 28 29 Top View 上視圖 Scale 1 1 ...
Page 22: ...1cm B11 40 P18x5 42 43 41 恭喜完成 P19 P19 06 07 44 Finished ...


