身體
Body
01
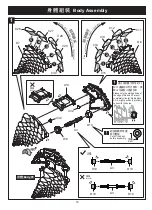
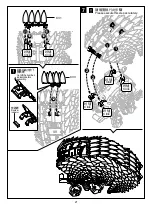
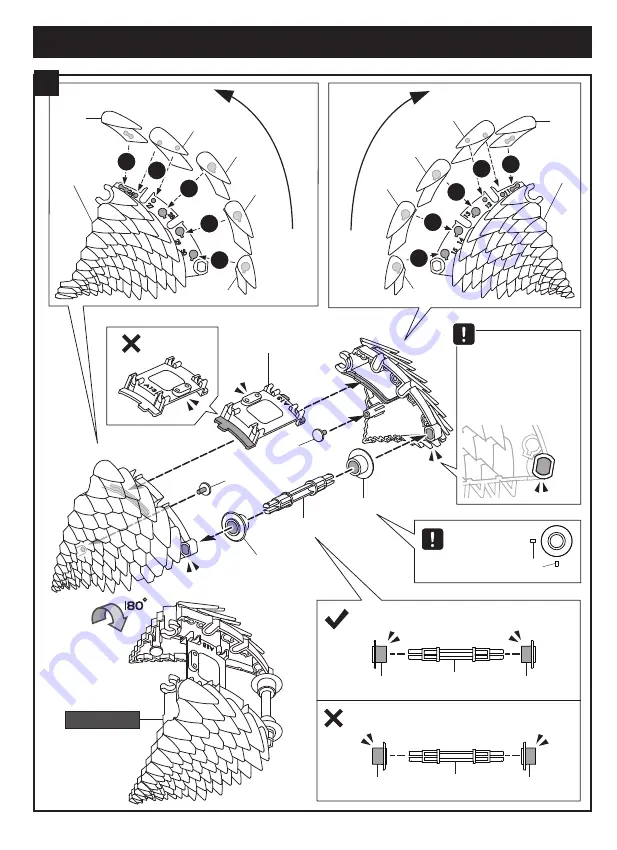
身 體 組 裝
Body Assembly
16
1
1
1
2
2
3
3
4
4
5
5
C12
C27
C28
C29
C14
C15
C30
C13
C11
C26
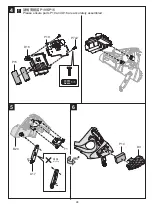
D10
A13
C32
C32
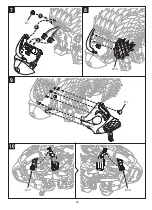
D6
D7
A3
A3
A3
D10
D10
D10
D10
D10
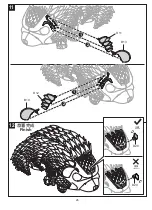
錯誤
Incorrect
Cut off the burrs
before assembly.
組裝前請將毛邊
剪切乾淨
毛邊
burr
錯誤
Incorrect
Correct
正確
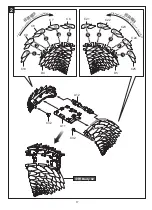
請注意如圖示所指的D6
和D7邊緣洞口非正圓形,請
將A3仔細放入連結洞口
Please note the marked holes at
the edge of D6 and D7 are not
completely circular. Kindly place
A3 in a right position to precisely
connect to the holes.
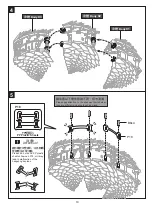
組
裝
順
序
Plea
se f
oll
ow
st
ep
s a
s b
elo
w
il
lu
str
ate
d
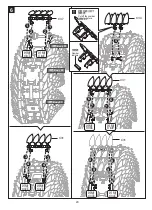
組
裝
順
序
P
le
as
e
fo
ll
ow
s
te
ps
a
s
be
lo
w
il
lu
str
ate
d
Summary of Contents for GE-896
Page 1: ...GE 896 AI...
Page 8: ...6 5 6 7 A23 B7 Mark 1 PUSH 2 Align the mark with the dashed line Incorrect Correct...
Page 10: ...8 10 9 C36 B17 B17 B18 1 B21 1 2 2 E1 D19...
Page 11: ...Correct 9 11 12 A6 P13 1 2 Incorrect Incorrect Please execute this step accurately...
Page 14: ...P8 A4 Incorrect Incorrect Correct 12 18 19 20 B17 D17 E2 B14 B1 A20 B12 1 1 Scale...
Page 17: ...A26 P8 B2 B2 28 27 B11 A9 26 A21 REMOVE REMOVE 15 Correct Incorrect 1 1 Scale Incorrect...
Page 25: ...Head Assembly 1 2 3 Incorrect Incorrect Correct P14 C32 D2 B19 F3 A16 P13 F2 A14 23 A27...
Page 27: ...25 7 8 9 D13 A17 A14 D1 D1 10 3 2 1...
Page 28: ...Incorrect Correct 26 12 D20 D20 B10 B13 D12 11 D11 Finish 1 1 2 2...


