


INSTALLING REMOVING
THE BASE STAND
WARNING
/
: The TV Display is very fragile and must be protected at all times when removing the base
Stand
Be
sur
e
that no har
d
or sharp object
or
anything that
could
scrat
ch
or
damage
the
TV
display
comes
into
contact
with
it Do
NOT
exert
pressure
on
the
front
of
the
unit
at
any
time
because
the
screen
could
crack
,
.
.
.
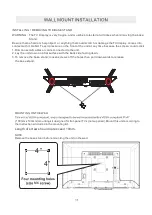
NOTE
Remove the base stand before mounting the unit on the wall.
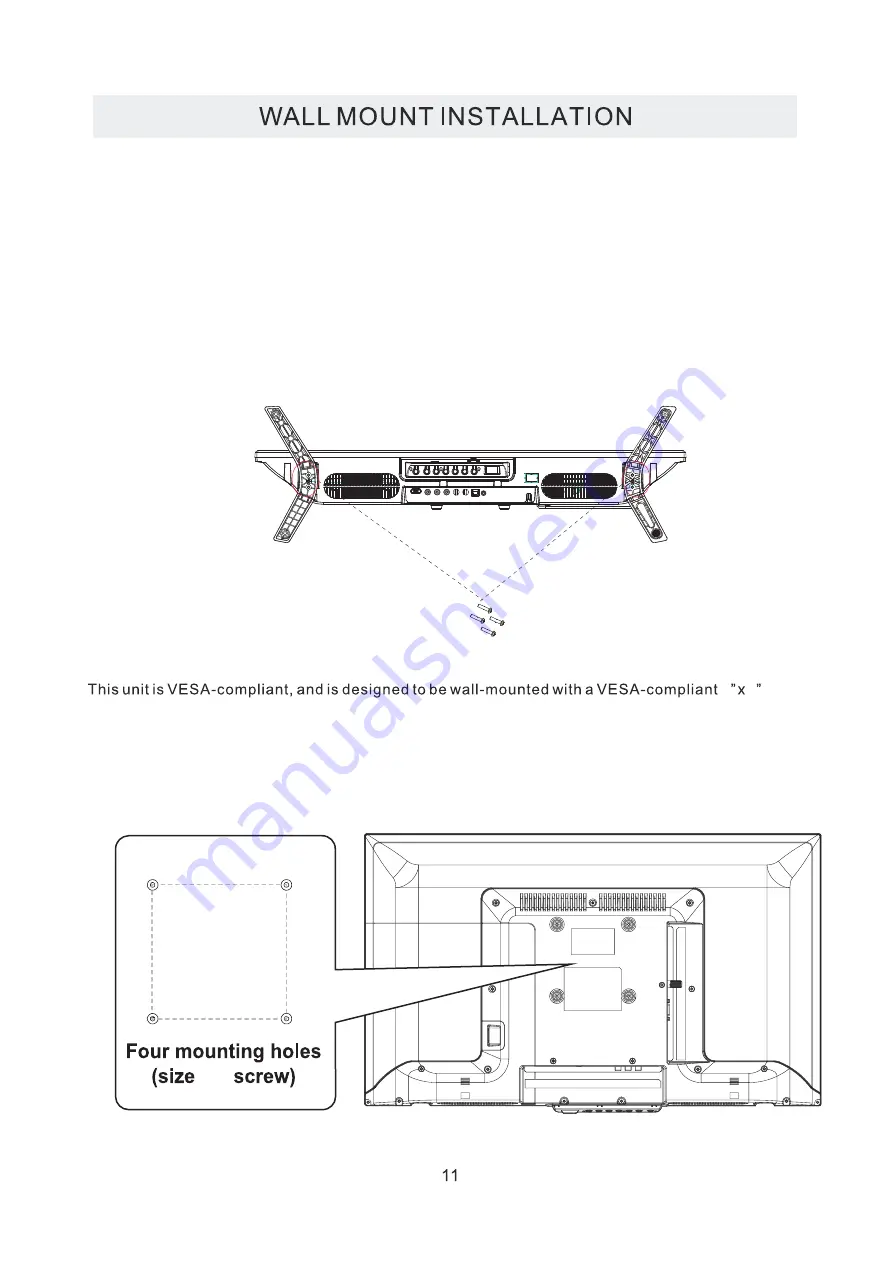
MOUNTING ON THE WALL
(
100mm
x 100mm) mounting kit designed for flat-
panel
TVs (
not
supplied). Mount
this
unit accor
ding
t
o
the
instructions included in the mounting kit.
Length of screw should not exceed 10mm.
1 Disconnect
all cables or cor
ds
connected t
o
the unit
2 Lay
the
unit
down
on
a
flat
surface
with
the
back
side
facing
down.
3 To
remove
the
base
stand loosen
screws
off
the
holes
then
pull
downwards
to
release
the
base
stand
.
.
,
.
.
.
4
4
4”
4”
M6
Summary of Contents for 058465784027
Page 1: ...Model PLED2845A D ...
Page 2: ...Digital Audio Out Connection ATTACHING THE STAND ...
Page 3: ...3 ...
Page 4: ......
Page 5: ......
Page 6: ......
Page 7: ...PLED2845A D ...
Page 8: ......
Page 9: ......
Page 10: ......
Page 11: ......
Page 12: ......
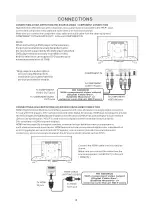
Page 13: ...Digital Digital Audio Out ...
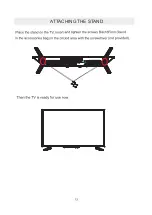
Page 15: ...ATTACHING THE STAND ...
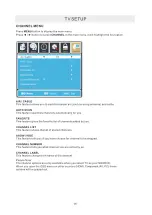
Page 16: ...Select Move Return ...
Page 17: ...Return Return Exit Exit Exit Exit Return Return Return Return ...
Page 18: ......
Page 20: ...RAW ...
Page 22: ......
Page 23: ......
Page 24: ......
Page 25: ......
Page 26: ...HDMI2 has Audio Return Channel fuction only Digital Audio Out S PDIF Coaxial 23 ...
Page 27: ......


