background image

14

Select Input Source

Press 

INPUT 

button to display the input source list,

Press 

 / 

 or 


 button to select the input 

source you want to,

Press 

ENTER

 button to enter the input source,

Press 

EXIT

 button to quit.

INPUT

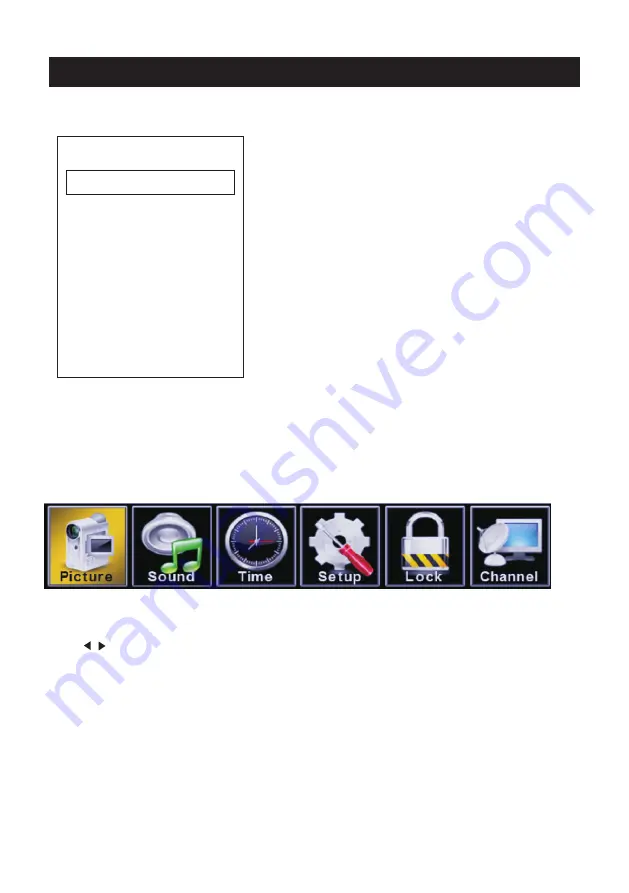
Main Menu

Press MENU to display the main menu or return to the previous menu or close the main menu.
Press </ > to highlight the desired menu icon, and press ENTER to select.

Source Select

TV
AV

Component

DVD

HDMI1

PC

HDMI2
HDMI3

Summary of Contents for PLDV321300-D

Page 1: ...plies with Part 15 of the FCC Rules Operation is subject to the following two conditions 1 this device might not cause harmful interference and 2 this device must accept any interference received including interference that might cause undesired operation ...

Page 2: ...er Turn On TV Help 2 3 4 6 7 8 9 12 13 15 31 36 37 TV Bracket assembly 5 Specifications Setup Wizard Wall Mount Installation Main Menu Operation Sound Menu Time Menu Setup Menu Close Caption Lock Menu US Rating TV MPAA Canada Rating Hotel Menu Channel Menu 15 17 17 18 19 20 21 23 Systems Connection 10 14 Select Input Source TV 24 25 26 26 27 27 28 29 30 31 PC 32 33 PC Menu DVD Setup 34 35 ...

Page 3: ...n the literature accompanying the appliance Correct disposal of this Product W aste Electrical Electronic Equipment WEEE Your product is designed and manufactured with high quality materials and components which can be recycled and reused This symbol means that electrical and electronic equipment at their end of life should be disposed of separately from your household waste Please dispose of this...

Page 4: ...3 ...

Page 5: ...4 8 10cm 6 7 90 x 3 95 200 100 Wall Mount Installation 20cm ...

Page 6: ...TV Bracket assembly 5 s ...

Page 7: ... off VOL The functions of the buttons on the are as follows TV CH When watching TV select channels DVD Mode CH DVD Eject CH Play Pause DVD Program MENU 1 Press Menu 2 Press SOURCE to enter 3 Use CH to shift UP DOWN 4 Press SOURCE to confirm then press VOL to adjust 5 Press SOURCE to confirm Top panel diagram 6 SOURCE External signal input selection and confirm the item selected ...

Page 8: ...YPbPr Connect to the composite terminal of your DVD VCR ANT 75Ω EARPHONE For Upgrade Use AV INPUT Earphone output COAXIAL Digital Audio Output Service Port HDMI IN Connect to HDMI of DVD or other equipment Name Function Description AUDIO OUTPUT Right Left Audio Output AC 120V 60Hz OUT PUT VIDEO Y Pb Pr COAXIAL EARPHONE service port ANT 75 ...

Page 9: ... D Disp PROG STEP REPEAT A B Zoom Angle Subtitle Audio D TITLE A B During the playback press this button to repeat playback of a specific section on a disc SLEEP Select amount of time before TV turn off automatically S MODE Press to cycle through the different sound settings P MODE Press to cycle through the different picture settings D DISP D MENU Press to enter a program number for multiple prog...

Page 10: ...3 side indicator 9 10cm 10cm 10cm LED TV ...

Page 11: ...2 10 Component AC 12 0V 60Hz OUTP UT VIDEO Y Pb Pr COAXIAL EARPHONE AC 12 0V 60Hz OUTP UT VIDEO Y Pb Pr COAXIAL EARPHONE ...

Page 12: ...11 service port ANT 75 service port ANT 75 ...

Page 13: ...erial socket Select Time Press button to select the time zone daylight saving time and time format you want to Press button on the remote control to adjust Press button on the remote control to select go to next step and press ENTER button to go Select TV Configuration TV Configuration ...

Page 14: ...13 Auto Scan Press button to select the antenna type Press button to select go to next step and press ENTER button to start auto scan Setup Wizard ...

Page 15: ...urce you want to Press ENTER button to enter the input source Press EXIT button to quit INPUT Main Menu Press MENU to display the main menu or return to the previous menu or close the main menu Press to highlight the desired menu icon and press ENTER to select Source Select TV AV Component DVD HDMI1 PC HDMI2 HDMI3 ...

Page 16: ...tint and sharpness are only available in User mode you can adjust as you like Standard Produces a highly defined image in a normally lit room Dynamic Produces a highly defined image in a brightly lit room Soft Produces a highly defined image in a soft lit room User Select to customize picture settings Brightness Adjust the visual perception output of the entire picture it will effect the iuminousn...

Page 17: ...red and the cool color personally blue according to your like sub menu Press button to adjust Normal Normal Automatically adjust Aspect Ratio based on TV size and TV program Wide Use to watch wide screen 16 9 content Zoom Expands image to fill screen Top and button maybe cut off Cinema Stretches image at edges but keeps a clear image in the center Off Select to turn off video noise detection Low D...

Page 18: ...ct among Sound Mode Bass Treble Balance MTS Audio Language Digital Audio Output Surround Sound AVL Press to enter Press button to adjust ENU again or back to parent menu M ENTER M ENTER M HDMI Mode Only available in HDMI input Dynamic Contrast Automatically adjust picture detail and brightness Press button to select Off O n Press button to select Video Graphic ...

Page 19: ...gures the multi tra ck sound Press button to select Mono Stereo SAP Mono Sets the sound to mono Stereo Sets the sound to stereo when stereo is not available the sound is automatically switched to mono SAP Sets the sound to the second audio program Audio Language It is only available in DTV Select the language supported by the chosen digital channel Press button to select English French Spanish Dig...

Page 20: ...ylight Saving Time Time Format Auto Clock Sleep Timer Set a timer for the TV to turn off automatically Press button to select Off 5min 10min 15min 30min 60min 90min 120min 180min 240min Select your time zone Press button to select Eastern Central Mountain Pacific Alaska Hawaii Samoa Newfoundland Atlantic Set the daylight saving time for your area Press button to select On Off Select your time form...

Page 21: ...t menu M ENTER M ENTER M Menu language Press button to select language English Français Transparent Adjust the transparency of the OSD on screen display menu Press button to select 0 25 50 75 100 OSD Time out Adjust the duration of the OSD on screen display menu Press button to select 5 Sec 15Sec 30Sec 45Sec 60Sec Closed Caption Adjust Closed Captioning settings Only available under TV and AV sour...

Page 22: ...4 Font 5 Font 6 Font 7 Adjust the size of the digital Closed Captioning font Pressvbutton to select Default Normal Large Small Adjust the edge of the digital Closed Captioning box Press button to select Default None Raised Depressed Uniform Left Shadow Right Shadow Adjust the color of the digital Closed Captioning box Press button to select Default Black White Red Green Blue Yellow Magenta Cyan Ad...

Page 23: ...tton to enter Other Settin gs Set the parameter of audio only no signal power off and no operation power off Press ENTER button to enter Blue Screen To select the transition type required while changing from one channel to another Press button to select On Off Audio Only Play the audio with the picture turned off When you turn the Audio Only on and exit the OSD menu the panel will be dark and then...

Page 24: ...estore Default Change power on options or reset TV to factory default Press ENTER button to enter Setup Wizard Set the first time installation Press ENTER button to enter For detail please refer to page 12 13 ...

Page 25: ... parent menu button to select among Change Password System Lock Input Block US Rating Canada Rating RRT Setting Reset RRT Hotel menu Press to enter Press button to adjust ENU again or back to parent menu Enter your 4 digital password Default password is 0000 M ENTER M ENTER M and if forget what you set please call the service center ...

Page 26: ...k is on Press button to enter For detail please refer to page 26 27 Restrict movie and TV programs by Canadian Ratings Only available when System Lock is on Press button to enter For detail please refer to page 27 RRT Settin g Display an advance V Chip rating table for digital channels The item is available only When current stream has downloadable rating data Reset RRT Reset the RRT to default Th...

Page 27: ...l of the age based rating For example a program with a TV PG V violence rating may contain moderate violence while a TV 14 V violence rating may contain intense violence So locking a higher level option will automatically cause locking the options that has more sensitive level TV The TV rating compose of two aspects age based and content based US Rating For the United States the rating setting bas...

Page 28: ...under age 13 Not recommended for under age 16 children This program is restricted to adults Canada French The ratings are for programs French rating system which are using Off News and sports Off News and sports Rating Define G PG PG 13 R NC 17 X General audience All ages admitted Parental guidance suggested Some material may not be suitable for children Parents strongly cautioned Some material ma...

Page 29: ... Setting Picture Mode Adjust picture mode to change picture appearance Press button to select Standard Dynamic Soft User Default Volume Max Volume Boot Source Set the default volume for every time you open the TV the default volume is 20 Set the max volume that you can adjust Set the default input source when turning on your TV ...

Page 30: ... is available when Boot Channel is set to be On To lock the Tuner Key Pad Menu Lock that you want Channel searching is invalid when Tuner Lock is set to be On Power Save Set a timer for the TV to turn off automatically Timer 60Min 120Min 180Min 240Min Off TV to USB USB to TV Reset Hotel Setting Available Backup data to USB Restore data from USB Recall the default settings of Hotel menu ...

Page 31: ...parent menu button to select among Air Cable Auto Scan Favorite channe list Show Hide Channel Number Channel Label Press to enter Press button to adjust ENU again or back to parent menu M ENTER M ENTER M Air C able Press button to select Air Cable Auto Scan Automatically search for channels Press ENTER button to enter Select signal type ...

Page 32: ...Number Press button to adjust Channel Label Press button to adjust Channel List Display your program list Press button to enter Show Hide Show or hide the channels in your program list Press button to enter Show the channel number Create labels for channels up to 7 characters TV 31 ...

Page 33: ...PC source ENU to enter the main menu Press button to select Setup menu Press to select PC Settings button to select among H Pos V Pos Clock Phase Auto Press to enter Press button to adjust ENU again or back to parent menu INPUT M ENTER M PC 32 ...

Page 34: ...es Press button to adjust Auto Press button to enter Adjust to the screen automatically to the optimal position of the picture Notes PICTURE are invalid 2 MTS and Audio Language in SOUND menu are invalid 3 Auto Clock in TIME menu is invalid 4 Close Caption in SETUP menu is invalid 5 US Rating Canada Rating RRT Setting and Reset RRT in LOCK menu are invalid 6 mode has no CHANNEL menu 1 Color Tint S...

Page 35: ...the DVD settings menu use the buttons to select thedesired menu page General Audio Video Preferences and use buttons to select the items in each menu then use buttonto enter the selected item If you then change any setting press ENTER button toconfirm the value you changed Press the button to return to the left submenu to go back up to one of the main DVD menu pages press EXIT button Downmix This ...

Page 36: ...he local TV system PAL TV Multi NTSC TV Audio Disc audio language selection disc dependent Subtitle Disc subtitle language selection disc dependent Disc Menu Disc Menu language selection disc dependent Parental Set the maximum disc rating Kid Safe G Pg Pg 13 Pgr R Nc 17 Adult that can be viewed without a password default password is 0000 Password Change the password Default Choose this to restore ...

Page 37: ...Help 36 ...

Page 38: ... Resolution 60HZ 640x480 800X600 1024x768 1360x768 Vertical frequency hz HDMI 60HZ 50HZ 50HZ 60HZ 50HZ 60HZ Vertical frequency hz Format 576 i P 720 P 480 i P 1080 i 60HZ 60HZ 60HZ NTSC ATSC 800 PAL NTSC IN TV AV YPbPr PC AUDIO VGA HDMI OUT COAXIAL EARPHONE AUDIO L R 10W 10W 56W Screen Size 32 Specifications 37 AC120V 60Hz ...

Reviews: