page 11
Grinding
.
1. Check the desired hollow radius and adjust if needed. Referring to the dressing of
the grinding wheel. (Page 9.)
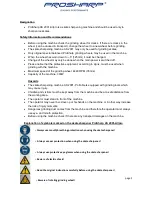
2. Adjust the grinding wheel sideways to the right blade thickness. (Picture 5.)
Always remember to measure both blades because there are sometimes
differences even between the blades in the same pair! HTC-tool is perfect for
this!
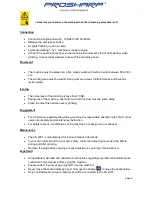
3. Take the skate with your left hand and put the skate in to the skate-holder so that
the heel is towards the wheel and make sure that the skate lies on both rolls at a
distance of min 10 mm (half an inch) from the grinding wheel. Make sure that the
skate is correctly clamped. (See the picture 6.)
4. Use right hand to turn the handle to the left and make sure that the skate is in the
correct position. Clamp the skate in place like in the picture 6.
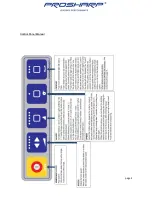
5. Choose number of grinding cyc
les by using the “SHARP” button . 1 push is
worth of 1 cycle, 2 pushes is worth of 2 cycles and so on. Machine will start after
choosing the amount of cycles.
Important! Never start the machine without a
skate unless you are dressing the grinding wheel! Grinding is finished when the
skate is in “home-position” and the motor stops. Check the result.
6. If you want to stop the grinding earlier
just push the “SHARP” button again
during cycles 1-5 = reset. During 1 cycle press the button once and the skate-
holder will turn back. Push again and the skate-holder will turn back again.
For more detailed instructions how to use the electronics and adjustments please
take a look at the control panel manual (Page 4.)
Grinding of figure skates
1. Check the desired hollow radius and adjust if needed. Referring to the dressing of
the grinding wheel. (Page 9.)
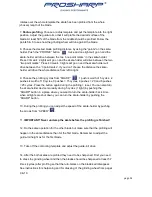
2. Adjust the wheel sideways to the right blade thickness. See Picture 7. Always
remember to measure both blades because there are sometimes differences
even between the blades in the same pair! HTC-tool is perfect for this!
3. There is three different ways to sharpen figure skates:
a. Use a special figure skate template and follow the radius profiling
instructions on page 12.
Picture 5.
Picture 7.
Picture 6.

