background image

CT-3200 

Installation Guide  

P. 13


Troubleshooting Poor Transmitting Range 

 installed at least 7.5 cm (3 in.) from the 

he best location. Install the antenna as far 

oise, airports, 

12.

 vehicle can affect range as well; vans in general have an especially 

or ran

e signal from the remote control). As a result, the direction in which the vehicle is 

cing in

14.

15.

g the 

nsmit


 cable. 

ted order for the Installation procedure. It is intended as guide for novices, 

 of installing a remote start module easier. Time is wasted by rewiring the 

 the vehicle is starts and idles properly with the Ignition key, 

and that the electrical system is not compromised in any way. 


l, you can start by looking for the 

wires that will be needed. 


when removing the panels that are covering the wires you are 

searching. 


the wires have been found, they should be hot wired to verify that they are the 

correct wires you will need for the installation. 


an be stripped to expose the wire ( over one inch 

of plastic should be removed).   

In order to ensure optimal range, the antenna should be
roof – 2.5 cm (one inch) below the tint strip is generally t
as possible from radio antennas, GPS, Onstar or factory compasses. 
Many factors may affect the operating range of the transmitter.  Some of these are: 

9.


The condition of the battery in the transmitter. 

10.


The operating environment (for example: downtown radio-frequency n

cellular phone towers…) 

11.


Metal: any type of metal will affect operating range. This includes the metal in the car. 


The shape of the

po

ge. 

13.


The shape of the roof and A-pillars brings about considerable radio-frequency deflection 

(in this case th

fa

 relation to the remote control can affect the range. Straight on – standing in front of the 

vehicle – generally gives you the greatest range; the second best performance is from the back. 

Using the remote control from either side of the vehicle will usually give the lowest range. 


The range will be significantly lower in a crowded parking lot than in open space. 


Always hold the transmitter high, approximately at shoulder height. Holdin

tra

ter against your chin will also increase your range: your head acts as an antenna. 

16.


The operating range will be somewhat lower on vehicles equipped with an aftermarket 

or factory alarm. 

17.


Windows and windshields tinted with lead or metallic tints will decrease the operating 

range. 

18.


The antenna cable may have been cut and/or is grounded out on the chassis. Try using 

another

19.


The receiver may be faulty. Try replacing it with another. 

Installation Order 

The following is a sugges
to help make the process
module when mistakes are made, also the neatness of the install is lessened every time the 
module is taken down and the wiring is “corrected”. A Messy install is harder to trouble shoot if 
there are problems later on. The actual “how to install” is not covered by this list, the order of the 
installation processes is the focus.    


Before you get started, make sure


After deciding what options are to be added to the basic instal


Remember to take care 


Once all of 


When all the wire pass the hot wire test, they c


Downloaded from 

www.Manualslib.com


manuals search engine


Summary of Contents for CT-3100

Page 1: ...U T O M A T I C T R A N S M I S S I O N M U L T I C H A N N E L R E M O T E S T A R T E R S Y S T E M CT 3200 Installation Guide Table of Contents Introduction 2 Included in the Package 2 Installation...

Page 2: ...device To reduce potential radio interference to other users the antenna type and its gain should be so chosen that the equivalent isotropically radiated power EIRP is not more than that required for...

Page 3: ...to the remote starter module are properly fused and diode isolated when testing the shock sensor never test on glass with an opened hand and never hit glass hard enough as to break it When testing on...

Page 4: ...or starter wires must use external relays DO NOT JUMP WIRES at the ignition switch this will compromise the OEM electrical system 5 Pin Secondary Harness Wire Description 1 BLACK Chassis ground input...

Page 5: ...7 WHITE ORANGE Starter Kill Armed output The unit is equipped with a selectable passive or active arming starter kill circuit that will immobilize the vehicle when the system is armed This wire will p...

Page 6: ...onnected to the ground out wire ensure that they are all diode isolated in order to avoid feedback and damaging the vehicle 11 GREY N A This pin is not used leave empty 12 YELLOW Glow plug input This...

Page 7: ...programming centre Once the module is in the programming centre the installer has no more than 20 seconds to get into one of the sub menus Failure to do so will result in the module exiting the progra...

Page 8: ...ion mode the parking lights will flash once twice depending on the option you have entered The unit will stay in programming mode until the hood pin switch or the brake pedal is pressed again therefor...

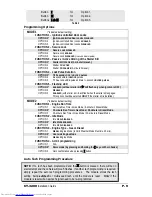
Page 9: ...ion should be selected ONLY if the starter kill is installed MODE 2 indicates default setting FUNCTION 1 Engine Run Time OPTION 1 4 minute Run Time in Gas Mode 9 minute in Diesel Mode OPTION 2 15 minu...

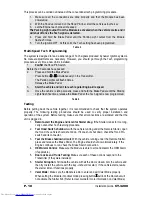
Page 10: ...back the vehicle together it is recommended to check that the system operates properly The following testing procedures should be used to verify proper installation and operation of the system Before...

Page 11: ...h set of ote Only one set of pins can be used at a time ote Only one set of pins can be used at a time pins has a function To activate one of the three possible 2nd outputs place the Jumper supplied o...

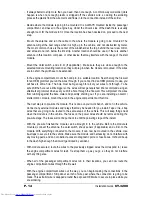
Page 12: ...lse dur default 4 sec LOCK and UNLOCK pulses or for a 7 10 sec LOCK pulse and two 1 4 second UNLOCK pulses used for double pulse disarm unlock systems In GAS mode the Mod minutes In DIESEL mode the Mo...

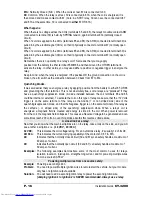
Page 13: ...metal in the car The shape of the po ge 13 The shape of the roof and A pillars brings about considerable radio frequency deflection in this case th fa relation to the remote control can affect the ran...

Page 14: ...drill a hole through the fire wall This will protect the wires from rubbing against the bare metal and possibly shorting out If you are installing an Alarm starter combo module mount the siren in the...

Page 15: ...cle can be put back together A basic introduction to the Relay What is a relay A device that responds to a small current or voltage change by activating switches or other devices in an electric circui...

Page 16: ...een the coil terminals 85 and 86 could be internal or external To activate the coil on this type of relay make sure that the 12 Volts trigger is on the same terminal of the relay as the Anode or non s...

Page 17: ...ctivates the wipers Where the connection was made from the start modules Park light output and the vehicle s park light circuit the OEM park light wire is cut to isolate the park light switch and the...

Page 18: ...cut The side of the wire that is still connected to the Ignition switch becomes the Key Side of the starter wire The side of the wire that is still connected to the starter motor becomes the Starter S...

Page 19: ...trol can affect the range Straight on standing in front of the vehicle generally gives you the greatest range the second best performance is from the back Using the remote control from either side of...

Page 20: ...Weak Tach signal Bad ground 7 The car starts by remote but then the starter re engages Check ground wire Is Tach programmed 8 The car starts on it s own Is the module in cold weather mode Program remo...

Page 21: ...hicle have factory alarm keyless entry You might have to switch to a 433MHZ module Some GM Trucks Cavalier Sunfire Breeze Stratus Cirrus 22 Sometimes I have to press button I twice to lock my doors No...

Reviews: