background image

CT-3400 TW 

User Guide 

P. 5


Alarm Clock 

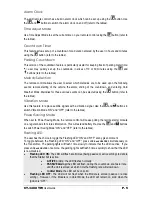
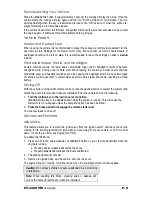
The LCD remote control has a built-in alarm clock which can be set up using the 

 button. Use 

the 

 and 

 buttons to switch the alarm clock on and off (refer to the tables). 

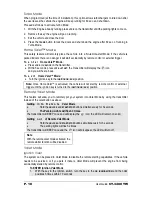
Time Adjust Mode 

Use Time Adjust Mode to set the current time on your remote control using the 

 button (refer to 

the tables). 

Countdown Timer  

This feature allows set up of a countdown for a duration entered by the user in hours and minutes 
using the 

 button (refer to the tables). 

Parking Countdown 

This version of the countdown feature is particularly useful for keeping track of parking meter time: 
the user may quickly set up the countdown in slices of 10 or 30 minutes using the 

 and 

 buttons (refer to the tables). 

Melody Selection 

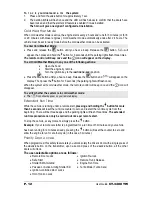
The remote control allows the user to select which melodies are to be used upon the following 
events: remote starting of the vehicle, the alarm, ending of the countdown, and entering Cold 
Weather Mode. Melodies for these various events can be selected using the 

 button (refer to 

the tables). 

Vibration Mode 

Use this feature to replace audible signals with a vibration signal. Use the 

 and   buttons to 

switch Vibration Mode “ON” and “OFF” (refer to the tables). 

Power Saving Mode 

When set to Power Saving Mode, the remote control will cease polling the remote starter module 
on a regular basis for status information. This will extend battery life. Use the 

 and   buttons 

to switch Power Saving Mode “ON” and “OFF” (refer to the tables). 

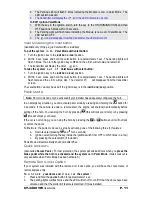
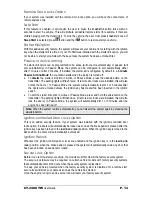
Flashing LED 

The user has the choice to toggle the Flashing LED “ON” and “OFF” at any given moment.  
To toggle between the Flashing LED “ON” and “OFF”, press 

LOCK and UNLOCK 

simultaneously on 

the Transmitter.  The parking lights will flash 1 time slowly to indicate that the LED is active.  If you 
press 

LOCK and UNLOCK 

once more, the parking lights will flash 3 times quickly to show that the LED 

is now disabled. 


Flashing LED ON:

 The LED will flash at all times (being passive or active arming) to denote 

that the Starter Kill is active.   


ACTIVE

 Arming: the LED flashes normally.   


PASSIVE Arming: 

the LED will flash, during the countdown, at a faster rate  

until the Unit is armed, at which time the flashing rate will slow down.  


In Valet Mode

, the LED will be on solid.


Flashing LED OFF:

 The LED will not flash when the Module is armed (passive or active 

arming).  However, if the Module is in Valet Mode, the LED will remain on solid when the 
Ignition is “OFF”. 

Summary of Contents for CT-3400 TW

Page 1: ...l emit two beeps in a repetitive cycle At that point you should replace your battery with a new one That is why we recommend that you keep a spare battery somewhere handy such as the glove compartment WARNING It is the responsibility of the vehicle operator to ensure their vehicle is parked in a safe and responsible manner 1 When leaving the vehicle it is the user s responsibility to ensure that t...

Page 2: ...rmations 8 Basic Operations Second Car Control 8 Start Stop While in Safe Start Mode 8 Timing and Alarm Adjustment 8 Remote starting Your Vehicle 9 Vehicle Presets 9 Heater and Heated Seat 9 Windshield Wipers Radio and Headlights 9 Driving Off 9 Advanced Features 9 Idle Mode 9 Turbo Mode 10 Home Valet Mode 10 Remote Valet Mode 10 Valet Mode 10 Panic Mode 11 Quick LockoutTM 11 Remote Door Locks Opt...

Page 3: ...r CT 300 LCD The installer is to write in the following box the module s serial number Module Serial Number Introduction This system is a state of the art remote car starter system with command confirmation It re presents a major breakthrough in vehicle convenience technology and remote starter systems What is eSH Technology eSH technology uses Manchester decoding along with advanced custom data f...

Page 4: ...installed Pressing and holding the button for more than 3 seconds will lock all doors and will send a constant pulse as long as the button is held down maximum of 15 seconds This constant pulse can be configured to activate certain functionalities such as rolling up the windows Please refer to your installer to see if your vehicle is compatible with this option Pressing and holding the button for ...

Page 5: ...ibration signal Use the and buttons to switch Vibration Mode ON and OFF refer to the tables Power Saving Mode When set to Power Saving Mode the remote control will cease polling the remote starter module on a regular basis for status information This will extend battery life Use the and buttons to switch Power Saving Mode ON and OFF refer to the tables Flashing LED The user has the choice to toggl...

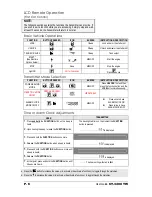
Page 6: ...nd the LOCK button simultaneously VIBRATION MODE ON OFF PRESS AND HOLD VIBRATES 4X ALARM CLOCK MODE ON OFF MELODY z Press once to have ALARM CLOCK ON z Press twice to have ALARM CLOCK OFF Time or Alarm Clock Adjustments USER TRANSMITTER 1 Press and hold the FUNCTION button until a beep is heard The backlight will turn on the moment the FUNCTION button is pressed 2 Upon hearing the beep release the...

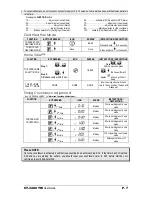
Page 7: ... Step 1 or Step 2 Simultaneously within 5 sec 1 BEEP Press or Within 5 seconds press the transmitter will display and you will hear 1 beep TO EXIT HOME VALET MODE NONE NONE NONE Insert key in ignition switch and turn to the on position the icon will disappear Timing Countdown Adjustment See ON PRESS NUMBER 8 of Alarm and Countdown Adjustment FUNCTION BY PRESSING ICON SOUND INSTRUCTIONS DESCRIPTION...

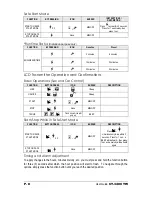
Page 8: ...ESS ICON BUZZER DESCRIPTION LOCK 1 Beep UNLOCK 2 Beep START MELODY STOP None MELODY TRUNK Trunk on vehicle will pop up BEEP Start Stop While in Safe Start Mode FUNCTION BUTTON PRESS ICON BUZZER DESCRIPTION START ON SAFE START MODE X 2 MELODY Press simultaneously twice within 3 seconds Press for 1 sec a BEEP will be heard then press 1 sec and a melody will be heard again STOP ON SAFE START MODE Non...

Page 9: ... ON even after remote starter shut down resulting in a dead battery Driving Off With the vehicle running under remote control press the UNLOCK button to disarm the system and unlock the doors if remote door locks are installed Enter the vehicle and do the following 1 Turn the ignition key to the IGNITION ON RUN position Do not turn the key to the CRANK position while the engine is running This wil...

Page 10: ...vated the vehicle will not start by remote control or external trigger until the ignition key is turned to the IGNITION ON RUN position Remote Valet Mode This feature will allow you to remotely put your system into Valet Mode by using the transmitter instead of the valet button as above Getting i n t o R e m o t e Valet Mode Hold the UNLOCK and START STOP buttons simultaneously for 3 seconds The P...

Page 11: ...ON RUN position Panic Mode Note Panic mode can only be activated if your installer has adequately configured the horn In an emergency situation you can activate panic mode by pressing and holding the button for 3 seconds If the vehicle is under a remote start the engine will shutdown automatically before setting off the horn You can stop the horn by pressing this will lock your doors or by pressin...

Page 12: ... the parking lights will flash once When the system exits cold weather mode the remote control will beep once and the icon will disappear To verify whether the system is in cold weather mode The icon should appear on your remote display Extended Run Time While the vehicle is running under a remote start pressing and holding the button for more than 3 seconds will reset the run time counter to zero...

Page 13: ...y rearm 1 or 3 minutes after the doors were unlocked unless the ignition key has meanwhile been inserted in the ignition switch To arm the starter kill option in Active or Passive Mode press and hold the LOCK button on the transmitter The parking lights will flash once If remote door locks were installed this will also lock the doors In Passive Mode the system will automatically arm 1 or 3 minutes...

Page 14: ...esel engine the module can be programmed to run the engine for 8 20 or 30 minutes 20 minutes by default Multi car Operation This option allows the owner of two vehicles both equipped with identical systems to control both systems with only one remote transmitter To control the 2nd vehicle simultaneously press the TRUNK button and the button of the function you wish to use Press TRUNK LOCK button s...

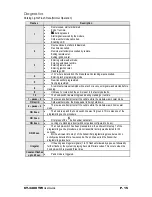
Page 15: ...re was an attempt to start the vehicle while the module was in valet mode ON solid Cold weather mode the brake pedal is being held down 2 pause 2 There was an attempt to start the vehicle while the module was in home valet mode ON 2 sec The hood is up and the hood switch line went to ground This is step one of the programming centre procedure ON 3 sec First press of the button under safe start ON ...

Page 16: ...ories will only be replaced if proven defective in material or workmanship and if when the accessory is returned to the point of purchase the retailer is provided with a copy of the proof of purchase THE WARRANTY IS VOID IF 1 The product has been damaged altered in any way or tampered with without the explicit written consent of an Autostart technician For remote starter modules this includes the ...

Reviews: