- 56 -
4.11
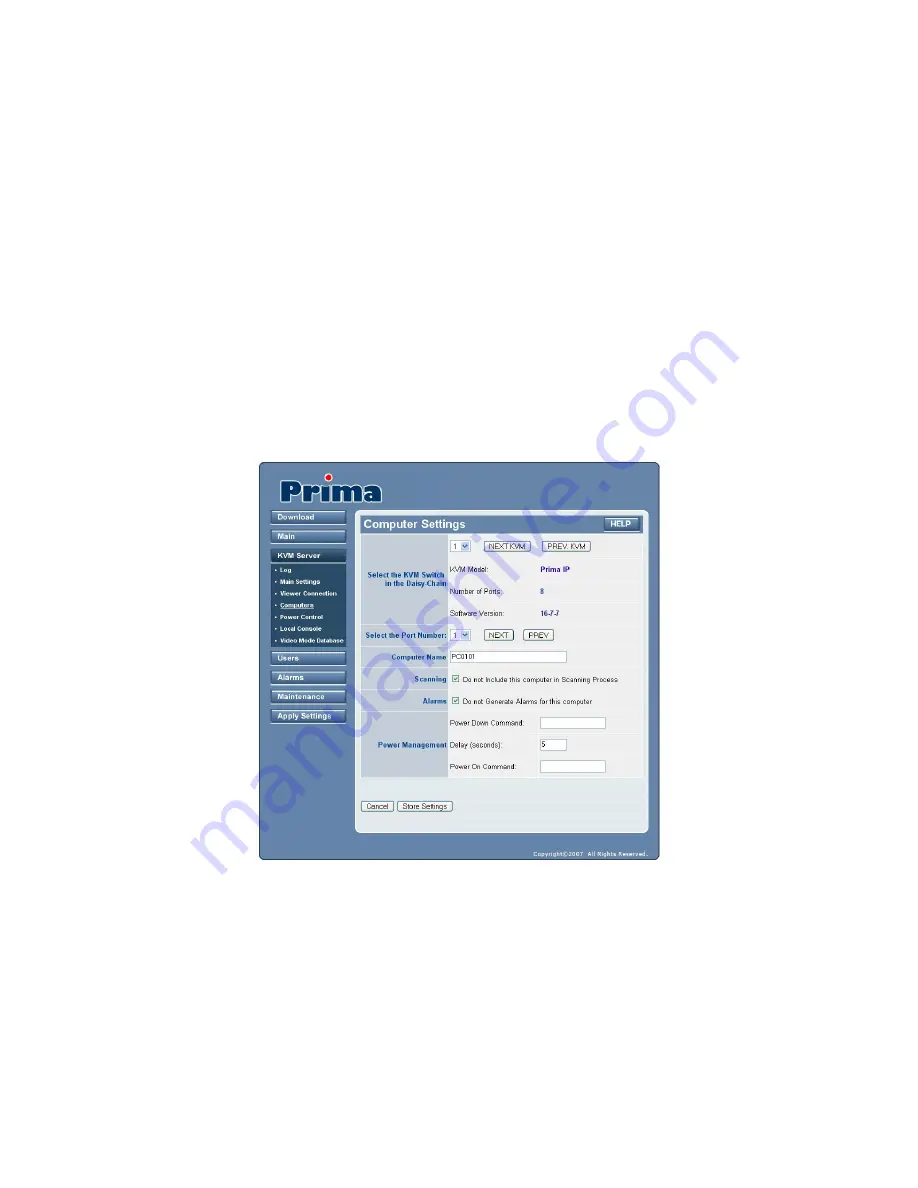
KVM Server/Computers – Port and IP settings
This page permits to provide PRIMA IP with information about all KVM-attached computers. This
information is used by PRIMA IP to do some actions automatically in order to simplify your job:
•
Select a specific KVM Switch in the Daisy-chain and show the information of each, concerning
model name, port number and software version
•
Work with computer names instead of KVM port numbers
•
Generate automatically the KVM switch hot keys to select computers. This allows you to select a
computer with a simple mouse click or by using the computer name
•
Generate automatically (or on request) the power down and power on cycling if a power control unit
is connected
•
Exclude some computers from the auto scanning process
•
Not generate alarms for some computers
After you have made all modifications, click Store Settings to save your settings and then hit Apply
Settings/Restart Servers to validate these new settings.
No change you have made on this page will apply until you hit Apply Settings/Restart Servers!
Select the KVM switch in the Daisy-chain:
The various settings on this page are KVM-switch-specific as
well as KVM-port-specific because a computer is first identified by the KVM Switch and the KVM port it is
attached to. Before configure any port specific settings, you have to choose the KVM switch in the Daisy-
Chain on which you will configure the port-specific settings.
Select the Port Number:
Select the KVM port on which your subsequent settings on this page are directed.
You can use the drop-down combo box as well as use the Previous and the Next button to navigate to a
specific port.
Computer Name:
Enter a character string of 32 characters maximum to identify the computer attached to
the selected port.


