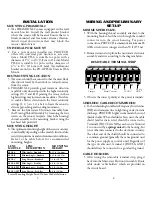
INSTALLATION
MOUNTING PIRAMID XL2
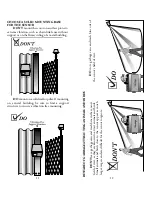
1. The PIRAMID XL2 comes equipped with a wall
mount bracket. Install the wall mount bracket
where the sensor will be located. Ensure that it is
firmly mounted and free from extreme vibration.
Avoid visual obstructions that may block the
sensor’s field of view.
UNIVERSAL POLE MOUNT
2. For a pole mount installation, PROTECH
offers two universal pole mounts as accessory
items. Model PH-4 is suitable for poles with a
diameter of 1
1
/
2
” to 4
1
/
2
”(3.8cm to 11.4cm). Model
PH-4A is suitable for poles with a diameter of
4
1
/
2
” to 8
1
/
2
” (11.4cm to 21.6cm). The wall mount
bracket mounts to the PH-4/PH-4A Universal Pole
Mount.
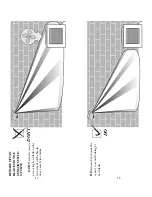
BEST MOUNTING LOCATION
3. The sensor should be mounted so that the most likely
direction of travel by the intruder is toward or away
from the sensor.
4. PIRAMID XL2 provides good transverse detection
capability only when adjusted in the higher sensitivity
settings (10, 9 and 8). Operating the sensor in these
higher settings may increase nuisance alarms. Therefore,
to enable effective detection in the lower sensitivity
settings (1, 2, 3, etc.), it is best to locate the sensor to
detect approaching and receding movement.
5. Remove the Microwave Electronic Assembly from
the Housing/Shroud Assembly by loosening the four
screws on the sensor’s faceplate. Attach the housing/
shroud assembly to the mounting bracket using the
hex head bolt provided.
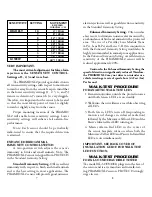
MOUNTING HEIGHT
6. The optimum mounting height of the sensor can vary
considerably depending on the model’s lens module,
security requirement and environmental conditions.
Refer to the table below for recommended
mounting heights.
LENS
MODULE
LENS
DESCRIPTION
MOUNTING
HEIGHT
Sensor Mounting Height Based On Lens Module Selection
3
WIRING AND PRELIMINARY
SET-UP
MINIMUM WIRE SIZE:
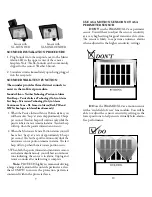
1. With the housing/shroud assembly attached to the
mounting bracket, feed the wire through the conduit
connector into the sensor housing. For power
connections, PROTECH recommends a minimum 18
AWG wire for wire runs greater than 50 ft (15.5m).
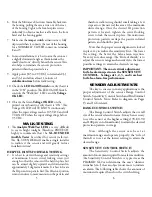
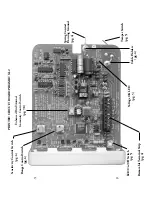
2. Remove terminal strip from the microwave electronic
assembly and wire according to the diagram below.
REMOVABLE TERMINAL STRIP
3. Observe the correct polarity at the power terminals.
SHIELDED CABLE RECOMMENDED
4. For best shielding from Radio Frequency Interference
(RFI) and transients due to lightning or electrostatic
discharge, PROTECH highly recommends the use of
shielded cable. When shielded cable is used, the cable
shield (and/or drain wire) should be connected to
Terminal 1 (HOUS’G GND) at each sensor. Terminal
1 is connected by a
spring contact
to the housing, but
is not otherwise connected to the electronic circuitry.
The other end of the shield should be connected to
a common ground (generally the same ground used
for the power supply or control unit). Regardless of
the type of cable used, Terminal 1 (HOUS’G GND)
should always be connected to a good earth ground.
CABLE HOLDERS
5. After wiring the removable terminal strip, plug it
back into the Microwave Electronic Assembly. Route
cable under “cable holders” which are provided on
the circuit board.
9
8 7
6 5 4 3 2
1
NC
NO
NC
Hous’g
Tamper
Alarm Contacts
GND
+ -
12 VDC
4
LENS-A
Wide Angle – Standard
8-15 ft. / 2.4-4.6m
LENS-B
Medium Angle – Standard
8-12 ft. / 2.4-3.7m
LENS-C
Long Narrow – Standard
7-9 ft. / 2-2.7m
LENS-A-PET Wide Angle – Pet Alley
4-6 ft. / 1.2-2m
LENS-B-PET Medium Angle – Pet Alley
4-6 ft. / 1.2-2m
LENS-C-PET Long Narrow – Pet Alley
4-6 ft. / 1.2-2m


