3. Operating Instruction:
Place the soldering iron /hot air pump in the holder separately. Then connect the plug to the receptacle on the
station and turn clockwise to tighten the plug nut. Check that the power supply is corresponding to the specification
on the type plate and the power switch is on the “OFF” position. Connect the control unit to the power supply and
switch on the power. Then a self-test is carried out in which all display elements are switched on briefly. The
electronic system then switches on automatically to the set temperature and displays this value.
4. The display and temperature setting
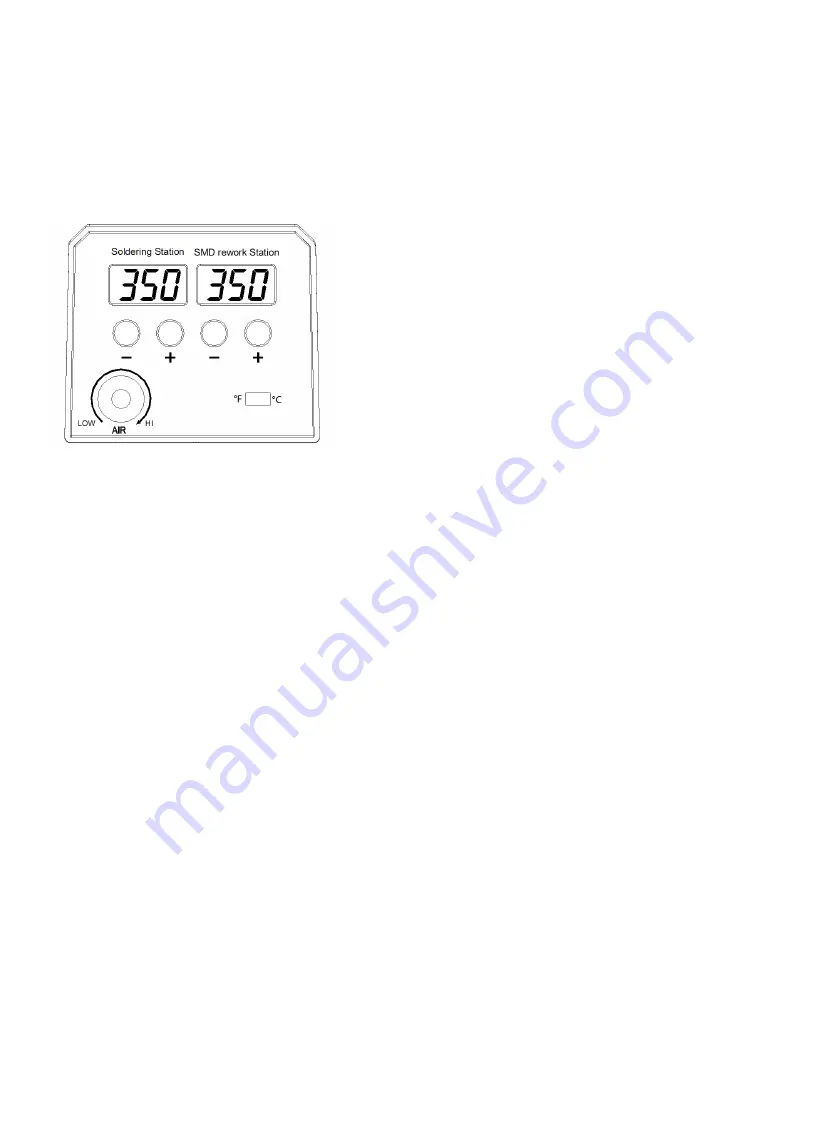
1. Press the button “+” or “- ” to adjust the temperature.
In short press, the set-point will change ±1°C
In long press, the set-point will change quickly and reach your target temperature.
2. " °C/°F" is the transfer button between °C /°F
The default unit is °C, press the" °C /°F " button to make change between °C and °F.
3. The air flow rate can be adjusted by the knob
When you rotate the knob to the LOW side, the air flow slows down;
When you rotate the knob to the HI side, the air flow goes up;
4. This item has sleep function.
When you put the air pump on the racket, the item will stop heating,
And the display shows “SLP”( means SLEEP) , when you pick up the air pump , the item will immediately get back
to the set temperature.
5. Please note: “EEE” in soldering iron OSD means the soldering iron does not heat, and not at work.
5. Maintenance
Before further use, safety devices or slightly damaged parts must be carefully checked for error-free and intended
operation. Inspect moving parts for error-free operation and that they don’t bind, or whether any parts are
damaged. Damaged safety devices and parts must be repaired or replaced by a qualified technician, so long as
nothing else is indicated in the operation manual. Use only accessories or attachments which are listed in the
operation manual. Use of other tools and other accessories can lead to a danger of injury.


