AVVERTENZE E PRECAUZIONI PER LA SICUREZZA E L’USO
Il presente manuale è rivolto esclusivamente a personale professionalmente competente.
Leggere attentamente prima di procedere con l’installazione: un’errata installazione può essere fonte di pericolo.
Conservare con cura questo manuale per interventi futuri di manutenzione.
Prima di iniziare l’installazione verificare l’integrità del prodotto.
Verificare che la superficie prescelta per l’installazione sia solida e possa garantire un fissaggio stabile.
Prima di alimentare il ricevitore accertarsi che la tensione di ingresso sia uguale
alla tensione di uscita della morsettiera sulla centrale elettronica.
Prima di eseguire interventi di installazione o manutenzione sull’impianto
disconnettere sempre il dispositivo dalla rete di alimentazione.
DESCRIZIONE PRODOTTO E DESTINAZIONE D’USO
Questo prodotto è un dispositivo di ricezione radio destinato agli impianti di automazione per cancelli, portoni, porte
garage, barriere stradali o similari.
Qualsiasi altro uso diverso dal quello descritto è da considerarsi improprio e vietato.
Il ricevitore RX4331 è compatibile con tutti radiocomandi Proteco frequenza 433.92 MHz a
CODICE FISSO
o a
ROLLING CODE
.
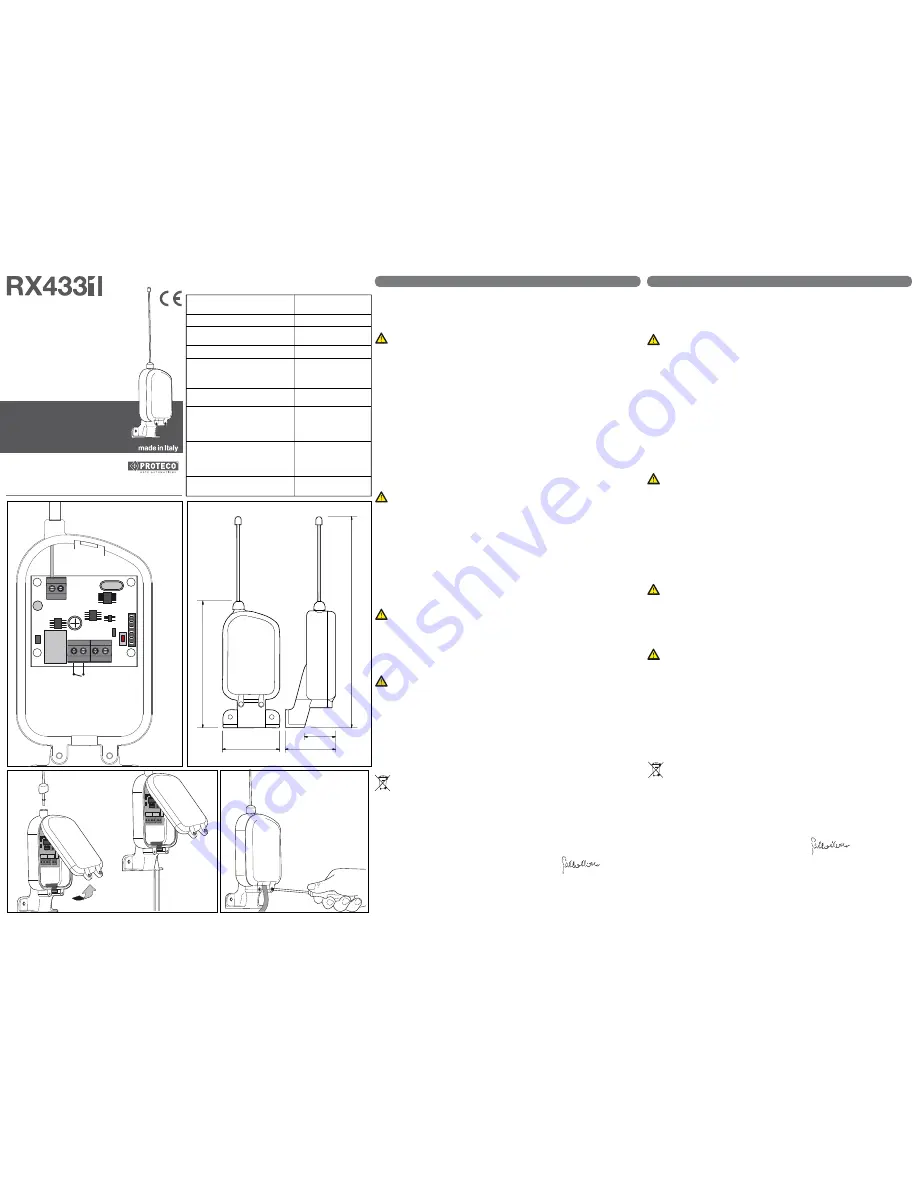
COMPONENTI SCHEDA
P1
= Pulsante PROGRAMMAZIONE / CANCELLAZIONE
RX
= Modulo RICEVITORE
JP1
= Morsettiera ANTENNA (calza - antenna)
JP2
= Morsettiera
1°
CANALE
JP3
= Morsettiera ALIMENTAZIONE
DL1
= Led di SEGNALAZIONE
M1
= EEPROM
POSIZIONAMENTO SCHEDA RX4331 NEL CONTENITORE
Mantenere una distanza minima di 5m tra un ricevitore e l'altro.
Installare preferibilmente in alto e lontano da struttutre in metallo o in cemento armato.
a)
Sollevare e togliere il coperchio (
dettaglio A
Fig. 2
).
b)
Inserire l’antenna nell’apposito foro facendo attenzione che sullo stelo sia posizionato il tappino e la guarnizione
come da
dettaglio B
(
Fig. 2
).
c)
Assicurarsi che lo stelo sia inserito a fondo nel morsetto corrispondente. Avvitare la vite.
d)
Inserire il cavo nell’apposito passacavo, avendolo in precedenza forato con una matita,
dettaglio C
(
Fig. 2
).
e)
Dopo aver eseguito i collegamenti vedi
Fig. 1
e provveduto alla memorizzazione dei telecomandi vedi
“PROGRAMMAZIONE” chiudere il coperchio e fissarlo con le due viti in dotazione (
Fig. 3
).
PROGRAMMAZIONE
Il ricevitore è predisposto per essere utilizzato con trasmettitori radio a
CODICE FISSO
o
ROLLING CODE
433,92 Mhz.
È necessario individuare la tipologia del trasmettitore da utilizzare prima di iniziare la procedura di MEMORIZZAZIONE.
Una volta memorizzato il primo trasmettitore il ricevitore funzionerà solo con trasmettitori di quel tipo:
CODICE FISSO se il primo trasmettitore memorizzato è a codice fisso, o ROLLIG CODE se il primo trasmettitore
memorizzato è rollig code.
SENZA POSSIBILITÀ DI RESET.
AUTOAPPRENDIMENTO CODICI
a)
Premere il pulsante
P1
, il
Led
DL1
lampeggia, rilasciare il pulsante.
b)
Premere per 2/3 sec. il pulsante
P1
, il Led si
accende a luce fissa,
r
ilasciare il pulsante.
c)
Premere e mantenere premuto il pulsante
P1
e contemporaneamente inviare il codice da memorizzare con il
trasmettitore.
Il
Led si spegne
.
Il trasmettitore è stato memorizzato.
Nel caso di codice già inserito o memoria esaurita il LED LAMPEGGIA
.
d)
Rilasciare il pulsante
P1
il
Led si ACCENDE
.
N.B.:
Ripetere l’operazione dal
punto c)
per memorizzare eventuali altri trasmettitori o attendere 10 sec. dopodichè il
ricevitore uscirà automaticamente dalla programmazione.
CANCELLAZIONE DEI CODICI
N.B.: È POSSIBILE SOLO LA CANCELLAZIONE TOTALE DI TUTTI I CODICI MEMORIZZATI
Premere e mantenere premuto il pulsante
P1
,
il
Led si accende a luce fissa
per circa 10 secondi .
Il
Led si spegne
,
tutti i codici sono stati cancellati.
SMALTIMENTO
Non disperdere nell’ambiente.
Alcuni componenti elettronici potrebbero contenere sostanze inquinanti.
Smaltire i materiali attraverso i centri di raccolta previsti e nel rispetto delle norme in vigore a livello locale.
DICHIARAZIONE DI CONFORMITÀ CE
Il fabbricante PROTECO Srl con sede in via Neive77, 12050 Castagnito, Italy dichiara i Ricevitori della serie RX4331
sono conformi ai requisiti essenziali previsti dalla direttiva EMC 2014/30/EU.
Castagnito 01.09.2017
Marco Gallo
Amministratore Delegat
Manuale per l’installazione
Installation manual
Notice d’installation et utilisation
Manual de instalación
Manual de instalação
Bedienungsanleitung
Ricevitore radio monocanale
ad autoapprendimento 433,92 MHz
One-channel self-learning Radio Receiver,
frequency 433.92 MHz
Récepteur radio 1-canal à
auto-apprentissage, fréquence 433.92Mhz
Receptor radio para 1 canal,
frecuencia 433,92 MHz
Receptor rádio 1 canal,
frequência 433.92 MHz
1 kanäliger selbst-lernender
Funkempfänger, Frequenz 433.92 Mhz
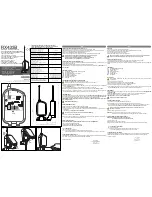
Alimentazione - Power supply
Alimentation - Alimentación
Alimentação - Versorgung
Frequenza - Radio frequency - Fréquence
Frecuencia - Frequência - Frequenz
Assorbimento - Stand-by absorption
Consommation à vide - Absorción
Consumo - Stand-by Absorption
Codici - Encoding - Décodage
Codificación - Tipo de código - Encoding
n° max. codici - Radio codes storage (No.)
n° max némoire codes
Capacidad (No.)
Memorização de códigos TX (No.)
Kodeanzahl
n° Canali - Radio channels (No.)
n° Canaux radio - Canales (No.)
Canais (No.) - Kanäle
Temperatura d’esercizio
Working temperature
Tem. de fonctionnement
Temperatura de servicio
Temperatura de funcionamento
Betriebstemperatur
Contatto relè
Relays contact
Contact relais
Contactos Relé
Contactos Relé
Relays Kontakte
Portata contatto - Relays capacity
Contacts relais - Capacidad Relé
Capacidade Relé - Relays Fähigkeit
12 - 24Vac/dc
433,92 Mhz
30 mA
12-24 bit / Rollig-code
64
1
-20° /+55° C
Monostabile (impulso)
Monostable (pulse working)
Monostable (impulsion)
monostable (tipo de pulso)
Funcionamento mono-estável
monostable (Impuls)
max 1A, 30V
CARATTERISTICHE TECNICHE -TECHNICAL SPECIFICATIONS
CARACTERISTQUES TECHNIQUES - ESPECIFICACIONES TÉCNICAS
CARACTÉRISTICAS TÉCNICAS - TECHNISCHE DATEN
0.1_17
CH1
English
279 mm
31 mm
53,55 mm
59,5 mm
135 mm
Italiano
P1 P2
SW1
DL1
JP4
JP3
JP2
JP1
RL1
RL2
RL3
RL4
Fig.1
Fig.2
Fig.3
A
B
P1 P2
SW1
DL1
JP4
JP3
JP2
JP1
RL1
RL2
RL3
RL4
C
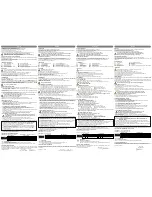
WARNINGS
This manual is only for professional or qualified installers.
Improper installation may cause serious damage, follow all installation instructions carefully.
Keep this manual for future consultation and maintenance.
Before installing, check the integrity of the product.
Make sure the chosen location is suitable for a stable fixing.
Before connecting make sure the receiver input voltage and the control unit’s output voltage match.
Always cut off the power supply before performing any maintenance on the system.
DESCRIPTION AND INTENDED USE
This receiver is intended for use on electric gates, garage doors, park barriers and similar systems.
Any installation and/or use other than that specified in this manual is forbidden.
RX4331 radio receiver is can work with all PROTECO brand remote controls 4334.92MHz with fixed or rolling-code
system.
COMPONENTS
P1
= PROGRAMMING/DELETING key
RX
= RECEIVING module
JP1
= AERIAL plugs
JP2
= Radio channel 1 plug
JP3
= POWER input
DL1
= SIGNALING Led
M1
= EEMPROM
INSTALLATION
Keep a minimum distance of 5m from other radio receiving units. Install on the top and away from metal or
concrete bodies.
a)
Lift up and remove the cover (
Fig. 2-A
).
b)
Insert the aerial with seal and cap as shown in the picture (
Fig. 2-B
).
c)
Make sure the stem is well placed in the corresponding plug and fasten it.
d)
Pierce the cable-seal and pass the cable through it (
Fig. 2-C
).
e)
After completing the wiring according to the scheme (Fig.1) and after storing the remote controls, according to the
“PROGRAMMING SECTION”, close the cover and fasten with the provided screws (Fig. 3).
PROGRAMMING
RX4331 receiver can work with PROTECO’s remote controls frequency 433.92 MHz featuring
FIXED RADIO CODE
or
ROLLING CODE
.
BEFORE PROGRAMMING make sure of what type of remote control you want to use with the receiver.
Once the first remote control is stored, the receiver will only accept that kind of code:
FIXED CODE if this is the one stored or ROLLING CODE
.
There is NO possibility to RESET after this.
STORING A REMOTE CONTROL
a)
Press
P1
on the receiver,
DL1
light flashes. Release the key.
b)
Press and hold
P1
key for 2/3 seconds until
DL1
light stays on and then release the key.
c)
Press again and hold
P1
key of the receiver and at the same time press the key of the remote control to store it.
DL1
light turns off :
the remote control’s radio code has been successfully stored on the receiver.
If the same radio code is already stored into the receiver or if storage memory is full,
DL1 flashes continuously.
d)
Release now
P1
key,
DL1
light turns on again.
WARNING:
To store more remote controls, please repeat the a.m. procedure from step c).
Otherwise, the receiver unit will automatically exit from programming mode within 10 seconds.
DELETING REMOTE CONTROLS FROM STORAGE
WARNING! It is not possible to delete a single radio code.
The deleting procedure will cancel all remotes stored.
Press and hold on key
P1
.
DL1
light turns on and stays still for 10 seconds.
DL1
light turns off, all remote controls previously stored have now been deleted from the receiver’s memory.
DISPOSING OF THE PRODUCT
Dispose responsibly.
Dispose of the packaging and the device properly at the end of its life cycle,
following the applicable laws in the country where the device is installed.
CE DECLARATION OF CONFORMITY
The manufacturer PROTECO Srl declares that RX4331 radio receiver units comply to the essential requirements
of RED 2014/53/CE Directive as well as EMC 2014/30/EU for the use the products have been designed for.
Castagnito, 01.09.2017
Marco
Gallo
C.E.O.
P1
JP2
JP1
RL1
1 2 3 4
MOD. RX
J1
JP3
+ -
~ ~
1°CH
M1
DL1
ANT.
www.proteco.net
PROTECO S.r.l.
Via Neive, 77 - 12050 Castagnito (CN) ITALY
Tel. +39 0173 210111 - Fax +39 0173 210199 - info@proteco.net


