9
STEP 6
STEP 5
1.
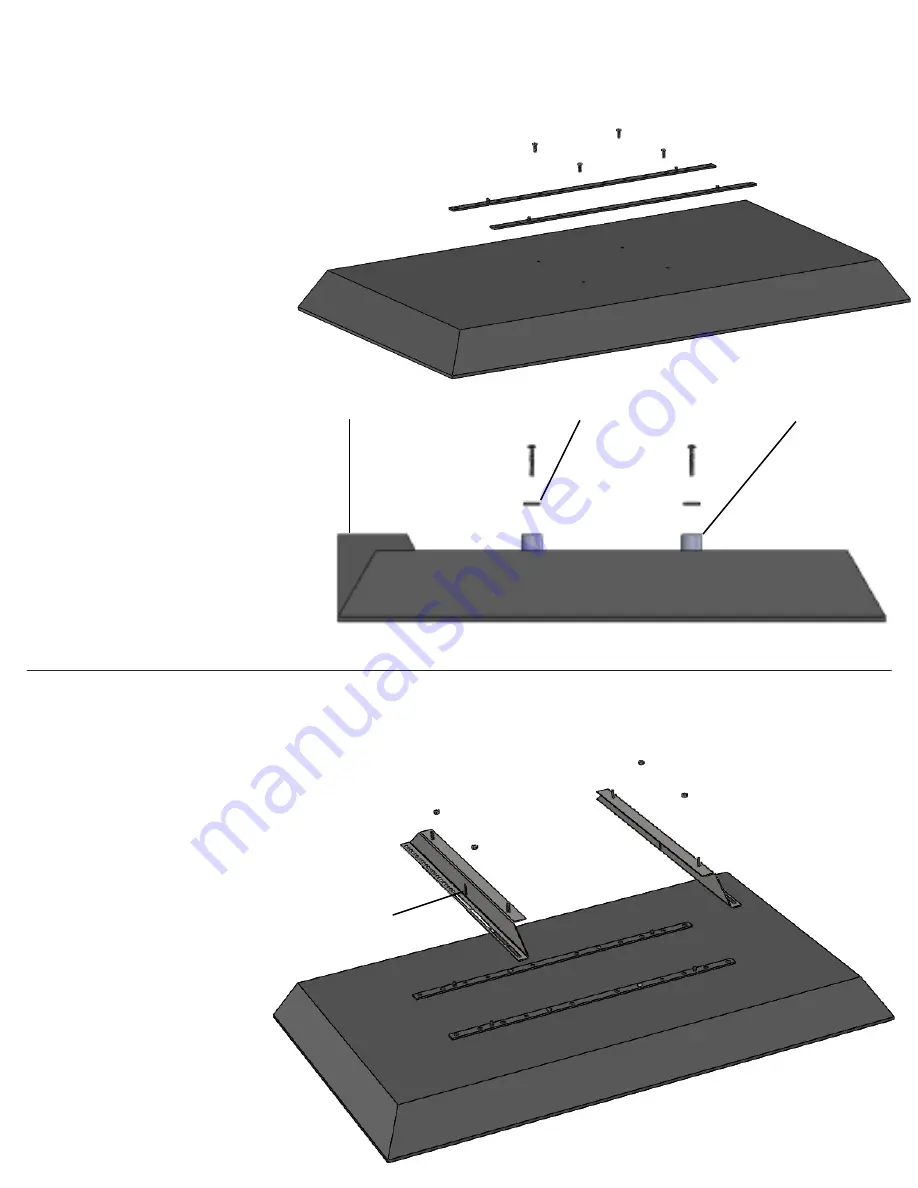
1. Place the horizontal brackets on the back of the TV. Make sure you are centering the bracket left to right on
your mounting
holes
. I.E.
,
if you are on the 3rd hole from right
,
make sure you are on the 3rd hole from left.
NOTE: you may also use the
spacers to move your TV closer to
the front panel if your display is
thin. Be sure to check your TV
depth and amount spaced to
ensure it will still fit within our max
interior depth.
1.
Install the vertical brackets by
aligning the center slot on bracket
with the vertical center of your TV.
This is the mark you made in step
4. Be sure the brackets are
installed like the diagram with the
threaded studs
towards the
middle
of your monitor. You may
need to slightly adjust the vertical
bracket up or down from exact
center which is OK. Place the
6mm washers and 6mm nuts on
the threaded studs from
horizontal bracket and tighten
using a 10mm socket.
2.
Install the provided screws that
fit your TV using a
Phillips head
screwdriver.
Use
the provided
washers if installing
the 4mm or
5mm screws.
NOTE: If your display has a raised
area on the mounting side
,
such
as a speaker bar
,
you will install
the 10, 20 or 30mm spacers under
the horizontal bracket and use the
longer screws to raise the
horizontal bracket to the same
plain as the raised area on your
monitor.
(See Ref1 to right)
Raised Area on back of TV
Horizontal Bracket
10, 20, or 30mm Spacer
Center slot
(Ref1)


