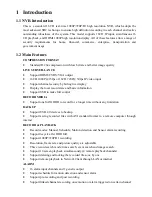
Step 3: Choose the searched devices and c
lick “OK” button to
add these devices. The added
cameras will be listed in the device management interface.
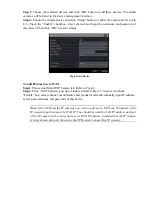
Step 4: Choose the camera device and cl
ick “Setup” button to enable th
e camera. Refer to Fig
4-
3. Check the “
E
nable” checkbox
, select channel and input the username and password of
this device. Then click “OK” to save settings.
Fig 4-3 Add Device
To add IP cameras via WAN:
Step 1: Please enter Menu
IP Camera tab. Refer to Fig 4-1.
Step 2: Click
“
Add
”
button to pop up a window similar to Fig 4-3. You need to check
“Enable”
box, select channel, manufacturer and product model and manually input IP address,
server port, username and password of this device.
Note: If the NVR and the IP cameras you want to add are in WAN, the IP address of the
IP camera input here must be WAN IP. You should forward the LAN IP address and port
of the IP camera in the router and use its WAN IP address, provided that the IP camera
is in local area network, otherwise, the NVR cannot connect this IP camera.


