background image

12 

Description of point coordination and distributed coordination wireless network


Notes:   
1. In this section, “cluster” denotes an association of a cradle and a number of handheld units. 
2. In this section,  “RF”  is the abbreviation for “radio frequency”. 


The  scanner  offers  two  kinds  of  wireless  network  topology:  point  coordination  and  distributed 
coordination.   
Point  coordination  topology:  This  network  topology  employs  TDM/FDM  integrated  technique.   
Different cluster operates in different frequency, suitable for a place where mass data transmission 
at  short  intervals  is  in  need.    This  network  topology  utilizes  a  token  communication  scheme.   
When working as a cluster, the cradle talks to the associated handheld units one by one.    Only one 
handheld unit can transmit data to the cradle at a time.    One single cluster can support up to 16 
handheld units.    Warning message will be given when the radio communication is out of working 
range.    Due to an operating cradle occupies one selected frequency channel all the time, thus the 
radio signal generated does interfere the nearby instruments which adapt the same frequency, such 
as a remote controller of a garage door. 
Distributed  coordination  topology:  This  network  topology  employs  TDM  technique.    Different 
cluster can operate either in the same frequency or in different frequency.    One single cluster can 
support up to 16 handheld units.    In the same working area it supports multiple clusters and up to 
2000  handheld  units  operating  simultaneously.    An  operating  cradle  only  occupy  the  selected 
frequency  channel  during  data  transmitting,  so  it  will  not  interfere  the  nearby  instruments  which 
adapt the same frequency. 


Switch between point coordination topology and distributed coordination topology can be done by 
scanning  corresponding  configuration  barcode.    Note  that  both  cradle  and  associated  handheld 
units must be configured. 


The handheld unit should be placed in the cradle for power charging.    It is suggested to prepare an 
individual cradle for power charging purpose if working as a cluster.


1. Sketch map of point coordination operating mode 

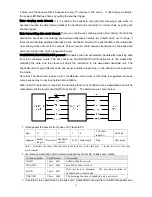
The  scanner  utilizes  430.5 ~ 432.0MHz,  433.05 ~ 434.79MHz  RF  wireless  communication  with 
LR-433-WPAN  wireless  communication  protocol.    LR-433-WPAN  protocol  first  time  introduces 
self-adaptive frequency hopping technique.    With this new protocol, a cordless scanner is able to pick 
up  a  high-quality  RF  channel  from  a  cluster  of  channels  in  terms  of  consolidated  communication.   
LR-433-WPAN protocol supports up to 256 handheld units (16 handheld-units/cradle x 16 cradle = 256) 
within the same effective communication range.    A maximum circle of poll time for one cradle with 16 
handheld units is 1 second, while the poll time for one cradle with one handheld unit is less than 0.1 
second. 
 

Summary of Contents for is900

Page 1: ...User Manual ...

Page 2: ......

Page 3: ...condensation does form wait until it dries completely before using the scanner 10 The scanner offers two kinds of wireless network topology point coordination and distributed coordination The default setting of wireless network topology is point coordination To change the wireless network topology you must change the setting of both handheld unit and cradle 11 The scanners within same working area...

Page 4: ...ii a higher location generally more than 1 meter above the ground If working outdoor the higher location the better ...

Page 5: ...id leakage heat emission explosion and fire Never dispose of the battery by incinerating it or otherwise expose it to heat Doing so creates the danger of battery heat emission explosion and fire Never allow the positive and negative terminals of the battery to become connected shorted by metal Doing so create the danger of battery heat emission explosion and fire Never transport or store the batte...

Page 6: ...e danger of fire and electrical shock Laser beam Never look directly into the laser beam Doing so can cause serious eye damage Lithium ion battery Do not put a battery in microwave ovens or pressure cookers Doing so may cause the battery to overheat explode or burst into flames Do not use a battery that smells strange is overheating is a strange color or is a strange shape Doing so may cause the b...

Page 7: ... pull on the power cord Doing so creates the danger of fire and electrical shock Use only the AC DC adaptor and charger specified in this manual Use of other AC DC adaptor models or chargers creates the danger of fire and electrical shock Should the power cord ever become severely damaged contact your original dealer Use of a damaged electrical cord creates the danger of fire and electrical shock ...

Page 8: ...ouch the mirror broken Doing so can cause personal injury Lithium ion battery Never leave the battery in an area expose to direct sunlight in a car parked in direct sunlight or any other very hot area Doing so creates the danger of heat emission and fire as well as deterioration of battery performance and shortening of its service life Do not use the battery in areas where static electricity is be...

Page 9: ...sure to unplug the power cord from the wall outlet before moving the Basic Unit Failure to do so can result in damage to the power cord caused by pulling it which creates the danger of fire and electrical shock Be sure to unplug the power cord from the wall outlet before cleaning the Basic Unit and charger Be sure to turn the power off and unplug the power cord after use Unplug the power cord from...

Page 10: ...viii ...

Page 11: ...ating mode 13 Point coordination wireless communication setting 14 1 Point coordination wireless communication setting for handheld unit 14 2 Point coordination wireless communication setting for cradle 19 Distributed coordination wireless communication setting 21 1 Cluster establishment example 21 2 Distributed coordination wireless communication setting for handheld unit 23 3 Distributed coordin...

Page 12: ...nance 63 G1 G6 FN1 substitution string setting 65 G1 G4 string position Code ID position 68 String transmission 69 Test Chart 71 Test Chart Continued 72 Troubleshooting 73 Maintenance 74 ASCII table 75 Barcode representing non printable character 76 Return default parameters 77 Display firmware version radio communication setting 78 Quick setting to point or distributed coordination wireless netwo...

Page 13: ...held Programming method Manual reading special barcode Program upgrade Using RSM software while a cradle unit is required Refer to RSM user manual Temperature 0 to 50 C 32 to 120 F Operating 40 to 60 C 40 to 140 F Storage Humidity 5 to 95 non condensing Input voltage 4 75V 6 5 V DC Operating current 12mA standby 90mA scanning 150mA transmitting Standby time Over 7 days Read barcode per charge Over...

Page 14: ... Length Width Depth 21 3 9 7 7 5cm Weight 189g without cable Indicator Visual Case material ABS Programming method Manual reading special barcode Program upgrade PC online using RSM software Refer to RSM user manual Temperature 0 to 50 C 32 to 120 F Operating 40 to 60 C 40 to 140 F Storage Humidity 5 to 95 non condensing Drop specifications Unit functions normally after repeated 1 2m 3 9ft drops t...

Page 15: ...le connector pin outs descriptions Pin RS232 Keyboard PS2 1 Power 5V Power 5V 2 3 3V for interface auto selection purpose Ground for interface auto selection purpose 3 Ground Ground 4 Power 5V Reserved 5 CTS KeyClock 6 RxD KeyData 7 Reserved TermClock 8 Reserved TermData 9 TxD Reserved 10 RTS Reserved Note Voltage level of all RS232 Pin outs RxD TxD CTS and RTS is 0V for logic low and 3 3V for log...

Page 16: ... Im Industrial 2 of 5 4 H Im Matrix 2 of 5 6 X Im Codabar 4 N Fm Code 128 1 K Cm UCC EAN 128 1 K Cm ISBT 128 1 K Cm Code 93 1 L Gm Code 11 4 V MSI Plessey 4 O Mm UK Plessey 1 U Mm China Post 11 2 T Im China Finance 10 2 Y GS1 DataBar 16 2 R em GS1 DataBar Truncated3 16 2 R em GS1 DataBar Limited 16 2 R em GS1 DataBar Expanded 1 R em Note 1 The settings for ISBN ISSN and EAN 13 must be the same 2 F...

Page 17: ...5 Decode zone High density series Long range series ...

Page 18: ...6 Dimensions ...

Page 19: ...munication Charge socket Power button Sound hole Red LED Not successful transmission Blue LED Power Green LED Setting Cradle B button Reserved S button Upgrade Reset P button USB Emulate Red LED Initiation failure Blue LED Power Green LED Data in Radio frequency hopping indicator Antenna ...

Page 20: ...f handheld unit Press the power button see Parts of the scanner for two seconds Charge battery 1 Please charge the battery before the first time of use The charge indicator red LED on the handheld unit is turned on when the charging is in process When the charging process completes the red LED is turned off 2 Charging time 8 hours for fully charged ...

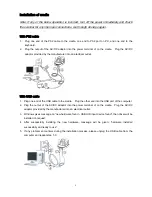
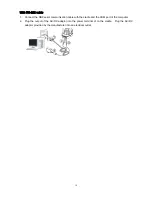
Page 21: ...rical outlet With USB cable 1 Plug one end of the USB cable to the cradle Plug the other end into the USB port of the computer 2 Plug the output of the AC DC adaptor into the power terminal of on the cradle Plug the AC DC adaptor provided by the manufacturer into an electrical outlet 3 Windows gives message on new hardware found USB HID input device found then driver will be installed on request 4...

Page 22: ...DB9 serial communication cable with the cradle and the COM port of the computer 2 Plug the output of the AC DC adaptor into the power terminal of on the cradle Plug the AC DC adaptor provided by the manufacturer into an electrical outlet ...

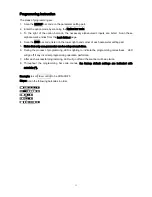
Page 23: ...the lower right hand corner of each parameter setting part 5 Notes that only one parameter can be setup at each time 6 During the process of programming LED is lighting to indicate the programming correctness LED will go off if any incorrect programming operation performed 7 After each successful programming LED will go off and the scanner will beep twice 8 Throughout the programming bar code menu...

Page 24: ...e frequency or in different frequency One single cluster can support up to 16 handheld units In the same working area it supports multiple clusters and up to 2000 handheld units operating simultaneously An operating cradle only occupy the selected frequency channel during data transmitting so it will not interfere the nearby instruments which adapt the same frequency Switch between point coordinat...

Page 25: ...series of cordless barcode scanner is working at 430MHz 432MHz 433 05MHz 434 79MHz and is covered by a patent of wireless communication method named LR 433 WPAN wireless communication protocol Single cluster single handheld unit Single cluster multiple handheld units Multiple clusters ...

Page 26: ...e data when it loses its connection to a remote device for example when a user holding the handheld unit walks out of range Data transmission is triggered by reestablishing the connection with the cradle for example when a user holding the handheld unit walks back into range Standard batch The handheld unit starts storing barcode data after EBM Enter Batch Mode is scanned Data transmission is trig...

Page 27: ... the instruction to the associated handheld unit The handheld unit will give different audio and visual indication depending on the instruction received from the cradle Note that 1 handheld unit is paired with 1 cradle base unit to work in this mode is suggested because some pauses may be obvious before data validation When a LOCK instruction is received the decoding function of handheld unit is d...

Page 28: ...eps with short duration 50ms Red LED off green LED on INVALID Return to normal working state Two beeps with long duration 200ms Red LED on green LED on LOCK Waiting for UNLOCK command packet from the base unit cradle no further operation allowed e g scanning Two beeps with long duration 200ms Red LED on green LED flashes UNLOCK Return to normal working state Two beeps with short duration 50ms Red ...

Page 29: ...ble Out of range batch Standard batch 00 01 02 Beep on reconnect attempt Disable Enable 00 01 Radio connection checking interval 00 ffH second 00 ffH 03 Save data at low battery or power off Disable Enable 00 01 Low battery indicator Disable Enable 00 01 Enter sleeping mode interval 00 ffH minute 00 ffH 0f Enter transmitting data mode interval 00 ffH minute 00 ffH 0f VALID INVALID LOCK UNLOCK prot...

Page 30: ...id only when the cradle is in upgrade ready mode Cradle entering upgrade ready mode Keep pressing the S button on the cradle until the blue LED is flashing Then three LEDs will all be turned ON this indicates the cradle being upgrade ready mode ...

Page 31: ...radle 16 different handheld unit IDs are offered Example 1 to set a cradle to work on channel 2 and to bind the first handheld unit ID as 15 Steps Scan the following barcodes in order Example 2 to set a cradle to work on channel 3 and communicate with the handheld units with ID 5 and 15 The first step is to bind the first handheld unit ID as 5 then recruit a next handheld unit ID as 15 Steps 1 Kee...

Page 32: ...1 16 Radio power level for cradle 10dbm 7dbm 5dbm 0dbm 5dbm 10dbm 15dbm 01 02 03 04 05 06 07 Frequency hopping Disable Reserved 00 END Show channel information of Cradle Note The settings indicated with are valid only when the cradle is in upgrade ready mode Cradle entering upgrade ready mode Keep pressing the S button on the cradle until the blue LED is flashing Then three LEDs will all be turned...

Page 33: ...an the optional barcode 0700 and 0800 to change the network topology Step 2 0 Scans the following barcode to return to default parameters This step can be omitted Step 3 0 Scan the following barcode to start configuring handheld unit Step 3 1 Scan the following barcode to assign an address to a handheld unit Step 3 2 Scan four digits as an address All handheld units used in the same area must have...

Page 34: ...tep 5 0 Please refer to instruction in previous section to pair the cradle with the first handheld unit Step 6 0 Repeat steps 3 0 3 3 to set radio address of the second handheld unit Step 7 0 Scan JOIN barcode to pair the second handheld unit with the cradle The blue LED on the handheld unit will blink to indicate that the handheld unit is ready to be positioned onto the cradle Step 7 1 Firmly pos...

Page 35: ...addresses for handheld unit Note that all scanners used in the same area must have different addresses Radio power level for handheld unit By selecting you can change the radio frequency power level for handheld unit Interval for radio communication An unsuccessful transmission is verified while the handheld unit has not received data beyond the interval If a RS232 is used this value should be set...

Page 36: ...02 03 04 05 06 07 Interval for radio communication 02 20 second 02 20 02 Inform the result of wired transmission for handheld unit Disable Enable 00 01 End of setup Bind Join Show channel information of handheld unit Note The settings indicated with are valid only when the cradle is in upgrade ready mode Cradle entering upgrade ready mode Keep pressing the S button on the cradle until the blue LED...

Page 37: ...rcode Options Value Wireless network topology for cradle Point coordination Distributed coordination 00 01 Radio power level for cradle 10dbm 7dbm 5dbm 0dbm 5dbm 10dbm 15dbm 01 02 03 04 05 06 07 End of setup Displaying wireless communication result for cradle Note The settings indicated with are valid only when the cradle is in upgrade ready mode Cradle entering upgrade ready mode Keep pressing th...

Page 38: ...26 Scanning When the scanner is scanning ensure the scan line crosses every bar and space of the symbol RIGHT WRONG ...

Page 39: ...C during power on Inter character delay This delay is inserted after each data character transmitted Inter byte delay This delay is inserted after each byte transmitted Normally a character is comprised of three or above bytes Block trans delay It is a delay timer between barcode data output This feature is used to transfer continually with shorter barcode data Caps Lock reversion By setting enabl...

Page 40: ... 00 01 02 03 04 05 06 07 08 09 10 11 Clock period 60us 70us 80us 90us 100us 200us 00 01 02 03 04 05 Delay after compound key 0ms 10ms 20ms 40ms 80ms 00 01 02 03 04 Numeric key Alphabetic key Numeric keypad Alt keypad 00 01 02 Power on simulation Disable Enable 00 01 Inter character delay 0ms 5ms 10ms 20ms 40ms 80ms 00 01 02 03 04 05 Inter byte delay 1ms 2ms 4ms 8ms 00 01 02 03 Caps Lock reversion ...

Page 41: ...29 SETUP Option bar code Option Alpha entry Caps Lock override Disable Enable 00 01 END ...

Page 42: ...RTS the scanner can be set to match the Serial Host RTS line XON XOFF An XOFF character turns the scanner transmission off until the scanner receives an XON character ACK NAK After transmitting data the scanner expects either an ACK acknowledge or NAK not acknowledge response from the host When a NAK is received the scanner transmits the same data again and waits for either an ACK or NAK After thr...

Page 43: ... ACK NAK 00 01 02 03 04 Inter character delay 0ms 5ms 10ms 20ms 40ms 80ms 00 01 02 03 04 05 Reserved Response delay 00 99 100ms 00 99 00 Baud rate 300 600 1200 2400 4800 9600 19200 38400 57600 115200 00 01 02 03 04 05 06 07 08 09 Parity None Odd Even 00 01 02 Data bit 8 bits 7 bits 00 01 Stop bit One bit Two bits 00 01 END ...

Page 44: ... the associated CD and on the manufacturer s website A Windows based software COM_Text is recommended to display the barcode data in text format COM_Text emulates some kind of serial key typing Note when changing USB Device Types the scanner automatically restarts Simple COM Port Emulation Please contact the manufacturer for the instruction Keyboard layout Refer to Keyboard layout of Keyboard wedg...

Page 45: ...ual COM Simple COM Port Emulation 00 01 02 03 Keyboard layout USA Turkish F Turkish Q French Italian Spanish Slovak Denmark Japanese German Belgian Russian 00 01 02 03 04 05 06 07 08 09 10 11 Host comm port speed 0 8 0 highest 8 lowest 00 08 02 Numeric key Alphabetic key Numeric keypad Alt keypad 00 01 02 END ...

Page 46: ...me decoded data to confirm a valid reading Global Max Min code length These two lengths are defined as the valid range of decoded barcode data length Make sure that the minimum length setting is no greater than the maximum length setting or otherwise the labels of the symbol will not be readable In particular the same value can be set for both minimum and maximum reading length to force the fixed ...

Page 47: ...omentary Alternate Continue Timeout off 00 01 02 03 04 Standby duration 01 99 second 01 99 04 Same barcode delay time 00 FF16 50ms 00 FF16 08 Double confirm 00 09 00 no 00 09 00 Global max code length 04 99 04 99 99 Global min code length 01 99 01 99 04 Global G1 G6 string selection 00 66 00 66 00 Element amendment Disable Enable 00 01 Printable character only Disable Enable 00 01 Decoder optimiza...

Page 48: ...ion is adjustable Beep tone duration This parameter can be adjusted for a good reading upon favorite usage Volume of beeper This parameter can be adjusted for different level of the volume of the beeper Example Visual and audio indication of handheld unit for RF transmission Successful Transmission Audio Beeper Red LED on handheld unit Yes None Off No Three beeps On SETUP Option bar code Option Al...

Page 49: ...Refer to Global insertion group selection of the chapter of Hand held scan some global settings Supplement digits The Supplement digits barcode is the supplemental 2 or 5 characters Format System character Data digits 10 digits Check digit Supplement digits 2 or 5 Truncation Expansion Truncate leading zeros The leading 0 digits of UPC A data characters can be truncated when the feature is enabled ...

Page 50: ...heck digit trans Disable Enable 00 01 Code ID setting 00 FF16 ASCII 00 FF16 A Insert group selection 00 66 00 66 00 Supplement digits None 2 digits 5 digits 2 or 5 digits 00 01 02 03 Truncation Expansion None Truncate leading zeros Expand to EAN 13 Truncate system character Add country code 00 01 02 03 04 Reserved END ...

Page 51: ...fer to Insertion group selection of UPC A Supplement digits Format System character 0 Data digits 6 digits Check digit Supplement digits 2 or 5 Truncation Expansion Truncate leading zeros Refer to Truncation Expansion of UPC A Expand to EAN 13 It extends to 13 digits with 0 digits when the feature is set to be enabled Example Barcode 0123654 Output 0012360000057 Expand to UPC A It extends to 12 di...

Page 52: ...heck digit trans Disable Enable 00 01 Code ID setting 00 FF16 ASCII 00 FF16 D Insert group selection 00 66 00 66 00 Supplement digits None 2 digits 5 digits 2 or 5 digits 00 01 02 03 Truncation Expansion None Truncate leading zeros Expand to EAN 13 Expand to UPC A Truncate system character 00 01 02 03 04 Reserved END ...

Page 53: ...oup selection Refer to Insertion group selection of UPC A Supplement digits Format System character 1 Data digits 6 digits Check digit Supplement digits 2 or 5 Truncation Expansion Truncate leading zeros Refer to Truncation Expansion of UPC A Expand to EAN 13 It extends to 13 digits with 0 digits when the feature is set to be enabled Expand to UPC A It extends to 12 digits when the feature is set ...

Page 54: ...00 01 Check digit trans Disable Enable 00 01 Code ID setting 00 FF16 ASCII 00 FF16 D Insert group selection 00 66 00 66 00 Supplement digits None 2 digits 5 digits 2 or 5 digits 00 01 02 03 Truncation Expansion None Reserved Expand to EAN 13 Expand to UPC A Truncate system character 00 01 02 03 04 Reserved END ...

Page 55: ...Refer to Insertion group selection of UPC A Supplement digits Format Data digits 12 digits Check digit Supplement digits 2 or 5 ISBN ISSN The ISBN International Standard Book Number or Bookland EAN and ISSN International Standard Serial Number are two kinds of barcode for books and magazines The ISBN is 10 digits with leading 978 and the ISSN is 8 digits with leading 977 of the EAN 13 symbol Examp...

Page 56: ...e 00 01 Check digit transmission Disable Enable 00 01 EAN 13 code ID setting 00 FF16 ASCII 00 FF16 A Insert group selection 00 66 00 66 00 Supplement digits None 2 digits 5 digits 2 or 5 digits 00 01 02 03 ISBN ISSN conversion Disable Enable 00 01 Reserved ISBN ISSN code ID setting 00 FF16 ASCII 00 FF16 B END ...

Page 57: ...ection of UPC A Supplement digits Format Data digits 7 digits Check digit Supplement digits 2 or 5 Truncation Expansion Refer to Truncation Expansion of UPC A SETUP Option bar code Option Alpha entry Read Disable Enable 00 01 Check digit verification Disable Enable 00 01 Check digit trans Disable Enable 00 01 Code ID setting 00 FF16 ASCII 00 FF16 C Insert group selection 00 66 00 66 00 Supplement ...

Page 58: ...d length barcode decoded Code ID setting Refer to Code ID setting of UPC A Insertion group selection Refer to Insertion group selection of UPC A Start End transmission The start and end characters of Code 39 are s You can transmit all data digits including two s as data character By setting Enable can be recognized as data character Convert Code 39 to Code 32 Code 32 is a variant of Code 39 used b...

Page 59: ...election 00 66 00 66 00 Format Standard Full ASCII 00 01 Start End transmission Disable Enable 00 01 as data character Disable Enable 00 01 Convert Code 39 to Code 32 Disable Enable 00 01 Code 32 Prefix A transmission Disable Enable 00 01 Trioptic Code 39 read Disable Enable 00 01 Trioptic Code 39 Start End transmission Disable Enable 00 01 END Note 1 If Trioptic Code 39 is set Enable Code 39 is f...

Page 60: ...n By setting Enable check digit will be transmitted Max Min code length Refer to Max Min code length of Code 39 Code ID setting Refer to Code ID setting of UPC A Insertion group selection Refer to Insertion group selection of UPC A SETUP Option bar code Option Alpha entry Read Disable Enable 00 01 Check digit verification Disable USS OPCC 00 01 02 Check digit transmission Disable Enable 00 01 Max ...

Page 61: ...ing Refer to Code ID setting of UPC A Insertion group selection Refer to Insertion group selection of UPC A SETUP Option bar code Option Alpha entry Read Disable Enable 00 01 Max code length 00 99 00 99 00 Min code length 00 99 00 99 00 Code ID setting 00 FF16 ASCII 00 FF16 H Insert group selection 00 66 00 66 00 Reserved END ...

Page 62: ...ngth Refer to Max Min code length of Code 39 Code ID setting Refer to Code ID setting of UPC A Insertion group selection Refer to Insertion group selection of UPC A SETUP Option bar code Option Alpha entry Read Disable Enable 00 01 Check digit verification Disable Enable 00 01 Check digit transmission Disable Enable 00 01 Max code length 00 99 00 99 00 Min code length 00 99 00 99 06 Code ID settin...

Page 63: ...ttern you may select one pair to match your application Start End transmission Refer to Start End transmission of Code 39 Start End character equality By setting Enable the start and end character of a Codabar barcode must be the same SETUP Option bar code Option Alpha entry Read Disable Enable 00 01 Check digit verification Disable Enable 00 01 Check digit transmission Disable Enable 00 01 Max co...

Page 64: ...oup selection Refer to Insertion group selection of UPC A Truncate leading zeros The leading 0 digits of Code 128 barcode characters can be truncated when the feature is enabled SETUP Option bar code Option Alpha entry Read Disable Enable 00 01 Check digit verification Disable Enable 00 01 Check digit transmission Disable Reserved 00 01 Max code length 00 99 00 99 00 Min code length 00 99 00 99 01...

Page 65: ...etting of UPC A Insertion group selection Refer to Insertion group selection of UPC A Truncate leading zeros Refer to Truncate leading zeros of Code 128 SETUP Option bar code Option Alpha entry Read Disable Enable 00 01 Check digit verification Disable Enable 00 01 Check digit transmission Disable Reserved 00 01 Max code length 00 99 00 99 00 Min code length 00 99 00 99 01 Code ID setting 00 FF16 ...

Page 66: ...Max Min code length of Code 39 Code ID setting Refer to Code ID setting of UPC A Insertion group selection Refer to Insertion group selection of UPC A SETUP Option bar code Option Alpha entry Read Disable Enable 00 01 Check digit verification Disable Enable 00 01 Check digit transmission Disable Reserved 00 01 Max code length 00 99 00 99 00 Min code length 00 99 00 99 01 Code ID setting 00 FF16 AS...

Page 67: ...th Refer to Max Min code length of Code 39 Code ID setting Refer to Code ID setting of UPC A Insertion group selection Refer to Insertion group selection of UPC A SETUP Option bar code Option Alpha entry Read Disable Enable 00 01 Check digit verification Disable Enable 00 01 Check digit transmission Disable Enable 00 01 Max code length 00 99 00 99 00 Min code length 00 99 00 99 01 Code ID setting ...

Page 68: ...method Max Min code length Refer to Max Min code length of Code 39 Code ID setting Refer to Code ID setting of UPC A Insertion group selection Refer to Insertion group selection of UPC A SETUP Option bar code Option Alpha entry Read Disable Enable 00 01 Check digit verification Disable One digit Reserved Reserved 00 01 02 03 Check digit transmission Disable Enable 00 01 Max code length 00 99 00 99...

Page 69: ... and check digit 2 will be transmitted upon your selected check digit verification method Max Min code length Refer to Max Min code length of Code 39 Code ID setting Refer to Code ID setting of UPC A Insertion group selection Refer to Insertion group selection of UPC A SETUP Option bar code Option Alpha entry Read Disable Enable 00 01 Check digit verification Disable 1 digit mod 10 Reserved Reserv...

Page 70: ...l be transmitted Max Min code length Refer to Max Min code length of Code 39 Code ID setting Refer to Code ID setting of UPC A Insertion group selection Refer to Insertion group selection of UPC A SETUP Option bar code Option Alpha entry Read Disable Enable 00 01 Check digit verification Disable Enable 00 01 Check digit transmission Disable Enable 00 01 Max code length 00 99 00 99 00 Min code leng...

Page 71: ...etting Refer to Code ID setting of UPC A Insertion group selection Refer to Insertion group selection of UPC A SETUP Option bar code Option Alpha entry Read Disable Enable 00 01 Reserved Reserved Max code length 00 99 00 99 11 Min code length 00 99 00 99 11 Code ID setting 00 FF16 ASCII 00 FF16 T Insert group selection 00 66 00 66 00 Reserved END ...

Page 72: ...tion of UPC A Conversion UCC EAN 128 Refer to Code ID transmission of String transmission Cm will be identified as AIM ID UPC A or EAN 13 Barcode beginning with a single zero as the first digit has the leading 010 stripped and the barcode reported as EAN 13 Barcode beginning with two or more zeros but not six zeros has the leading 0100 stripped and the barcode reported as UPC A SETUP Option bar co...

Page 73: ...on Refer to Insertion group selection of UPC A Conversion Refer to Conversion of GS1 DataBar GS1 DataBar Truncated SETUP Option bar code Option Alpha entry Read Disable Enable 00 01 Code ID setting 00 FF16 ASCII 00 FF16 R Insert group selection 00 66 00 66 00 Conversion None UCC EAN 128 UPC A or EAN 13 00 01 02 Reserved END ...

Page 74: ...n of UPC A Conversion UCC EAN 128 Refer to Code ID transmission of String transmission Cm will be identified as AIM ID SETUP Option bar code Option Alpha entry Read Disable Enable 00 01 Max code length 00 99 00 99 00 Min code length 00 99 00 99 01 Code ID setting 00 FF16 ASCII 00 FF16 R Insert group selection 00 66 00 66 00 Conversion None UCC EAN 128 00 01 Reserved END ...

Page 75: ...th Refer to Max Min code length of Code 39 Check digit verification The check digit is made as the sum module 10 of the numerical values of all data digits Leading character 5 6 7 8 9 converted to A B C D E By setting leading character 5 6 7 8 9 can be converted to A B C D E Leading character assignment By setting only the barcode with the assigned leading character can be output Code ID setting R...

Page 76: ... 03 04 05 06 Leading character assignment Disable Assigned to 0 Assigned to 5 A Assigned to 6 B Assigned to 7 C Assigned to 8 D Assigned to 9 E Assigned to 1 Assigned to 2 Assigned to 3 Assigned to 4 00 01 02 03 04 05 06 07 08 09 10 Code ID setting 00 FF16 ASCII 00 FF16 Y Insert group selection 00 66 00 66 00 END Laser Light Direction Setting By scanning the barcode above the decoding direction of...

Page 77: ...fix for all symbols Steps 1 Scan SETUP and Prefix string setting barcode 2 Use the ASCII table to find the value of 24 3 Scan 2 and 4 from the barcode on the foldout back page 4 Scan END barcode Scanning steps Scan the following barcodes in order Insert G1 G2 G3 G4 string setting The scanner offers 4 positions and 4 character strings to insert among the symbol Example Set G1 string to be AB Origin...

Page 78: ... 6 Steps scan the following data in order Testing barcode Truncate ending G6 string setting By setting a defined ending character or string can be truncated Also a single character can be un defined Repeat of a G6 character setting While G5 is set as a single defined un defined character G6 can also be set to be repeated This setting is ignored when the truncate number is more than the barcode dat...

Page 79: ...cters None 00 FF16 00 Insert G4 string setting 0 22 characters None 00 FF16 00 FN1 substitution string setting 0 4 characters SP 00 FF16 20 Truncate leading G5 string setting A un defined character 1 22 defined characters 0 00 01 7F16 30 Repeat of a G5 character setting Once Defined times Un defined times All 01 01 22 FF Truncate ending G6 string setting A un defined character 1 22 defined charact...

Page 80: ...f the insertion position is greater than the length of the symbol the insertion of string is not effective Code ID position It is allowed to select different positions of code ID placement SETUP Option bar code Option Alpha entry Insert G1 string position 00 99 00 99 00 Insert G2 string position 00 99 00 99 00 Insert G3 string position 00 99 00 99 00 Insert G4 string position 00 99 00 99 00 Code I...

Page 81: ... transmitted before the code data when Enable is selected The length is represented by a number with two digits Case conversion The characters within code data or the whole output string can be set in either upper case or lower case FN1 substitution transmission The scanner supports a FN1 substitution feature for keyboard wedge USB and RS 232 interface The replacement string of FN1 can be chosen b...

Page 82: ...tary ID AIM ID 00 01 02 Code length transmission Disable Enable 00 01 Case conversion Disable Upper data only Lower data only Upper whole string Lower whole string 00 01 02 03 04 FN1 substitution transmission Disable Keyboard wedge USB RS 232 Keyboard wedge USB RS 232 00 01 02 03 All non printable character string transmission with string setting Disable Enable 00 01 Transmit the first N data char...

Page 83: ...st Chart UPC A UPC E EAN 8 EAN 13 Code 39 Code 32 A908765439 Code 128 Interleaved 2 of 5 Industrial 2 of 5 Default setting Read disable Matrix 2 of 5 Code 93 UCC EAN 128 Code 11 Default setting Read disable ...

Page 84: ...72 Test Chart Continued MSI Plessey Default setting Read disable UK Plessey ISBN ISSN China Post GS1 DataBar GS1 DataBar Truncated GS1 DataBar Limited GS1 DataBar Expanded ...

Page 85: ... same bar code type Scanner is not programmed for the correct bar code type Be sure the scanner is programmed to read the type of bar code you are scanning Laser comes on but the scanner does not decode Distance between scanner and bar code is incorrect Move the scanner closer to or further from the bar code Scanned data is incorrectly displayed on the host Scanner is not programmed to work with t...

Page 86: ...ning accuracy 1 Do not allow any abrasive material to touch the window 2 Remove any dirt particles with a damp cloth 3 Wipe the window using a tissue moistened with water 4 Do not spray water or other cleaning liquids directly into the window 5 Use a piece of soft and dry cloth when cleaning the scanner ...

Page 87: ...8 BS CAN 9 Tab F9 HT EM A F10 LF SUB B Home Esc VT ESC C End F11 FF FS D Enter F12 CR GS E Insert Ctrl SO RS F Delete Alt SI US Notes The 2nd and the 3rd columns above are used for keyboard wedge only H L 2 3 4 5 6 7 0 SP 0 P p 1 1 A Q a q 2 2 B R b r 3 3 C S c s 4 4 D T d t 5 5 E U e u 6 6 F V f v 7 7 G W g w 8 8 H X h x 9 9 I Y i y A J Z j z B K k C L l D M m E N n F O _ o DEL Example ASCII A 41...

Page 88: ...de is different 2 If using CODESOFT software firstly read the information through Help Index Code128 Special input syntax Also refer to ASCII table For example if we wish to make F1 barcode select code128 then select CODE A type and input DOC1 as data Up Down Left Right Page Up Page Down Backspace Tab Home End Enter Insert Delete F1 F2 F3 F4 F5 F6 F7 F8 F9 F10 Esc F11 F12 ...

Page 89: ...return to default setting WARNING If you wish to return all parameters of the handheld unit excluding radio communication setting to default setting please scan the barcode above Some parameters of cradle return default value initialization WARNING If you wish to return all parameters of the cradle excluding radio communication setting to default setting please scan the barcode above Note The sett...

Page 90: ...display If you wish to display the radio communication setting of the cradle please scan the barcode above Handheld unit radio communication setting display If you wish to display the radio communication setting of the handheld unit please scan the barcode above Note The settings indicated with are valid only when the cradle is in upgrade ready mode Cradle entering upgrade ready mode Keep pressing...

Page 91: ...dination network without changing other radio parameters Set to distributed coordination network without changing other radio parameters Set to point coordination network with returning default radio parameters Set to distributed coordination network with returning default radio parameters 3 The blue LED on the handheld unit will blink and the beeper will beep regularly to indicate that the handhe...

Page 92: ...80 Configuration alphanumeric entry barcode ...

Reviews: