background image


10.2. Connecting the Prowise Touchscreen to audio equipment 

10.2.1. Connecting headphones 

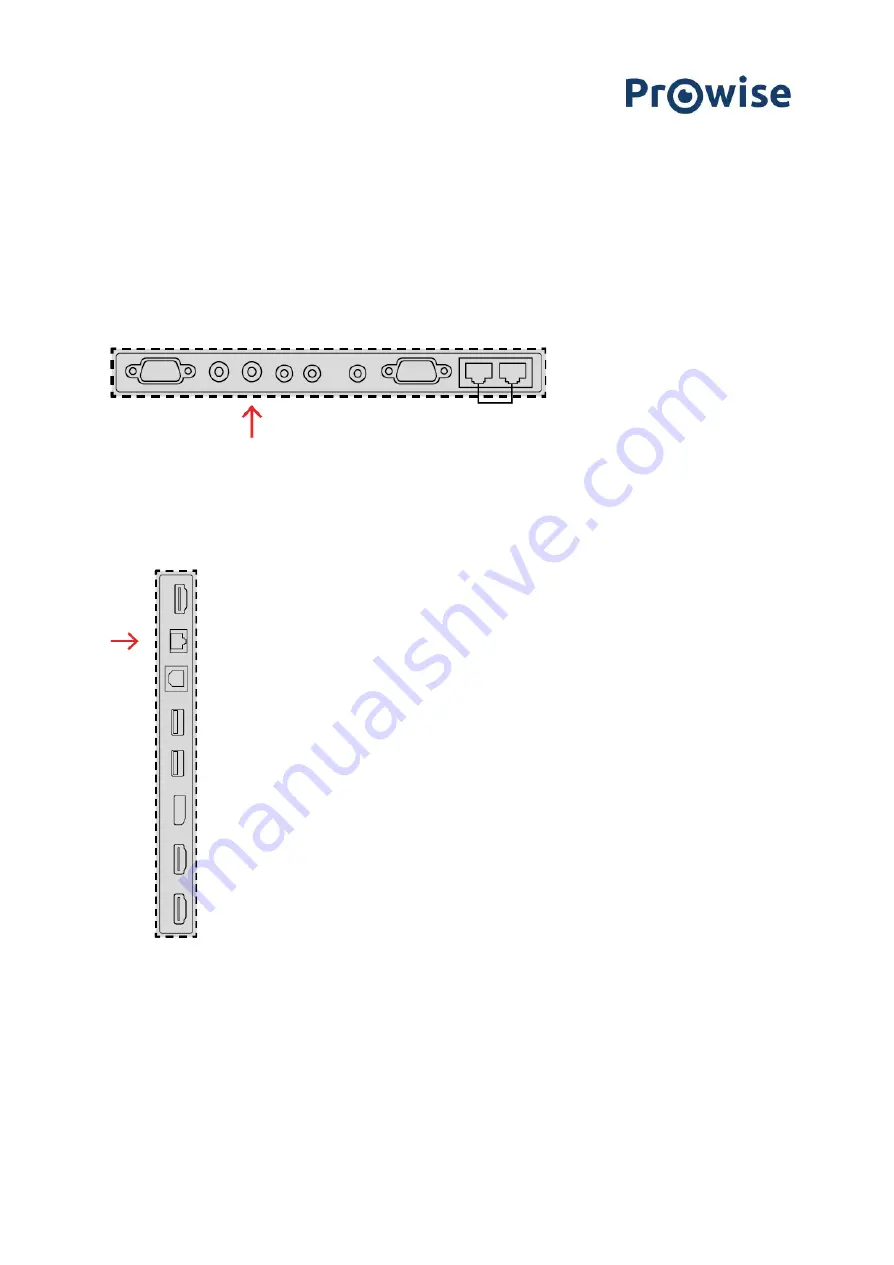
Connect headphones by plugging them into the analogue audio output “headphones”. Use the touchscreen’s 

volume control to adjust the headphones volume. 


10.2.2. Connecting an amplifier 


Connect an amplifier via the digital S/PDIF port. Use the amplifier’s volume control to adjust the amplifier’s 

volume. 


www.prowise.com


42 / 53


Summary of Contents for PW.1.16065.0001

Page 1: ...This user manual applies to the Prowise Touchscreen One with the following model numbers 65 PW 1 16065 0001 75 PW 1 16075 0001 86 PW 1 16086 0001...

Page 2: ...cifications 13 4 2 In the box 17 4 3 Product overview 19 4 4 Touchscreen operation 20 4 5 The control button 22 The control button 23 4 8 ProWrite technology 24 4 9 Cleaning 25 5 Getting started 26 5...

Page 3: ...cting auxiliary equipment 41 10 1 1 HDMI 41 10 1 2 VGA 42 10 1 3 DP 42 10 1 4 AV 42 10 1 5 YPBPR 42 10 2 Connecting the Prowise touchscreen to audio equipment 43 10 2 1 Connecting headphones 43 10 2 2...

Page 4: ...mend not to install the touchscreen yourself or by a third party Let Prowise or a certified Prowise partner install or mount the touchscreen to avoid possible damage Prowise can not be held responsibl...

Page 5: ...Prowise Touchscreen One is ENERGY STAR certified When the touchscreen is no longer usable it can be disposed of at a designated collection point WARNING Warning for electrified parts Never open the h...

Page 6: ...es that can be reused or recycled Device Do not dispose of the device together with the household waste at the end of its lifespan Enquire about the possibilities for an environmentally friendly and r...

Page 7: ...nected and only use the power cable supplied by Prowise 3 1 Place of installation Please follow the instructions below these will help guarantee reliable functioning and a long lifespan of your touchs...

Page 8: ...d damage to the cables do not place any objects on the cables Prevent electrical overloads when using a distributing plug as this can lead to a short circuit For extra safety we recommend using a surg...

Page 9: ...i module HAZARD WARNING Suffocation hazard This product contains small parts that form a choking hazard for children Keep this product out of reach for children when not installed into the touchscreen...

Page 10: ...steps below to install the OPS PC module Please note the OPS PC module is optional CAUTION Please ensure the power cable is not connected to the main power supply while installing the OPS PC module 1...

Page 11: ...2 Remove the cover plate 3 Insert the OPS PC module into the slot www prowise com 11 53...

Page 12: ...Avoid standing in a stooped or bent posture and ensure that the ends of the screen are located within arm s reach The screen is in an optimal position if you can touch both the top and the bottom wit...

Page 13: ...ight when the screen is used Display Bezel colour Matte black aluminium Screen dimensions inches 65 75 86 Screen type Ultra HD LED IPS Resolution 3840 x 2160 60Hz Glass panel Tempered anti glare Thick...

Page 14: ...ac OS Linux Android and Chrome OS Audio Speakers 2 0 audio 2 front speakers Front speaker power 2 x 16W 8 Max output amplifier 2 x 16W ProWrite Number of pens 2 Simultaneous writing with multiple colo...

Page 15: ...io input 1 PC Audio in Video output 1 HDMI OUT 2 0 1 AV OUT Audio output 1 3 5mm headphone Jack female 1 Optical audio output S PDIF USB 2 0 A 2 USB 2 0 B 1 RS232 Control DB9 Female 1 Straight connect...

Page 16: ...179W Energy consumption in standby mode 0 5 Watt Gross weight 65 54 1 5 kg 119 05lb 3 5 lb 75 74 1 5 kg 163 14lb 3 5 lb 86 94 1 5 kg 207 23lb 3 5 lb Net weight 65 39 kg 1 5kg 85 98lb 3 5 lb 75 54 kg 1...

Page 17: ...45 inches VESA standard 65 600 x 400 mm 75 600 x 400 mm 86 700 x 400 mm VESA arrangement for external devices VESA 100 x 100 mm Certification CE EMC LVD RED FCC IC VOC RoHS REACH RCM WEEE and Energy S...

Page 18: ...4 2 In the box 1 Prowise Touchscreen www prowise com 18 53...

Page 19: ...U 11 USB touch cable 12 HDMI cable 13 VESA plate 100 x 100 mm 14 RS232 adapter 15 Camera mount plate Installing camera mount plate 1 Place the plate on the bezel align with screw holes 2 Mount the pla...

Page 20: ...put S PDIF 3 USB 2 0 Type B Touch port 4 USB 2 0 Type A PLEASE NOTE Check whether the supplied package is complete in case anything is missing please contact our service desk within 5 days after deliv...

Page 21: ...p 60Hz 2 PC Audio input 3 Audio output Headphones 4 AV Video output 5 AV Video input 567i 6 Component Video input 7 RS232 serial port Straight connection 8 2x LAN Port RJ45 AC input and main switch ri...

Page 22: ...n without releasing your finger from the screen Opening Prowise Central menu Place five fingers of one hand on the screen for at least 2 seconds The menu will appear Right click context menu PC module...

Page 23: ...ntrol Furthermore you can use the control button located in the centre of the speaker bar of the touchscreen to turn the screen ON or OFF or to open the Central menu 4 5 The control button The control...

Page 24: ...cally click into place when you hold a pen in front of the docking location What makes the ProWrite technology and pen combination unique in the market is that the pen has two different font sizes to...

Page 25: ...gressive cleansers as these can cause damage to the screen Never spray a cleanser directly onto the screen apply it to a cloth first The cloth may be slightly damp but not wet as this can cause damage...

Page 26: ...ker bar of the touchscreen Press the on off button on the supplied remote control WARNING In the unlikely event that the touchscreen gets wet do not turn the power on and do not insert the power cable...

Page 27: ...ess the control button in the middle of the speaker bar 2 The notification The system will shut down in 15 seconds will appear 3 Select Shut down if you want to shut down the touchscreen immediately o...

Page 28: ...the Prowise touchscreen for the first time after installing Prowise Central 3 0 we take you through several important steps Press Start to begin Country and language Select your preferred language Sel...

Page 29: ...work connection Select a network to connect with You can choose between a Wi Fi network or Ethernet connection Terms and conditions Read and accept our general terms and conditions www prowise com 29...

Page 30: ...ted with Prowise Central 5 3 Connecting to a network Connect your touchscreen to a wireless Wi Fi network or via a network cable Ethernet Connect the network cable to the LAN port of your touchscreen...

Page 31: ...Fi network 1 Make sure the Wi Fi module is installed correctly 2 Place five fingers on the screen for at least 2 seconds to launch the Prowise Central menu 3 Press Settings and then select Connectivi...

Page 32: ...wise Centra 6 1 Prowise Central home Prowise Central is the smart operating system of your Prowise touchscreen Software that is specially developed to be compatible with our hardware and to make life...

Page 33: ...home Three dots open the Prowise Central menu The Prowise Central menu unfolds on the left hand side of the Prowise touchscreen You can open the Prowise Central menu in three ways 1 Press the three d...

Page 34: ...l manual 8 OTA updates over the air updates OTA updates over the air updates ensure that you always have the latest software version installed on the touchscreen The only thing you need for the OTA up...

Page 35: ...9 Remote control 9 1 Schematic overview and explanation of the buttons www prowise com 35 53...

Page 36: ...than Prowise Central home is active this button can be used to return to Prowise Central home 9 Freeze button pause the screen 10 Chance input source 11 Temporarily disables the screen This is depicte...

Page 37: ...l Before using the remote control for the first time you must insert the two 1 5V AAA batteries supplied with the remote control Once the batteries are running out and the remote control is no longer...

Page 38: ...compartment 4 Close the battery compartment again by carefully replacing the cover plate WARNING Remove any leaking batteries as quickly as possible from the remote control Thoroughly wash your hands...

Page 39: ...input port of the touchscreen 2 Connect the USB touch cable to the touch USB port of the touchscreen and to a USB port on the external PC 3 Once all cables have been connected switch on the touchscre...

Page 40: ...en and the external device 3 As soon as the touchscreen and the external PC have booted up navigate to Input in the Central menu and select the VGA source 10 1 3 DP You can also connect an external de...

Page 41: ...the component video signal with the Prowise Touchscreen with a 3 5mm Jack plug Male with 3 rings via the YpbPr port luminance and 2x chrominance Connect the audio signal to the Prowise Touchscreen wi...

Page 42: ...ones by plugging them into the analogue audio output headphones Use the touchscreen s volume control to adjust the headphones volume 10 2 2 Connecting an amplifier Connect an amplifier via the digital...

Page 43: ...rolled via the touchscreen s remote control Connect a device via CEC by inserting an HDMI cable in the touchscreen s HDMI port PLEASE NOTE The audio output the digital S PDIF is always active If you c...

Page 44: ...es the hardware interface specification and software protocols of RS232 interface communication between the touchscreen and the connected PC or other control unit with RS232 protocol Pin2 is TXD Pin3...

Page 45: ...ight RS232 cable is required Serial Port Settings Protocol description Command format Items Value Baud Rate 9600 Baud fixed Data Bits 8 fixed Stop Bits 1 fixed Parity None fixed Stream Control None fi...

Page 46: ...A Head Fixed value 2 0xBB Fixed value 3 0xCC Fixed value 4 Main Command 5 Subcommand 6 0x00 Length Valid Data 7 checksum Checksum Sum from No 4 to No 6 8 0xDD End Fixed value 9 0xEE Fixed value 10 0xF...

Page 47: ...DD EE FF VGA AA BB CC 02 03 00 05 DD EE FF AV AA BB CC 02 02 00 04 DD EE FF YPBPR AA BB CC 02 04 00 06 DD EE FF Audio Volume 0 100 AA BB CC 03 00 value checksum DD EE FF value 0 100 hex code Mute AA...

Page 48: ...namic AA BB CC 08 0D 01 16 DD EE FF Default display setting Vivid AA BB CC 08 0D 02 17 DD EE FF Default display setting Soft AA BB CC 08 0D 03 18 DD EE FF Default display setting User AA BB CC 08 0D 0...

Page 49: ...02 11 4B DD EE FF Language Finnish AA BB CC 38 02 12 4C DD EE FF Language Welsh AA BB CC 38 02 13 4D DD EE FF User menu Menu gesture off AA BB CC 38 03 01 3C DD EE FF User menu Menu gesture on AA BB C...

Page 50: ...40 00 47 DD EE FF Blank screen AA BB CC 07 4E 00 55 DD EE FF Up AA BB CC 07 47 00 4E DD EE FF Down AA BB CC 07 4D 00 54 DD EE FF Left AA BB CC 07 49 00 50 DD EE FF Right AA BB CC 07 4B 00 52 DD EE FF...

Page 51: ...EE FF DP AA BB CC 81 02 00 83 DD EE FF AV AA BB CC 81 08 00 89 DD EE FF PC AA BB CC 81 04 00 85 DD EE FF YPBPR AA BB CC 81 0A 00 8B DD EE FF Android Obtain PC status AA BB CC 09 02 00 0B DD EE FF AA...

Page 52: ...EE FF PTP Obtain bass status AA BB CC 39 08 00 41 DD EE FF AA BB CC 40 08 xx DD EE FF Bass level Obtain treble status AA BB CC 39 09 00 42 DD EE FF AA BB CC 40 09 xx DD EE FF Treble level Obtain bala...

Page 53: ...DD EE FF Polish AA BB CC 40 0F 0F 5E DD EE FF Portuguese AA BB CC 40 0F 10 5F DD EE FF Romanian AA BB CC 40 0F 11 60 DD EE FF Hungarian AA BB CC 40 0F 12 61 DD EE FF Finnish AA BB CC 40 0F 13 62 DD EE...

Reviews: