background image

xiii 

Proxess C-Series Service Manual 

TROUBLESHOOTING 


TROUBLESHOOTING HARDWARE 


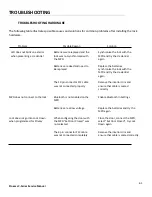
The following table illustrates possible causes and solutions for common problems after installing the lock 
hardware. 


Problem 


Possible Reason  


Solution 

 
   LED does not blink on exterior  

Batteries were replaced and the  

Synchronize the lock with the  

   when presenting a credential   

lock was not synchronized with   

MPD and try the credential 


the MPD 


again 


Batteries are dead and need to   

Replace the batteries,  


Be replaced 


synchronize the lock with the 


MPD and try the credential 


again 


The 10 pin connector FFC cable   

Remove the interior trim and  


was not connected properly 


ensure that cable is seated 


correctly


MPD does not connect to the lock 

Bluetooth is not enabled on the  

Enable Bluetooth in Settings 


MPD 


Batteries are at low voltage 


Replace the batteries and try the  


MPD again. 

 
Lock does not go into Lock Down 

When configuring the door with  

Close the door, connect the MPD, 

when programmed for Privacy   

the MPD “Set Door Closed” was


select “Set Door Closed”, try Lock 


not selected. 


Down again. 


The 4 pin connector FFC cable    

Remove the interior trim and 


was not connected completely   

ensure that cable is seated correctly 


4-1 

Summary of Contents for PX10100001

Page 1: ...C Series Service manual...

Page 2: ...FUNCTIONS AND PARTS 2 1 Lock functions 2 1 Function descriptions 2 1 Lock parts 2 3 Exploded view of parts 2 3 Parts list 2 3 Trim parts 2 5 MAINTENANCE 3 1 Maintenance tools 3 1 Replacing levers 3 1...

Page 3: ...Series Lock CERTIFICATIONS AND STANDARDS ANSI BHMA A156 25 Indoor Outdoor ANSI BHMA A156 2 Grade 1 UL 294 ULC S319 PDR UL10C Positive Pressure Rated UL10B Neutral Pressure Rated FCC Part 15 ADA Compli...

Page 4: ...ware Manual PXM1003 TECHNICAL SUPPORT Your first source for technical answers is this C Series Service Manual If you are not able to find an answer to your question in this manual contact your local P...

Page 5: ...Function A system ID GUID will be set by the factory allowing all credentials assigned to the site system access until the lock is reprogrammed Inside lever is always unlocked for single action egres...

Page 6: ...id credential Furthermore a BLE Bluetooth interface is supplied on the interior trim of the lock The BLE interface is paired with an active fob which enables a teacher or user to place a lock in lockd...

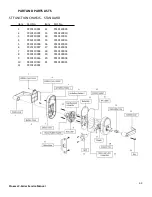
Page 7: ...tem Part No 1 PX10110001 12 PX10120005 2 PX10110003 13 PX10110010 3 PX10110004 14 PX10110011 4 PX10110005 15 PX10110013 5 PX10110006 16 PX10110014 6 PX10110007 17 PX10120001 7 PX10110002 18 PX10100002...

Page 8: ...1 PX10110001 12 PX10120005 2 PX10110003 13 PX10110010 3 PX10110004 14 PX10110011 4 PX10110005 15 PX10110013 5 PX10110006 16 PX10110014 6 PX10110007 17 PX10120001 7 PX10110002 18 PX10100002 8 PX1011000...

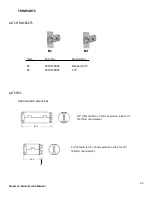
Page 9: ...CH BACKSETS Item Part No Description B1 PX10120006 Standard 2 B2 PX10120007 2 LATCHES Optional latch extensions B1 B2 2 5 2 70mm latch 57mm extension tube for 5 127mm requirement 2 60mm latch 35mm ext...

Page 10: ...m Part No Description S1 PX10120002 Standard 2 strike S2 PX10120003 ANSI 4 strike LEVERS Item Part No Description 6 PX10120005A Angled Return most common lever 7 PX10120005C Curved Return 9 PX10120005...

Page 11: ...able core by inserting the control key and turning it 15 degrees clockwise then pull out the removable core and key 2 Insert the pin of the lever release tool into the small hole at the base of the sh...

Page 12: ...and push firmly until it is seated 3 If replacing the exterior lever reinstall the removable core by aligning the throw member forked prongs within the lock chassis and then sliding the core back in p...

Page 13: ...hronize the lock with the MPD and try the credential again The 10 pin connector FFC cable Remove the interior trim and was not connected properly ensure that cable is seated correctly MPD does not con...

Page 14: ...xiv Proxess C Series Service Manual INSTALLATION INSTRUCTIONS The following pages contain the Installation Manual for the C series Cylindrical Lock...

Page 15: ...sembly Interior lever Steel ring Exterior rose chassis mounting plate Interior rose chassis mounting plate Latch bolt with deadlock 2 Keys ASA Strike Screw Pack includes SB1 Hager mounting screws M5 x...

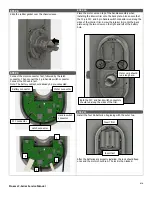
Page 16: ...rd cylindrical chassis b Put the lever release tool into the allocated position of exterior rose mounting plate per the illustration below c Rotate exterior rose mounting plate to door thickness by us...

Page 17: ...to accommodate the hand of the door Replace the lock chassis and reroute the FFC cable into the cable slot Screw on the backplate and replace the rubber gasket STEP 2 Install the strike plate checkin...

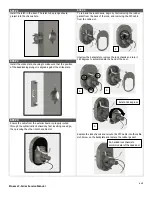
Page 18: ...atch connectors are fed through the rose liner TO CONNECT AND DISCONNECT THE 4 AND 10 PIN CONNECTORS To connect the pin connectors FFC and handle switch begin by pushing up the black cowl Then insert...

Page 19: ...STEP 9 Connect the motor connector first followed by the latch connector Then connect the 4 pin handle switch connector Connect the FFC cable last Note The battery cable should already be pre connecte...

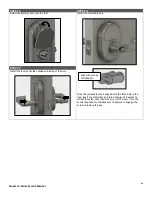
Page 20: ...aligned with the forked pin in the lock insert the control key and turn clockwise 15 degrees to retract the catch then insert the core into the lever Turn the control key back counterclockwise 15 deg...

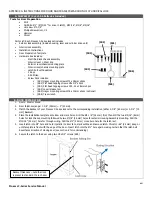
Page 21: ...mounting screws M6 x 10mm x2pcs optional SB6 Trox wrench B DOOR PREPARATION 1 Doors Steel or Wood 2 Door thickness range 1 3 8 35mm 2 51mm 3 Match the Backset of your Proxess C Series lockset to the...

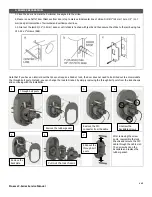
Page 22: ...ou have an interior door that does not require a Grade 1 lock the door does not need to be drilled out to accommodate the through bolt posts Instead you can change the lock to Grade 2 by simply removi...

Page 23: ...e following two conditions 1 This device may not cause harmful interference and 2 this device must accept any interference received including interference that may cause undesired operation Industry C...

Reviews: