background image


10 

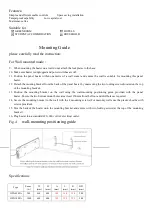
Features: 

Simple and efficient usable controls              Space saving installation 
Tamperproof capability              Low capital cost 
Maintenance free                                                                                                                 
 

Suitable for 

GREENROOM                                                HOTELS 

  STUDENT ACCOMMODATION                  HOUSEHOLD


Mounting Guide   

please carefully read the instruction: 

For Wall mounted mode : 

9.


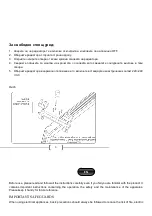
When mounting the heater on a wall do not attach the foot plates to the base. 

10.


Make sure heater is unplugged and power switches are off. 

11.


Position  the  panel  heater  within  one  metre  of  a  wall  socket  and  ensure  the  wall  is  suitable  for  mounting  this  panel 

heater. 

12.


Detach the mouting bracket from the back of the panel heater by unscrewing the two locking screws(located on the top 

of the mounting bracket). 

13.


Position  the  mounting  bracket  on  the  wall  using  the  wall-mounting  positioning  guide  provided  with  the  panel 

heater .Ensure the two bottom mount holes are at least 150mm from the floor and drill holes as required. 

14.


Secure the  mounting bracket to  the  wall with the 4  mounting screws.(For  masonry  walls  use the  plastic sheaths  with 

screws provided). 

15.


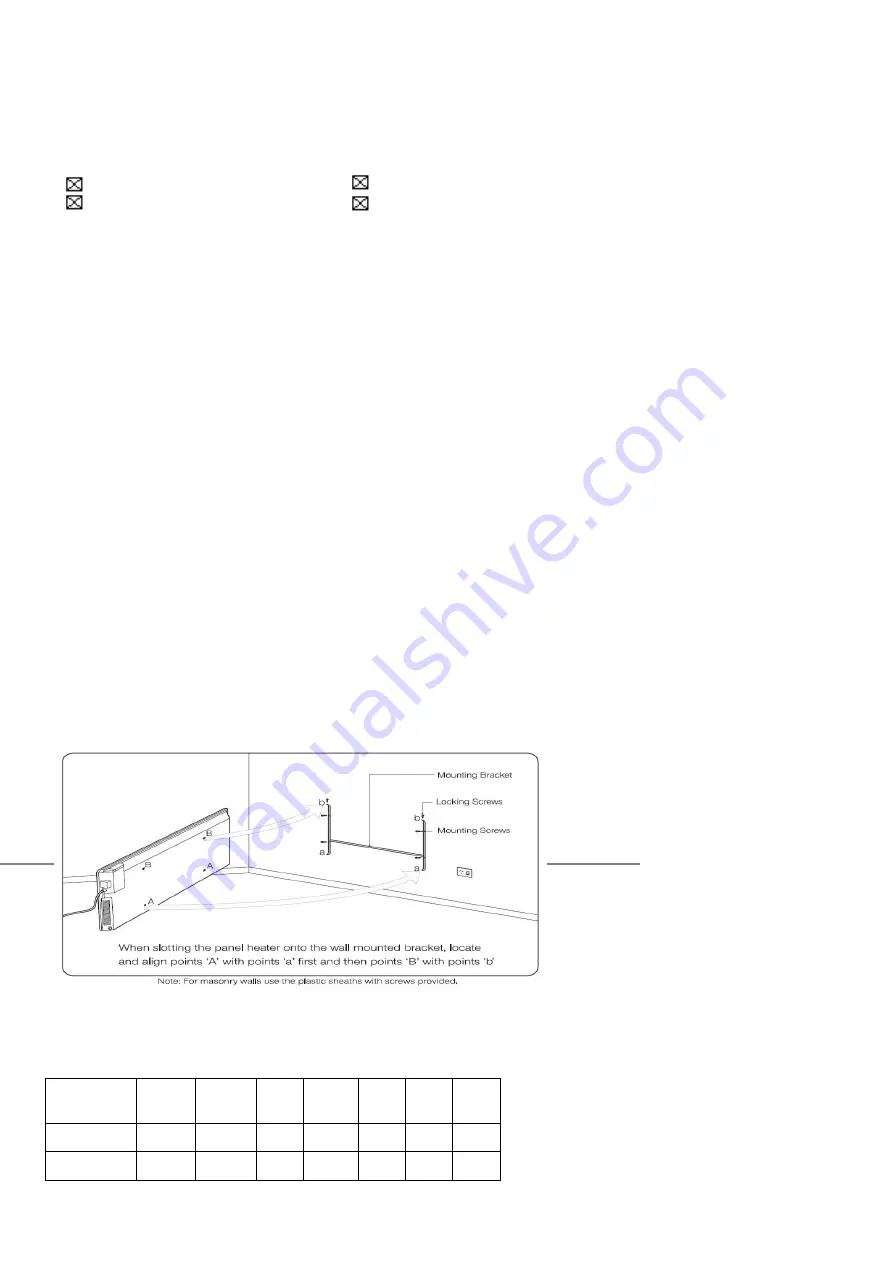
Slot the back of the  heater onto the  mounting bracket and secure with two locking screws(at the top  of the  mounting 

bracket). 

16.


Plug heater into a standard 220~240 volt AC electrical outlet. 

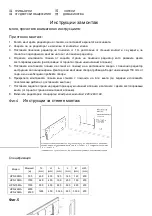
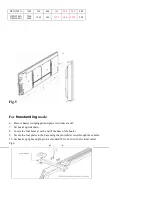
Fig.4   

  wall-mounting positioning guide


Specifications 

Type 

Power 

(w) 

TL 

(mm) 

(mm) 

(mm) 

(mm) 

(mm) 

H23 

(mm) 

HPN-05MA 

500 

460 

400 

180 

160 

120 

200 

HPN-10MA 

1000 

640 

400 

195 

250 

195 

200 

Summary of Contents for AURA HPN-05MA

Page 1: ...а Те съдържат важна информация за работата безопасността и поддръжката на уреда Запазете ги на леснодостъпно и удобно място за бъдещи справки ПРЕДПАЗНИ МЕРКИ Когато използвате електрически уреди трябва да спазите основните инструкции за безопасност за да намалите риска от пожар късо съединение телесна повреда 1 Свържете уреда към електрическата мрежа само ако напрежението обозначено на табелката с...

Page 2: ... пожар късо съединение или телесна повреда не потапяйте уреда и захранващия кабел във вода или друга течност 11 Уредът трябва да се използва само в закрити помещения 12 Не хващайте щепсела с влажни ръце 13 Уредът трябва да се изключи от стенния контакт използвайте влажен парцал за да почистите рамката на контакта след това подсушете със сух парцал 14 Когато радиаторът работи свободно стоящ с компл...

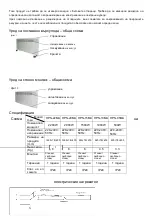
Page 3: ...рическия нагревател Модел Х ка HPN 22MA HPN 20MA HPN 15MA HPN 10MA HPN 05MA Номинална мощност 2200W 2000W 1500W 1000W 500W Номинално напрежение 220 240V 50Hz 220 240V 50Hz 220 240V 50Hz 220 240V 50Hz 220 240V 50Hz Размери на продукта mm 1265 78 400 1265 78 400 930 78 400 640 78 400 460 78 400 Нето тегло Kg 8 8 6 4 5 3 3 Монтаж Стенен свободно стоящ Стенен свободно стоящ Стенен свободно стоящ Стене...

Page 4: ... проверете за пердета дрехи и други препятствия които могат да попречат на постъпването на въздуха в панелния радиатор Поставете отново щепсела в гнездото на контакта и включете радиатора от ключа Сега вашият панелен радиатор ще работи нормално 3 Поддръжка и почистване Радиаторът изисква редовно почистване за да се осигури безпроблемната му работа Изключете радиатора от захранващата мрежа преди да...

Page 5: ...на стената с помощта на доставените заедно с панелния радиатор инструкции за позициониране Двата долни монтажни отвора трябва да бъдат на минимум 150 mm от пода ако е необходимо пробийте отвори 6 Прикрепете монтажната планка към стената с помощта на 4 те винта за зидария използвайте пластмасови дюбели с доставените винтове 7 Поставете задната страна на радиатора върху монтажната планка и затегнете...

Page 6: ...вори 5 Обърнете радиатора в нормално положение и го включете в стандартен електрически контакт 220 240 V AC Фиг 6 Before use please read and follow all the instructions carefully even if you fell you are familiar with the product It contains important instructions concerning the operation the safety and the maintenance of the apparatus Please keep it handy for future reference IMPORTANT SAFEGUARDS...

Page 7: ...y a responsible person to ensure that they can use the appliance safety 26 Yong children should be supervised to ensure that they do not play with the appliance 27 To protect against fire electrical shock and injury to person do not immerse appliance power cord plug in water or other liquid 28 This appliance is indoor use only 29 Do not handle plug with wet hands 30 The appliance has to be unplugg...

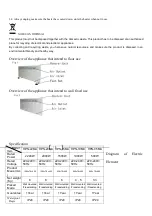
Page 8: ...f the appliance that intend to floor use Overview of the appliance that intend to wall fixed use Specification Diagram of Electric Element Model Item HPN 22MA HPN 20MA HPN 15MA HPN 10MA HPN 05MA Rated Power 2200W 2000W 1500W 1000W 500W Rated Voltage 220 240V 50Hz 220 240V 50Hz 220 240V 50Hz 220 240V 50Hz 220 240V 50Hz Product Meas mm 1265 78 400 1265 78 400 930 78 400 640 78 400 460 78 400 Net wei...

Page 9: ...nel heater to cool for 45 minutes The heater will function again when it has cooled down Carefully check for any obvious causes such as curtain or clothes that may have prevented air from entering the panel heater Refit the mains plug into the socket and turn you heater on Your panel heater should now work normally 3 Care and Cleaning The heater requires regular cleaning to ensure trouble free ope...

Page 10: ...ter by unscrewing the two locking screws located on the top of the mounting bracket 13 Position the mounting bracket on the wall using the wall mounting positioning guide provided with the panel heater Ensure the two bottom mount holes are at least 150mm from the floor and drill holes as required 14 Secure the mounting bracket to the wall with the 4 mounting screws For masonry walls use the plasti...

Page 11: ...te the four holes at each end of the base of the heater 9 Secure the foot plates to the base using the provided screws through these holes 10 Set heater upright and plug into a standard 220 240 volt AC electrical outlet Fig 6 HPN 15M A 1500 930 400 290 350 290 200 HPN 22MA HPN 20MA 2200 2000 1265 400 332 5 600 332 5 200 ...

Page 12: ...52 509 987 e mail info proximus bg com гр София мобилни тел 0899 932 704 708 e mail sofia proximus bg com Varna Office Zapadna Promishlena Zona Baza NOVA tel 359 52 500 070 359 899 932 789 Fax 359 52 509 987 e mail info proximus bg com Sofia Office tel 359 899 932 704 708 e mail sofia proximus bg com ...

Reviews: