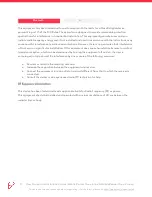
7. For Nano Inline re-insert/secure the reader assembly into the enclosure, or for Nano Connect
secure the reader back on to the mounting backplate.
8. For the Nano Connect, install the Proxy faceplate cover, using a single screw at the bottom.
Power Up and Testing
1. Connect to power
2. View the Nano name in the “Proxy ID” app as a New Device
3. Provision Nano
-
Refer to the Provisioning Guide to provision to your Proxy organization and
sync to the local Access Control System
Recommended Infrastructure
1. All cabling and wiring shall be UL Listed or UL Recognized
2. All readers shall be powered by a UL Listed power-limited power supply, or power-limited
output from a UL Listed control panel
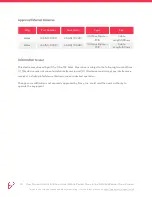
3. Linear DC Power Supply (5–24VDC, 12 mA @ 12V)
Do not exceed 24V
Nano Inline and Nano Connect operate at very low current ratings. If operating with the need for more
precise ratings of low current draw, please contact Proxy directly.
Voltage (V)
Peak Current (mA)
5
30
12
12
Installation in a Turnstile, Elevator Panel, or Other
Enclosure
The optimal placement of the external antenna is against the glass pane where the current access
control reader exists. These glass panes are typically designed to allow for radio signals to pass
through with minimal interference, which is preferred for the Bluetooth Low Energy (BLE) signal from
the Nano Inline for connection to the Proxy ID mobile app.
The recommended mode of operation of the Nano Inline is such that the phone must be placed within a
few inches of the antenna in order to activate the mobile credential. For this reason, it is recommended
|
14 User Manual and Installation Guide: Mobile Reader Nano Inline & Mobile Reader Nano Connect
This document may have been updated since printing — for the latest, please visit https://proxy.com/s/nano-install


