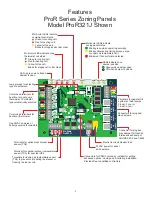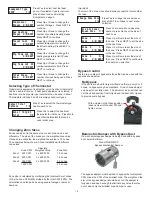
Display Data And
Selections Y/N
Monitor HVAC
Performance Y/N
Restore Defaults
Y/N
Save Options Now
Y/N
Save Selections
As Clone Y/N
Change Advanced
Options Y/N
Fresh Air Off
Y-On/N-Off
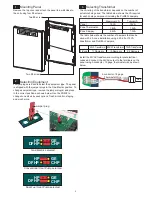
Press Yes to display all the option
settings, sensor data, call status,
error messages and much more.
Press No to continue.
Press Yes to display the leaving air
temperature, duct pressure and the
position of the non-calling zone
dampers when used for bypass. The
data is automatically updated every 5
seconds. Press No to continue.
Press Yes to restore the panel to the
factory settings. Press No to
continue.
Press Yes to save the options and
settings selected. Press No to
return to the main menu.
Press Yes to save the options and
settings as a Clone. The Clone can
be identified with a 16-character
name for future use. Press No to
return to the main menu.
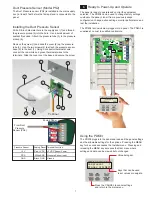
Press Yes to select advanced
options such as purge, opposite
system service, heat or cooling
priority, automatic emergency heat
control, moderate weather staging
inhibit, fresh air control and others.
Press No to continue.
Press Yes to select fresh air control to
meet the new requirements of Title24
and ASHRAE 62.2 without the use of
a dedicated fresh air controller. Press
No to continue.
The PDMi3 can be used to calcualte
the minimum CFM of fresh air and the
number of minutes of fresh air intake
per hour. Or the minutes of fresh air
each hour can be entered.
The outdoor temperature can also be
used to limit fresh air operation if the
outdoor temperature exceeds the high
or low limit set.
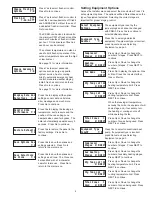
Setting Equipment Options
Access the Installer menu and select the menu below. Press Y to
set equipment options. The options will be different based on the
type of equipment selected. Selecting the correct stages is
important for proper staging control.
The equipment type is set by the
jumper plugs and cannot be changed
with PDMi3. Press Yes to continue to
select additional options.
Press Yes to select conventional heat
pump. If equipment type is incorrect,
press Cancel and see Selecting
Equipment on page 3.
Press Yes to select gas/electric
equipment. If equipment type is incorrect,
press Cancel and see Selecting
Equipment on page 3.
Press Up or Down to change the
number of stages. Press NEXT to
continue.
Press Up or Down to change the
number of stages. Press NEXT to
continue.
Press Up or Down to change the
number of stages. Press NEXT to
continue.
Press Up or Down to change the
number of auxiliary heating stages.
Press NEXT to continue.
Press No to display the options– Gas
or Elec. Press Yes to select either
Gas or Electric.
Press Up or Down to change the
heating temperature limit. Press
NEXT to continue.
Press Up or Down to change the
heating temperature limit. Press
NEXT to continue.
Press Up or Down to change the
cooling temperature limit. Press
NEXT to continue.
Press Up or Down to change the
cooling temperature limit. Press
NEXT to continue.
Press Up or Down to change the
number of zones being used. Press
NEXT to continue.
Press Up or Down to change the
number of zones being used. Press
NEXT to continue.
When the leaving air temperature
exceeds the limits, the equipment will
down stage and, if necessary, turn
the heating or cooling source off
while operating the fan.
Select Equipment
Options Y/N
Equipment Type
GasElec Y/N
Equipment Type
ConvHP Y/N
Compressor 1
Stages U/D/NEXT
Compressor 1
Stages U/D/NEXT
Heating 1
Stages U/D/NEXT
Aux Heating 1
Stages U/D/NEXT
Fan Mode Gas
N/NEXT
Htg Temp Lmt 160
U/D/NEXT
Htg Temp Lmt 160
U/D/NEXT
Clg Temp Lmt 45
U/D/NEXT
Clg Temp Lmt 45
U/D/NEXT
Total Zones 3
Used U/D/NEXT
Total Zones 3
Used U/D/NEXT
9
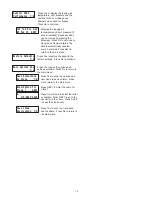
Change Fresh Air
Options Y/N
Press Yes to select fresh air control.
Press No to continue.
See page 12 for more information.
See page 13 for more information.


