Getting started
31
4. Use
f
/
g
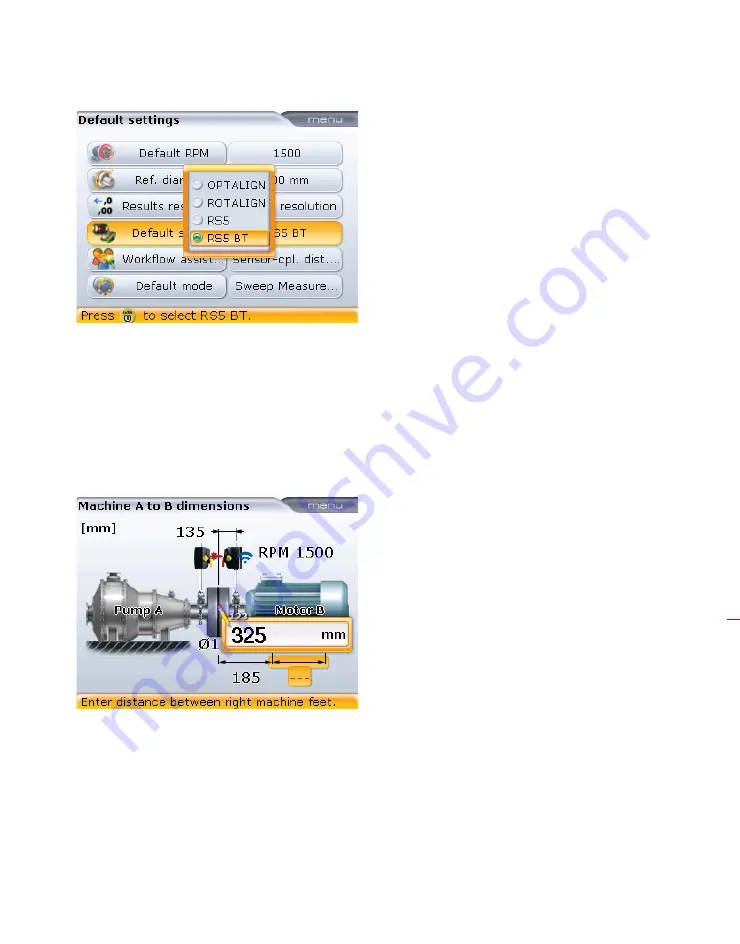
and highlight the option RS5 BT. Confirm selection by pressing
e
.
4.3 Enter dimensions
Press
d
to access the machine dimensions screen.
Use the data entry keys to directly enter all required dimensions.
The editing box appears as soon as a data entry key is pressed. Confirm entry by
pressing
e
. The rectangular highlight box moves to the next dimension. The
navigation keys can also be used to cycle through all dimensions.
Dimensions to be entered include:
1. Sensor-to-coupling center
2. Coupling diameter (default is 100 mm / 10” {for US units})
3. RPM (default is 1500 / 1800 {for US units})
4. Coupling center-to-front foot (machine designated movable)
5. Front foot-to-back foot (machine designated movable)
The type of sensor used
may also be set via the
“Dimensions” screen
context menu item ‘Change
sensor type’.
Summary of Contents for OPTALIGN smart RS5 BT
Page 10: ...OPTALIGN smart RS5 BT handbook 10 Page intentionally left blank ...
Page 16: ...OPTALIGN smart RS5 BT handbook 16 This page intentionally left blank ...
Page 28: ...OPTALIGN smart RS5 BT handbook 28 Page intentionally left blank ...
Page 38: ...OPTALIGN smart RS5 BT handbook 38 This page intentionally left blank ...
Page 112: ...OPTALIGN smart RS5 BT handbook 112 This page intentionally left blank ...
Page 174: ...OPTALIGN smart RS5 BT handbook 174 This page intentionally left blank ...
Page 194: ...OPTALIGN smart RS5 BT handbook 194 This page intentionally left blank ...


