6-5
ROTALIGN 01.2000
Shaft alignment in theory and in practice
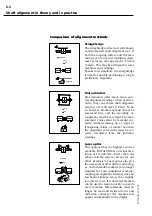
How accurate should alignment be?
The suggested alignment tolerances shown at right are general values
based upon experience and should not be exceeded. They are to be
used only if existing in-house standards or the manufacturer of the
machine or coupling prescribe no other values.
To use the table, consider all values listed to be the maximum
allowable deviation from the alignment target, be it zero or some
desired value to compensate for thermal growth. In most cases, a
quick glance at the table will tell whether coupling misalignment is
allowable or not.
As an example, a machine running at 1500 rpm has coupling offsets
of -0.04 mm vertically and +0.02 mm horizontally: both these values
fall within the "excellent" limit of 0.06 mm.
Angularity is usually measured in terms of gap width at the edge of
the coupling. For a given amount of angularity, the larger the
diameter, the wider the gap at the coupling edge. The table lists
values for coupling diameters of 100 mm or 10". You may compare
results directly by entering this coupling diameter into ROTALIGN, or
alternatively, if actual coupling diameter is entered, then multiply the
value from the table by the appropriate factor.
For example, a machine running at 1500 rpm has a coupling of
diameter 75 mm. At this diameter, the maximum allowable gap
would be
(0.07 mm) x 75/100 = 0.0525 mm (or 5/100 mm)
For spacer shafts, the table gives the maximum allowable offset for
each 100 mm or inch of spacer shaft length. To take an example, a
machine running at 6000 rpm with a 300 mm spacer shaft installed
would allow a maximum offset of
(0.03 mm) x 300/100 = 0.09 mm (or 9/100 mm)
at either coupling at the ends of the spacer shaft.
"Acceptable" limits are calculated from sliding velocity of lubricated
steel on steel, using a conservative value of 12 mm/sec. (0.5 in./sec.)
for allowable sliding velocity. These values also coincide with those
derived from elastomer shear rates, so they also apply to short
couplings with flexible elements. The "excellent" values draw on
vibration observations made upon a wide variety of industrial
machines to determine the critical misalignment for vibration;
however, compliance with these tolerance values does not guarantee
vibration-free operation of a particular machine.
Since rigid (flanged) couplings have no tolerance for misalignment,
they should be aligned as accurately as possible.
e.g. 7200 rpm, Length = 10"
0.25 mils x 10"/1" = 2.5 mils offset
e.g. 1800 rpm, Diameter = 20"
5 mils x 20"/10" = 10 mils gap
e.g. at 1800 rpm offsets are
-1.3 mils vertically, and
+.6 mils horizontally:
both values fall within "excel-
lent" limit of 2 mils.
Inch examples:
Summary of Contents for ROTALIGN ALI 3.500
Page 13: ...1 10 ROTALIGN 01 2000 This page intentionally left blank ...
Page 103: ...4 66 ROTALIGN 01 2000 This page intentionally left blank ...
Page 121: ...5 18 ROTALIGN 01 2000 This page intentionally left blank ...
Page 143: ...6 22 ROTALIGN 01 2000 This page has intentionally been left blank ...
Page 158: ...6 37 ROTALIGN 01 2000 This page intentionally left blank ...


