


Building your MINI+
Original Prusa MINI+ semi-assembled
21
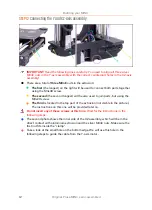
STEP 30
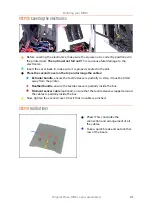
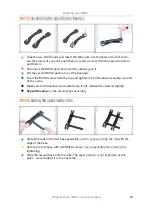
Covering the electronics
Before covering the electronics, make sure the square nut is correctly positioned in
the printed part.
The nut must not fall out!
This can cause fatal damage to the
electronics.
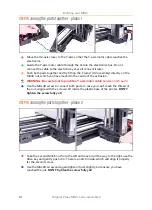
Insert the cover back in, make sure it is properly seated in the slot.
Place the second cover on the top and arrange the cables:
Extruder bundle
, ensure the textile sleeve is partially in. Also, it must be tilted
away from the printer.
Heatbed bundle
, ensure the textile sleeve is partially inside the box.
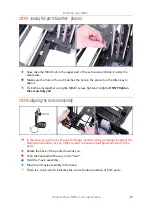
Filament sensor cable
(optional), ensure that the textile sleeve wrapped around
the cables is partially inside the box.
Now, tighten the second cover. Check that no cable is pinched.
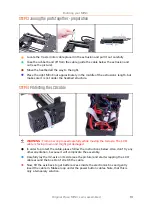
STEP 31
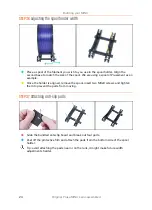
Haribo time!
Phew! This concludes the
connection and arrangement of all
the cables.
Take a quick break and eat another
row of the bears.
Summary of Contents for MINI+
Page 2: ...2 ...
Page 3: ...Original Prusa MINI semi assembled 3 Manual changelog MINI semi assembly ...
Page 5: ...Original Prusa MINI semi assembled 5 Building your MINI ...
Page 27: ...27 Notes ...
Page 28: ...28 ...
Page 29: ...29 Notes ...
Page 30: ...30 ...
Page 31: ...31 Notes ...
Page 32: ...32 ...


