


Building your MINI+
26
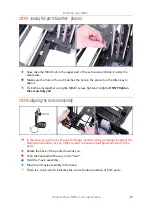
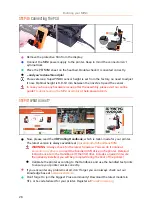
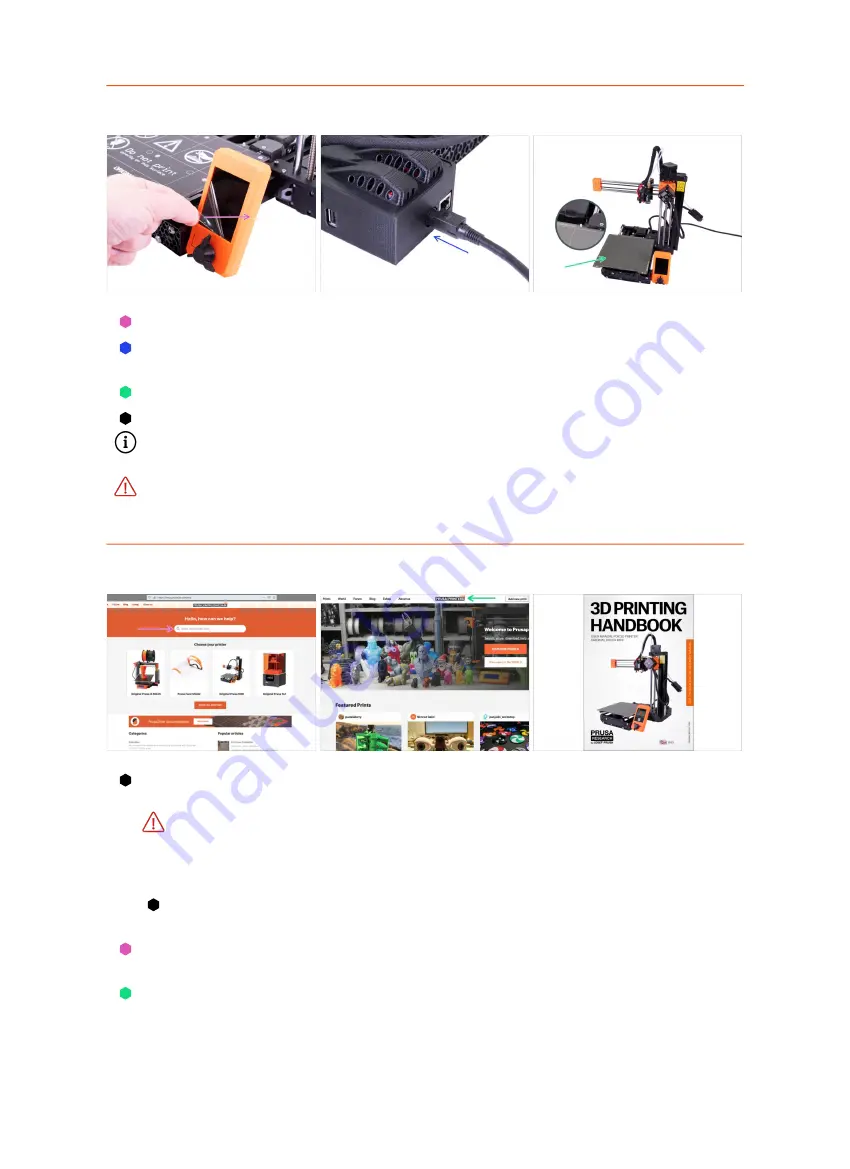
STEP 40
Connecting the PSU
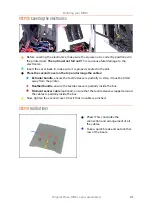
Remove the protective film from the display.
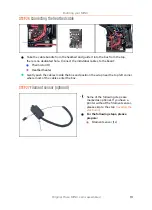
Connect the MINI power supply to the printer. Keep in mind the connector isn't
symmetrical.
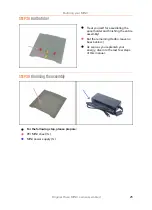
Place the PEI MINI sheet on the heatbed. Double-check it is oriented correctly.
...and you're done! Good job!
Prusa veterans: SuperPINDA sensor height is set from the factory, no need to adjust
it now. Optimal height is 0.8-1.0 mm between the nozzle's tip and the sensor.
In case you have any hardware issues, after the assembly, please visit our online
Troubleshooting the MINI assembly
STEP 41
What is next?
Now, please read the
3D Printing Handbook
, which is tailor-made for your printer.
The latest version is always available at
WARNING
: Always check for the latest firmware. You can do it online at
or insert the bundled USB drive in the printer. Detailed
instructions are in the Handbook. (If the USB drive includes a newer firmware
than already installed, you will be prompted during the boot of the printer.)
Calibrate the printer according to the Handbook and use the bundled test prints
to ensure your printer works correctly.
If you encounter any problems at all, don't forget you can always check out our
knowledge base at
Don't forget to join the biggest Prusa community! Download the latest models in
Summary of Contents for MINI+
Page 2: ...2 ...
Page 3: ...Original Prusa MINI semi assembled 3 Manual changelog MINI semi assembly ...
Page 5: ...Original Prusa MINI semi assembled 5 Building your MINI ...
Page 27: ...27 Notes ...
Page 28: ...28 ...
Page 29: ...29 Notes ...
Page 30: ...30 ...
Page 31: ...31 Notes ...
Page 32: ...32 ...